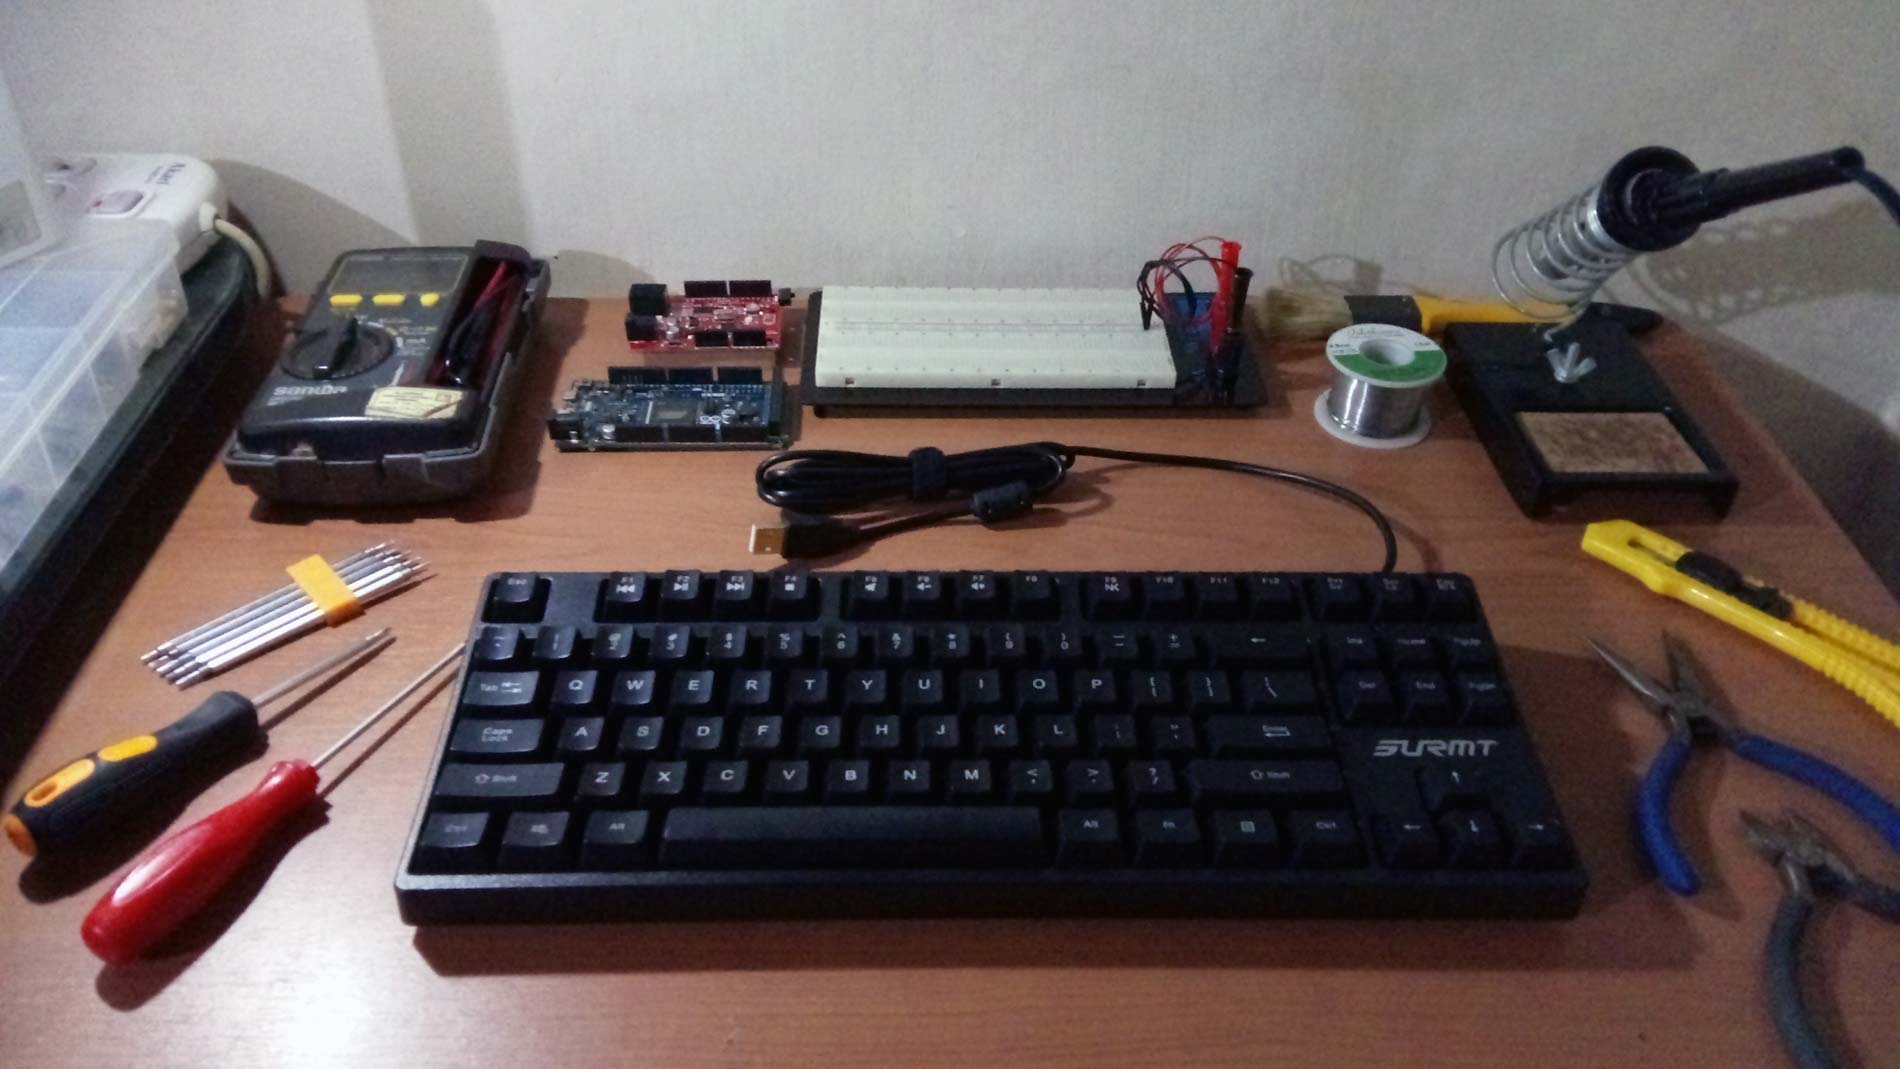
The subject of the modification:
Surmt CM625 TKL Mechanical Keyboard.
Target Output of Modification:
Surmt CM625 TKL in Wooden Case and Removable USB Cable.
DISASSEMBLY
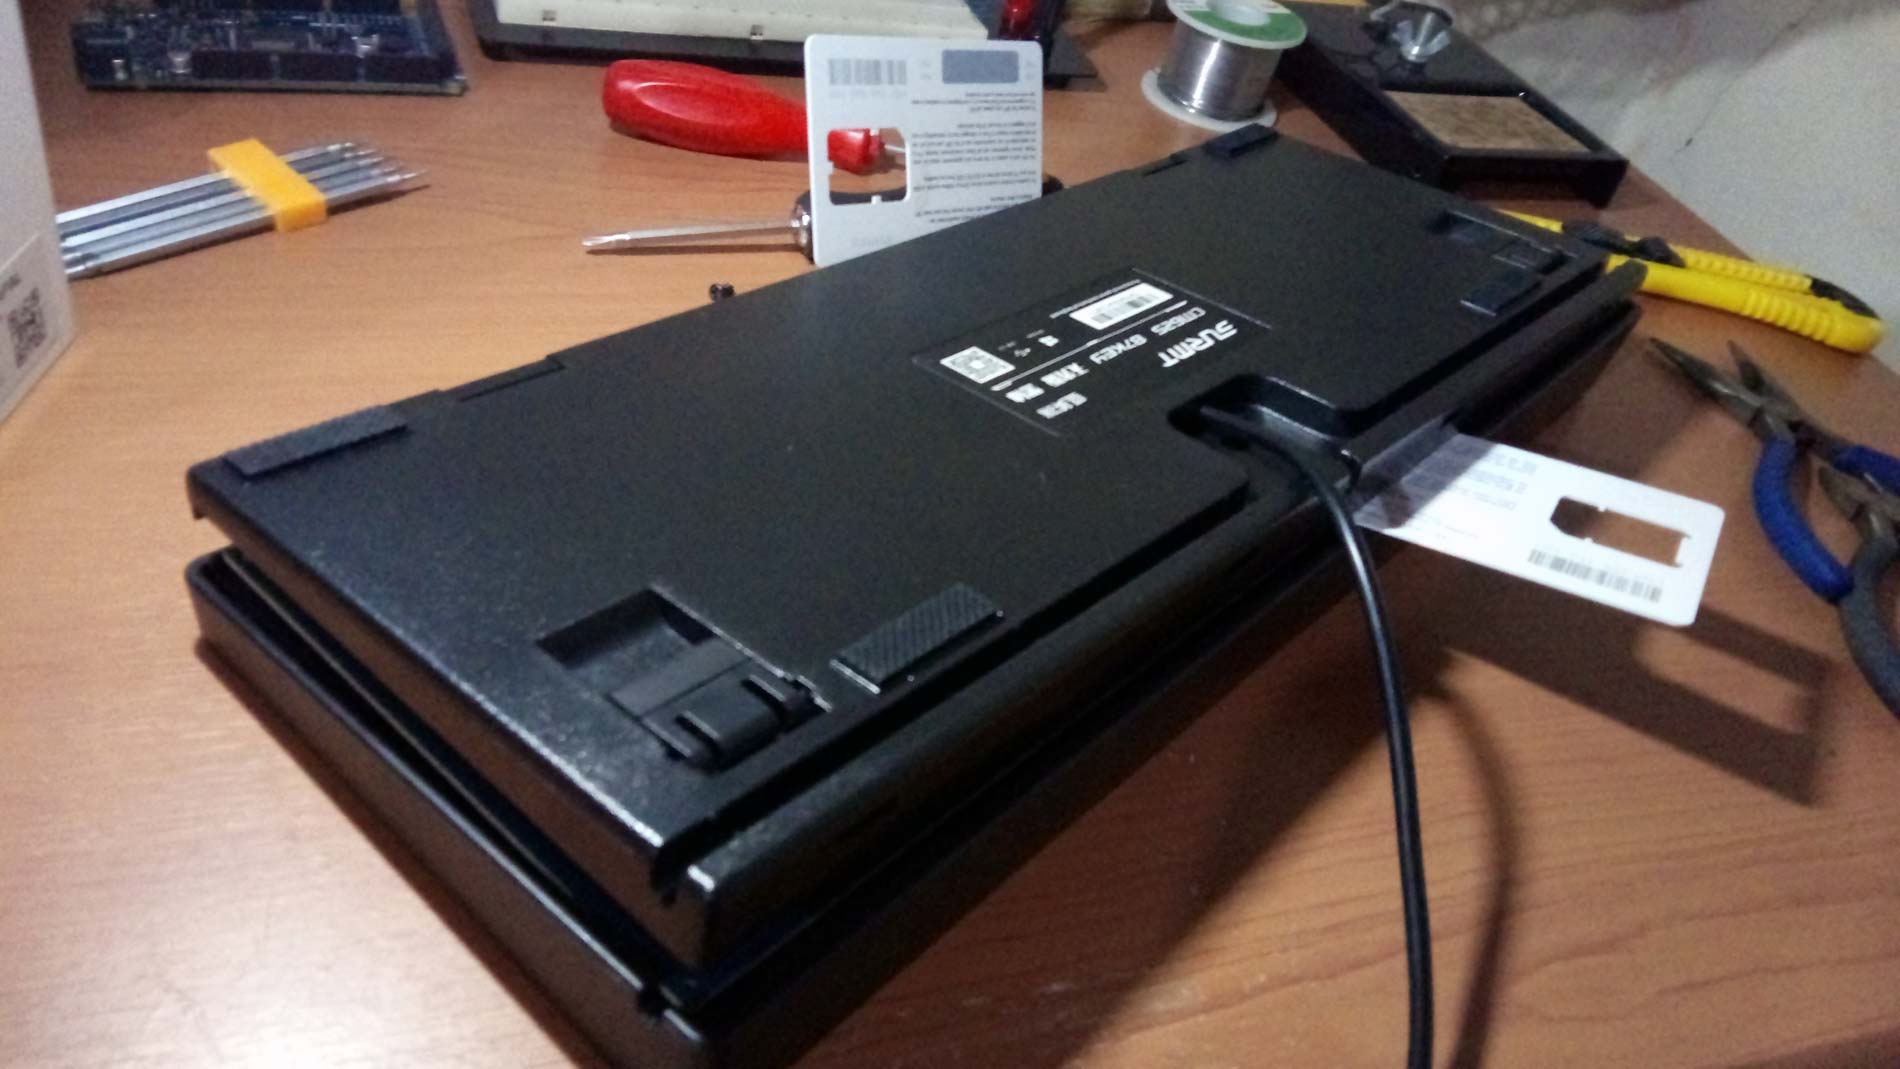
Remove the lone screw at the back of the base using Phillip screwdriver.
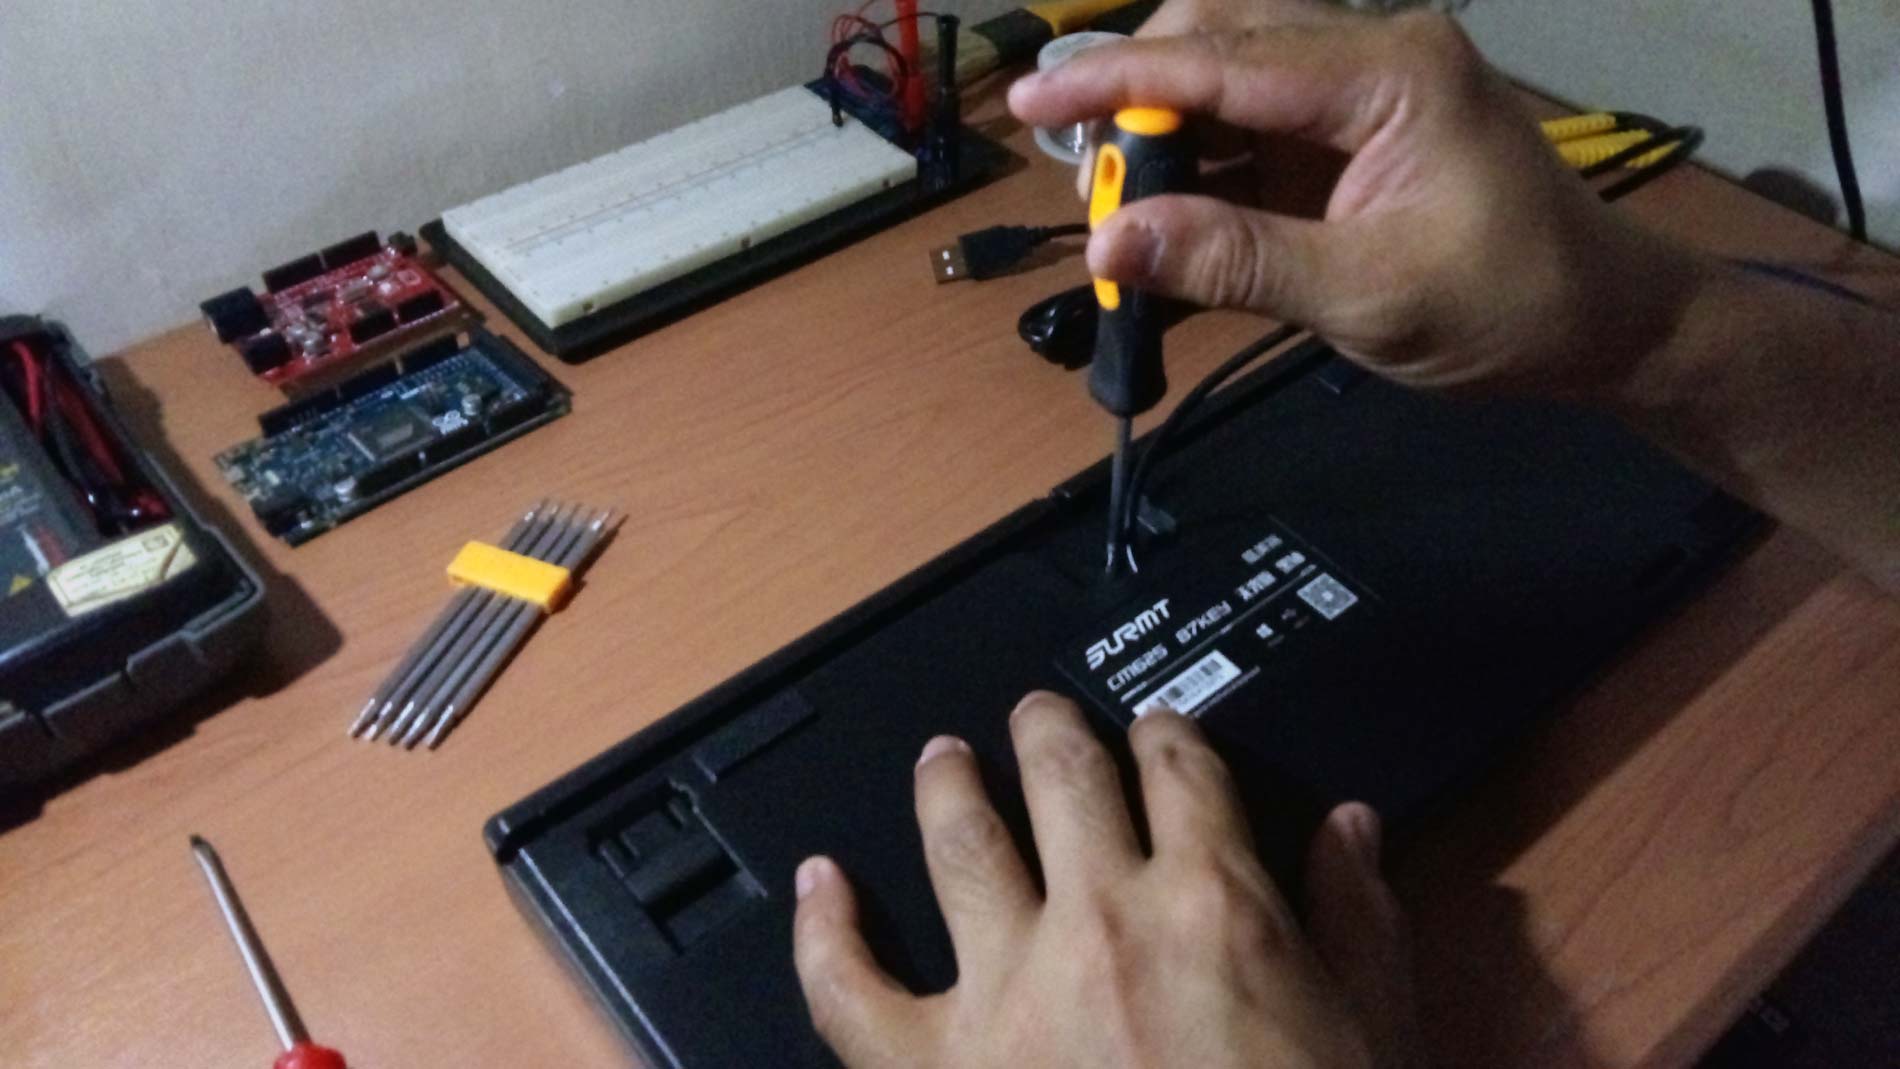
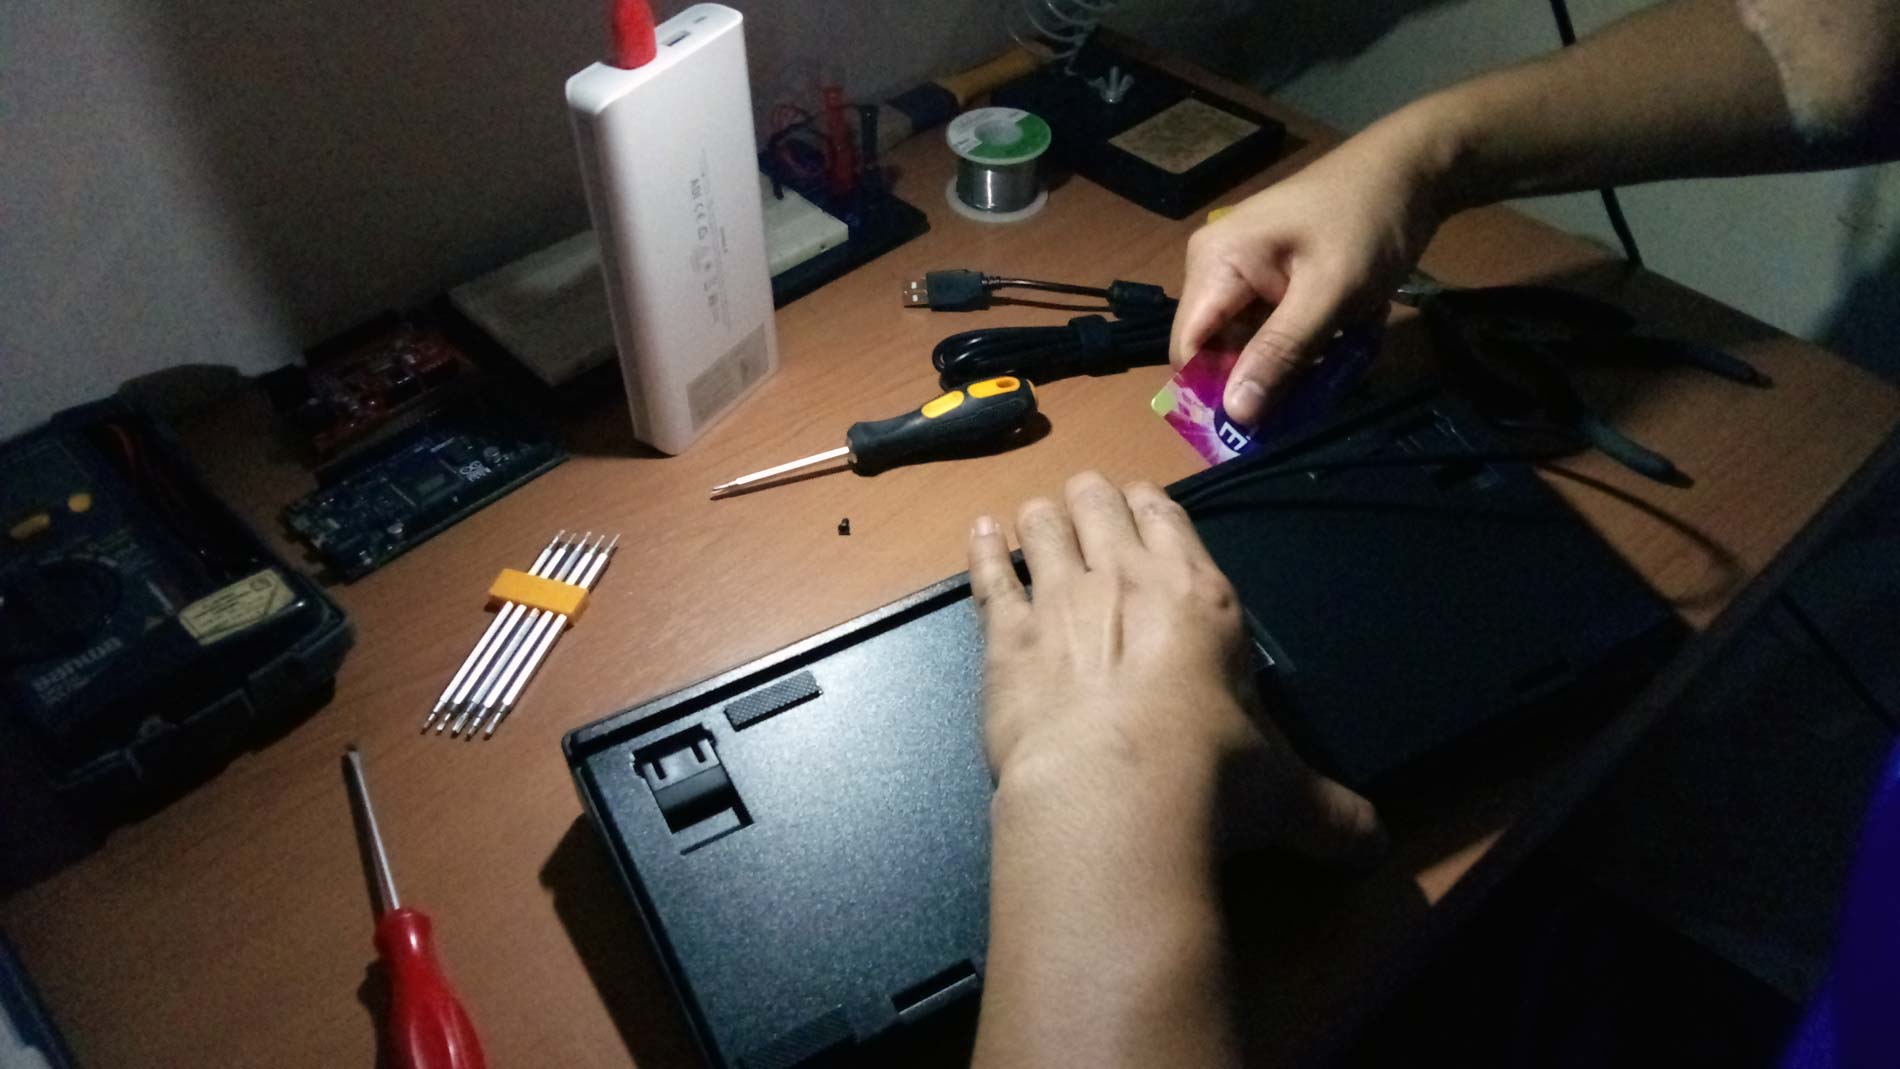
Separate the top cover and the base. Using a hard plastic card, (in my case, I used an old simcard housing) slide down towards the edges of the top cover and the base.
Slide until it being stop. At that point, push forward and slightly pull the hard plastic card until you heard a “click” on that area. Repeat until the base pop-up.
The lock connection of the top cover and the base is like this:
If the other side has pop-up, make a way to stay it open, and repeat on the other side until it completely separated. In my case, I used another card to stay it open.
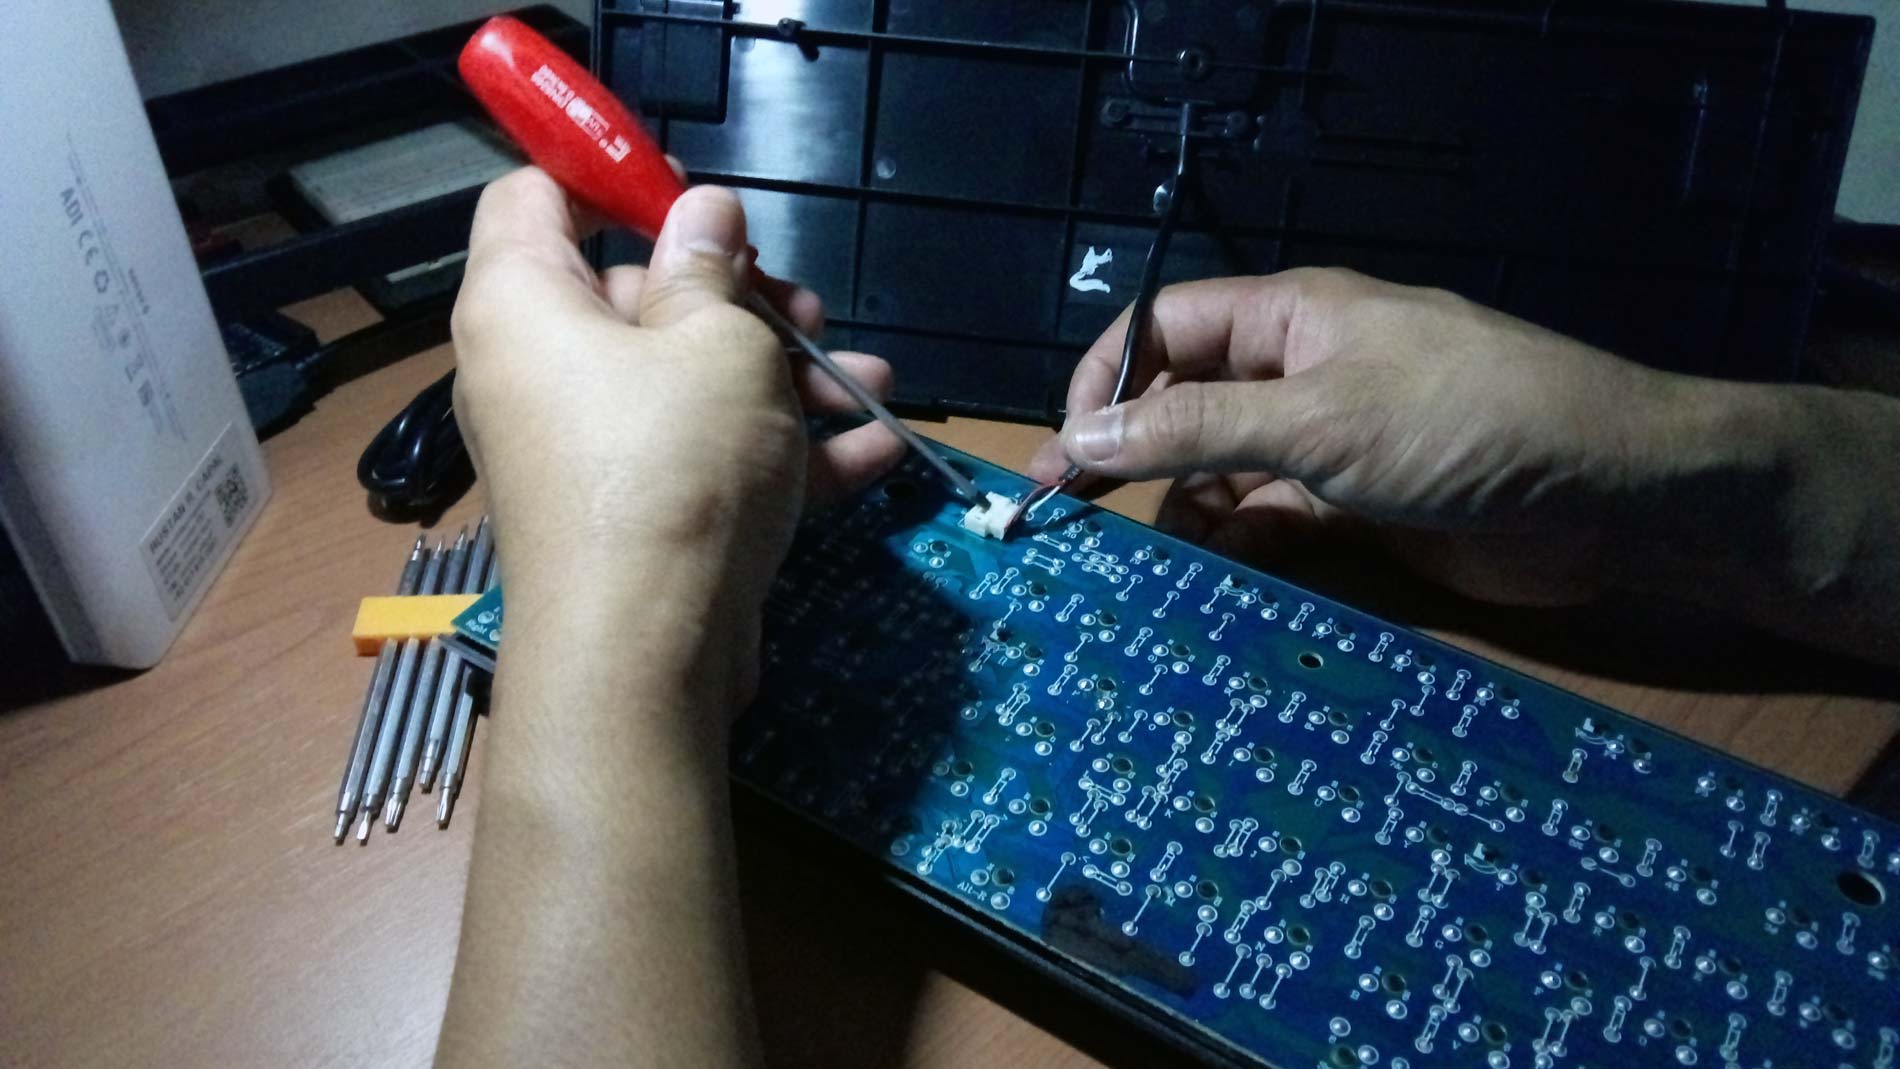
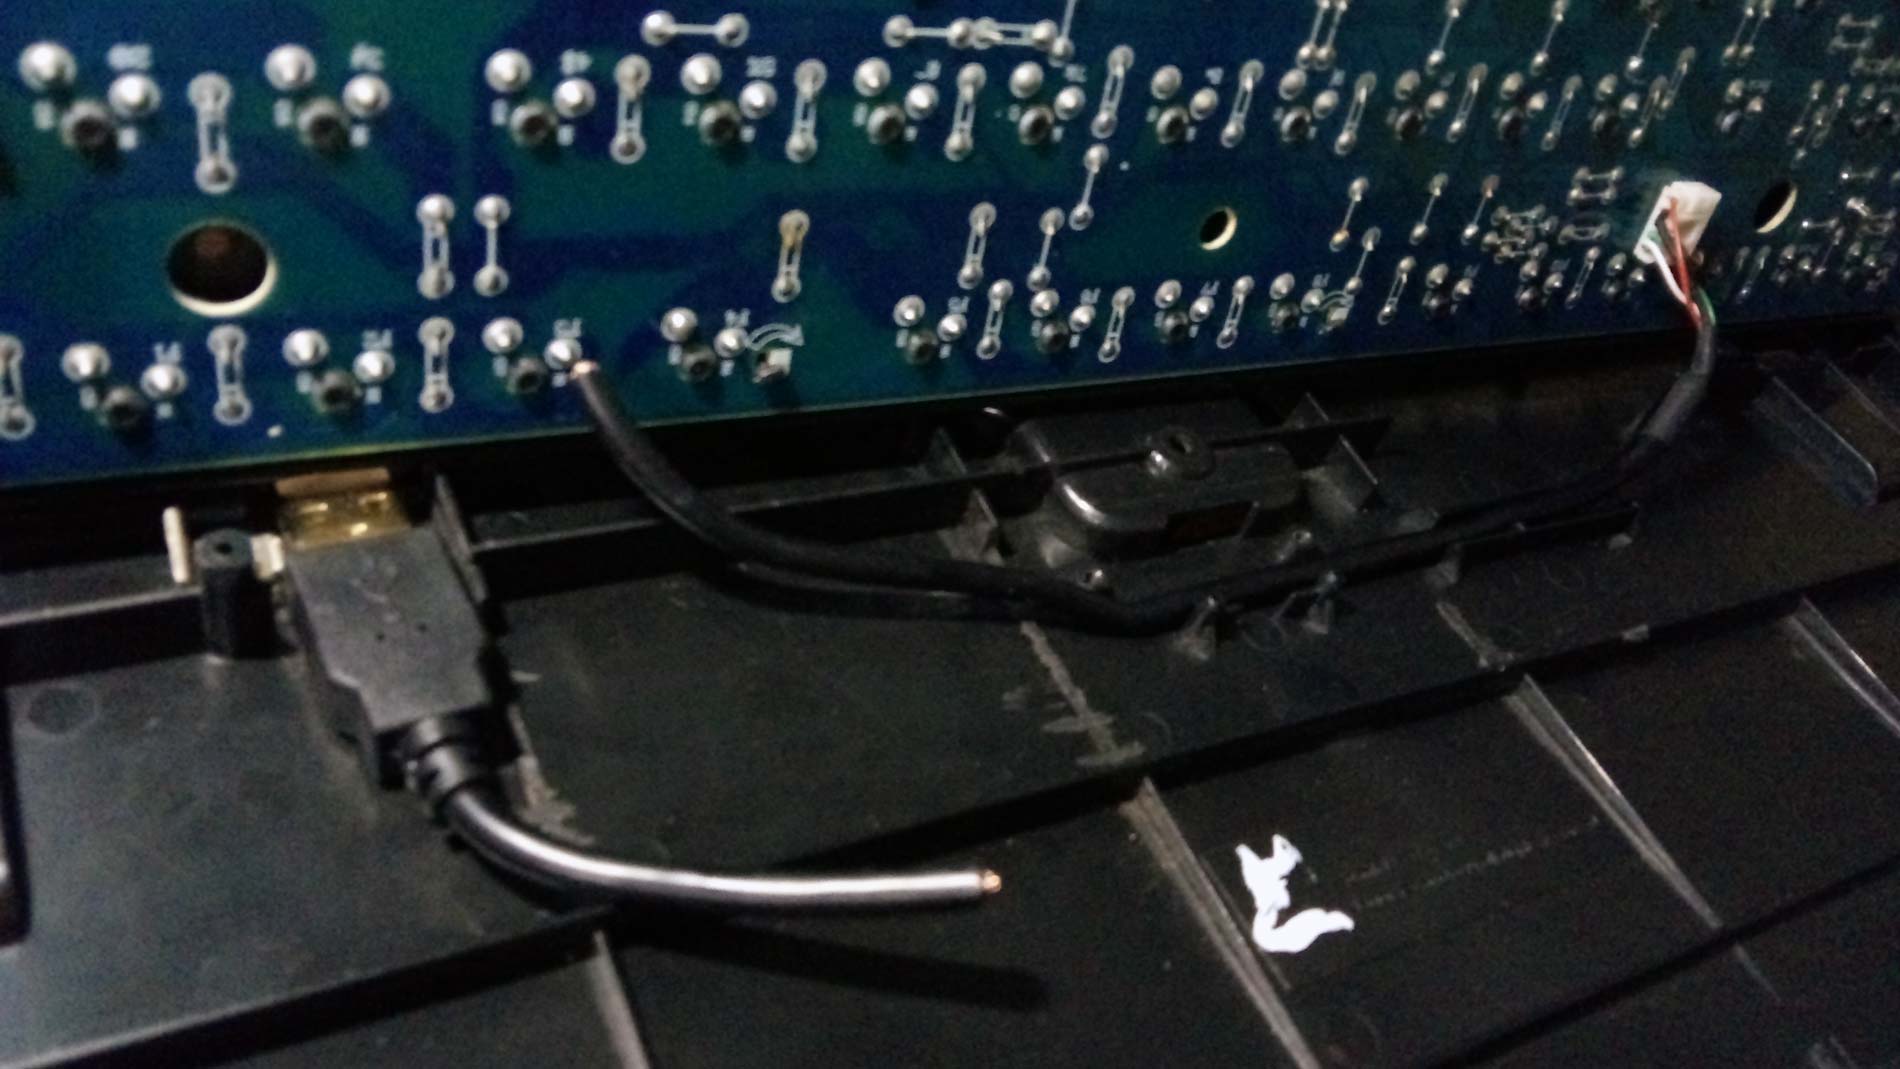
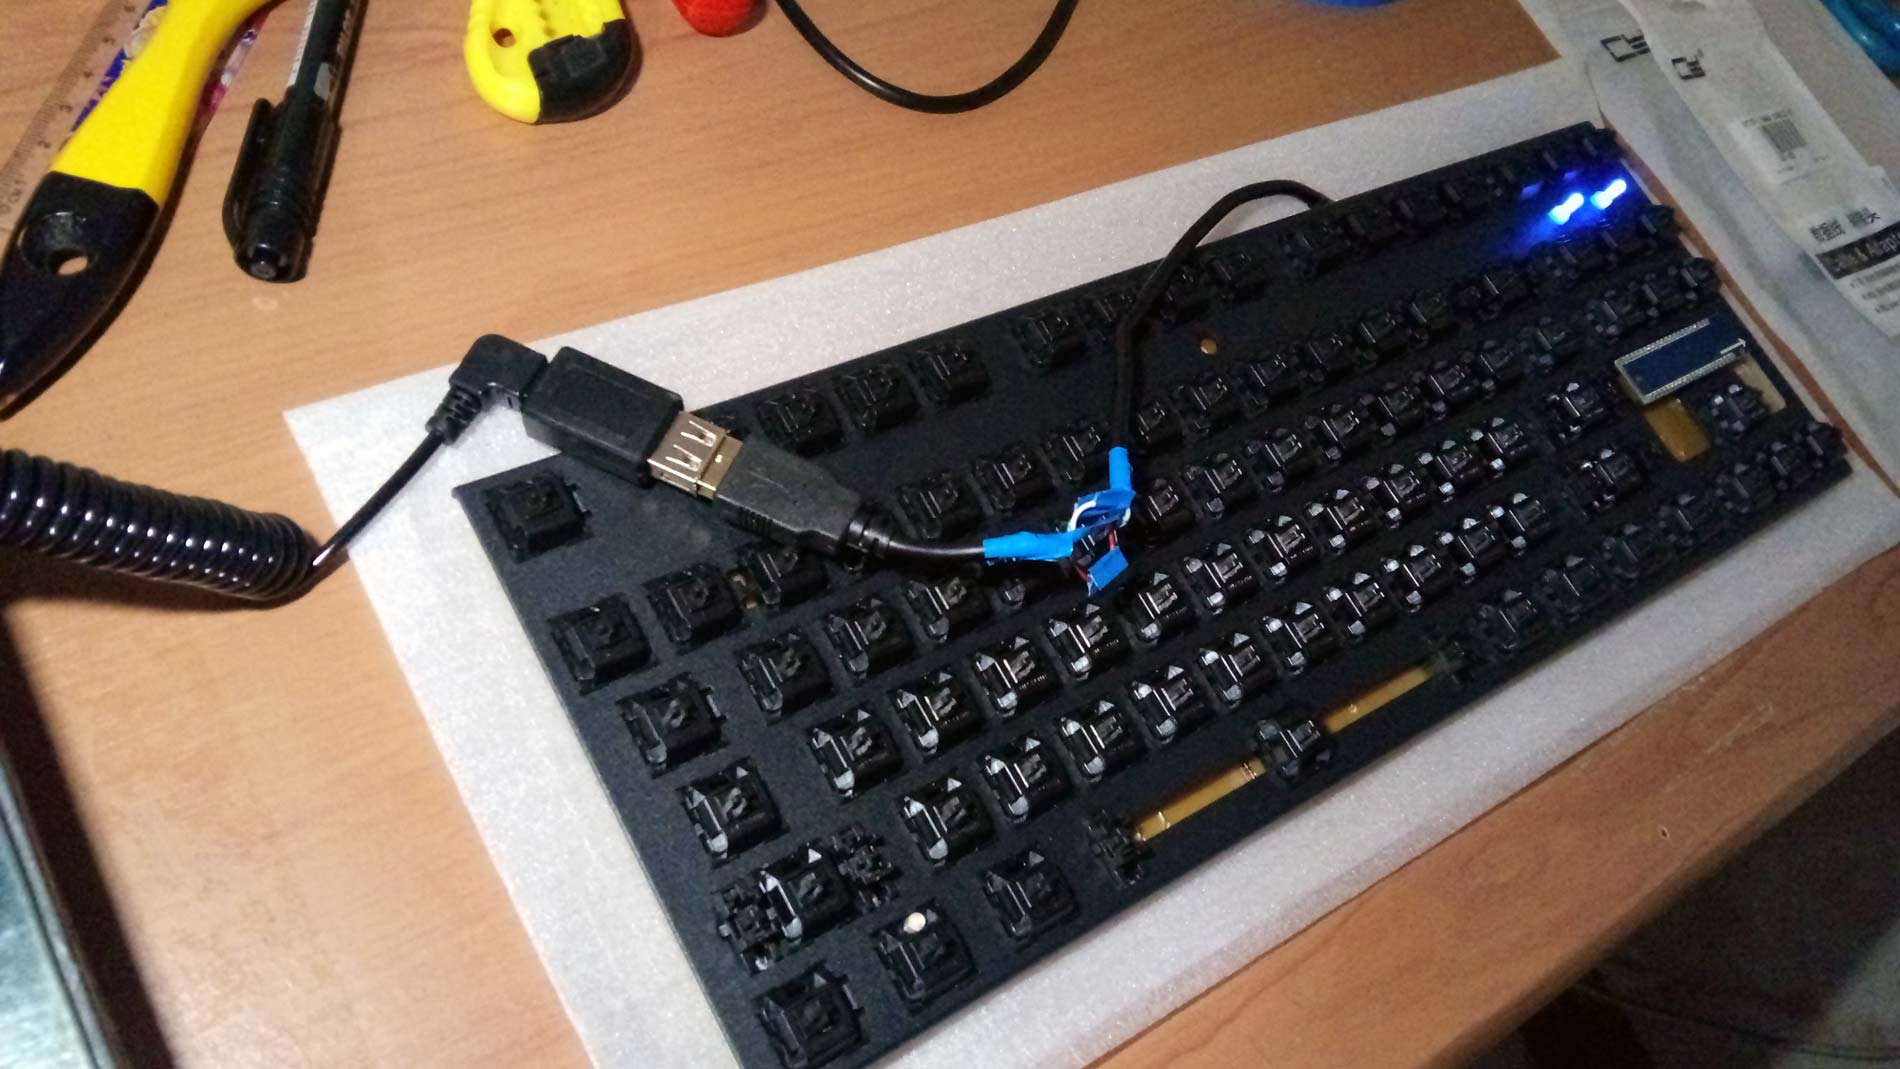
Remove the connection of the USB cable on the PCB. Using a Flathead screwdriver, slightly carefully push the connector.
Important: Do not pull the connection by hand as it will possibly damage the wires.
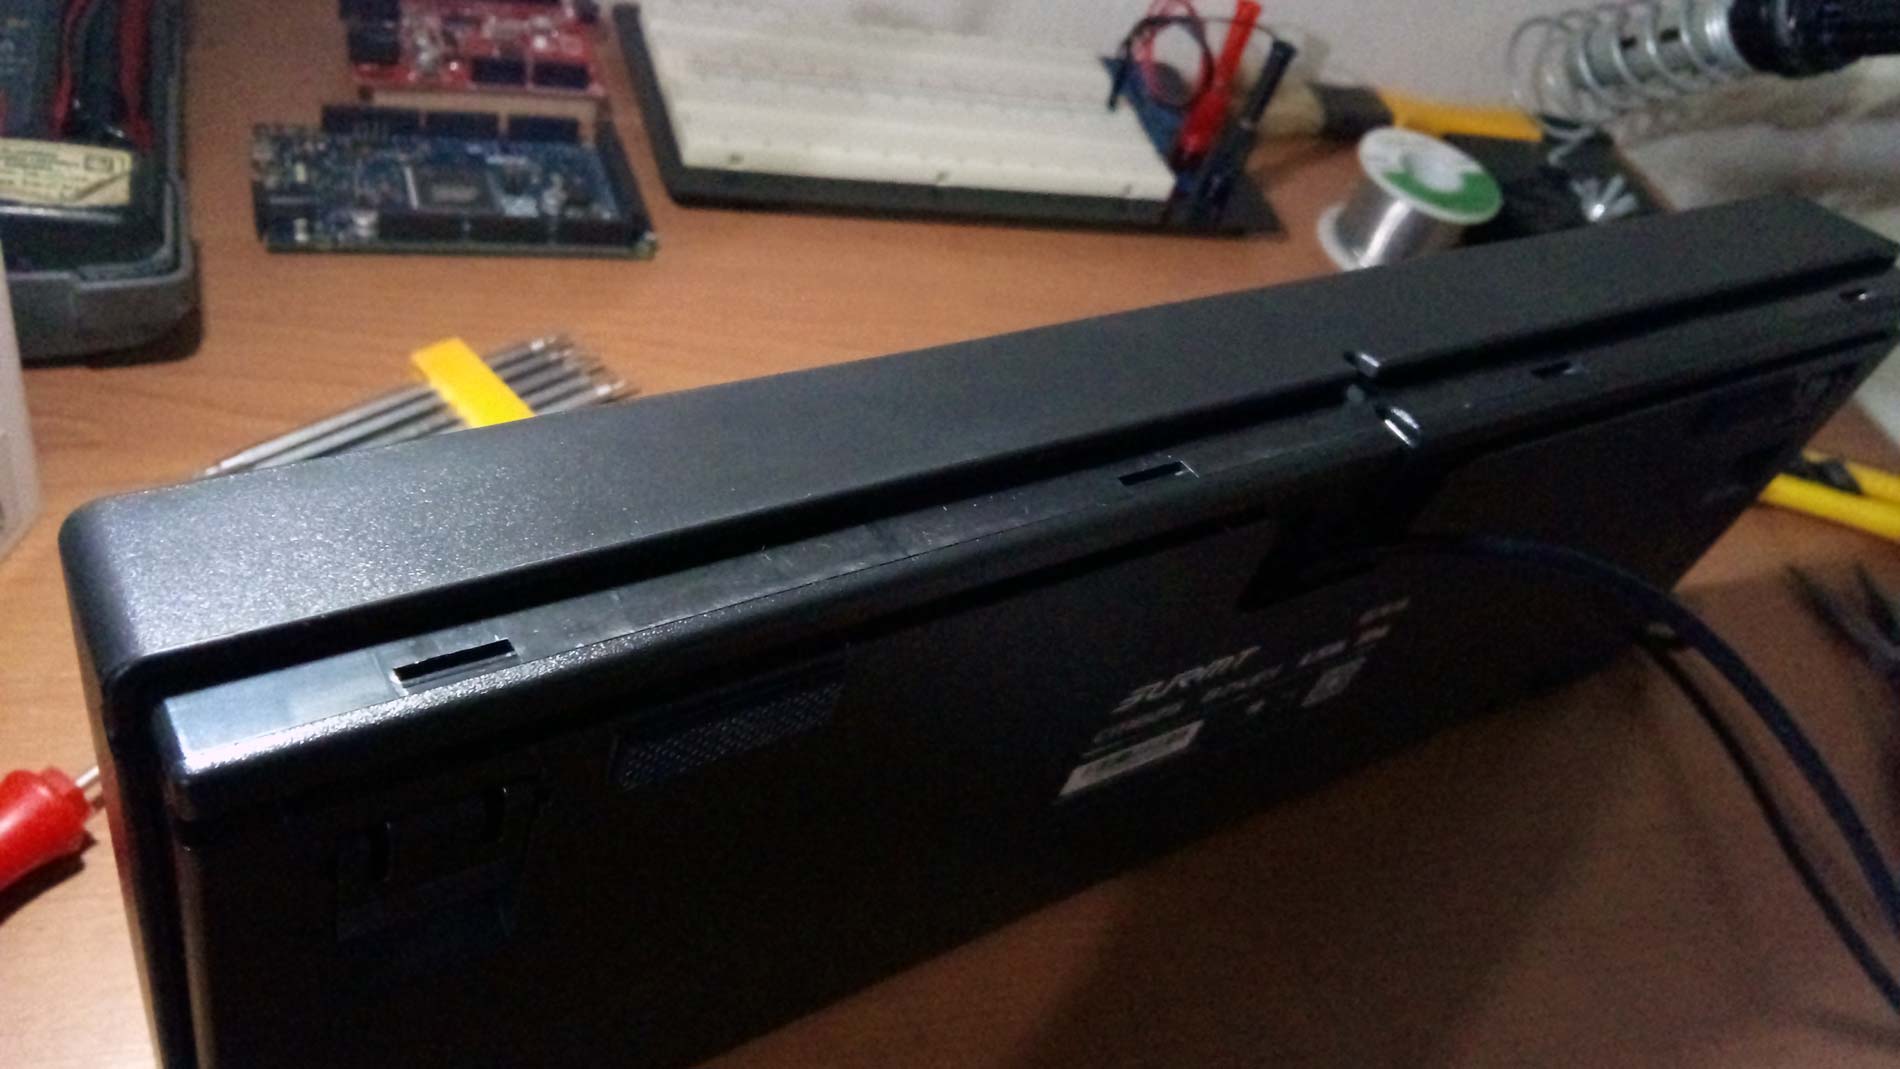
The separation of the key connections: Top cover, base, and USB wire:
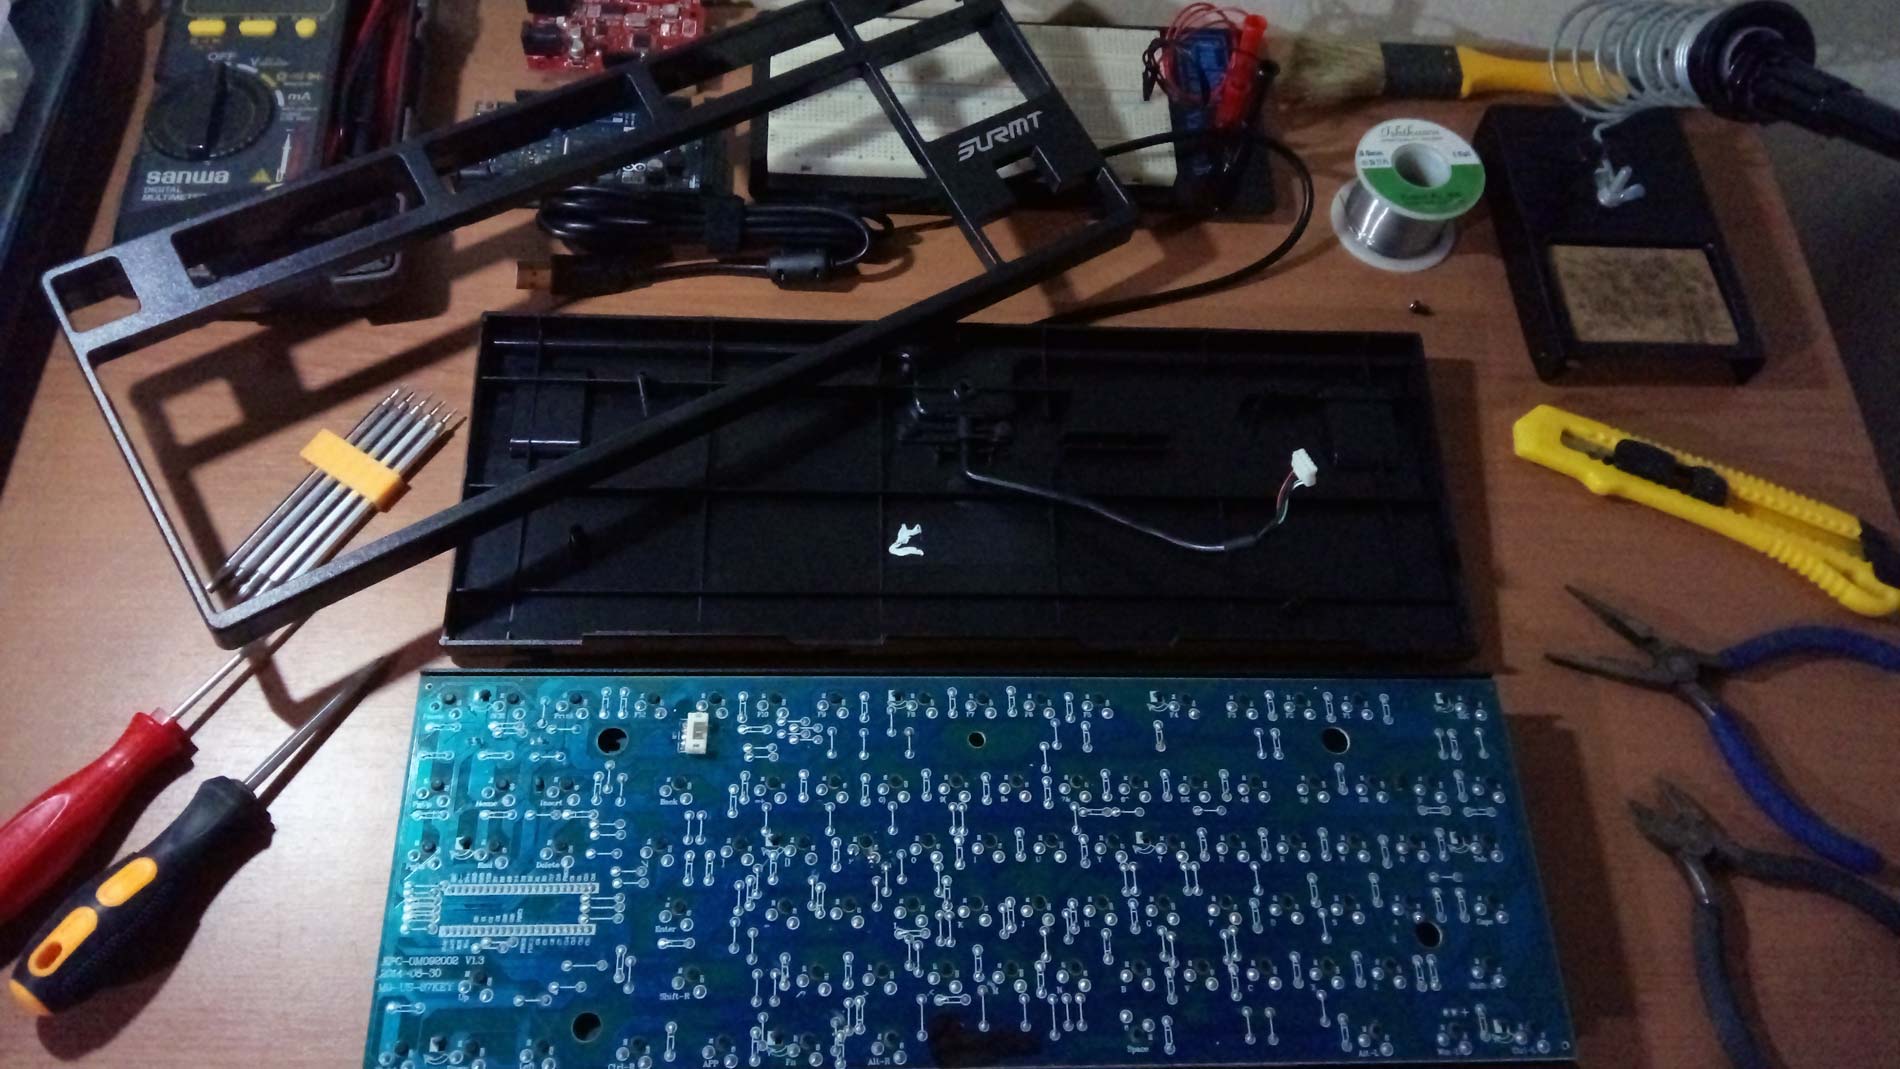
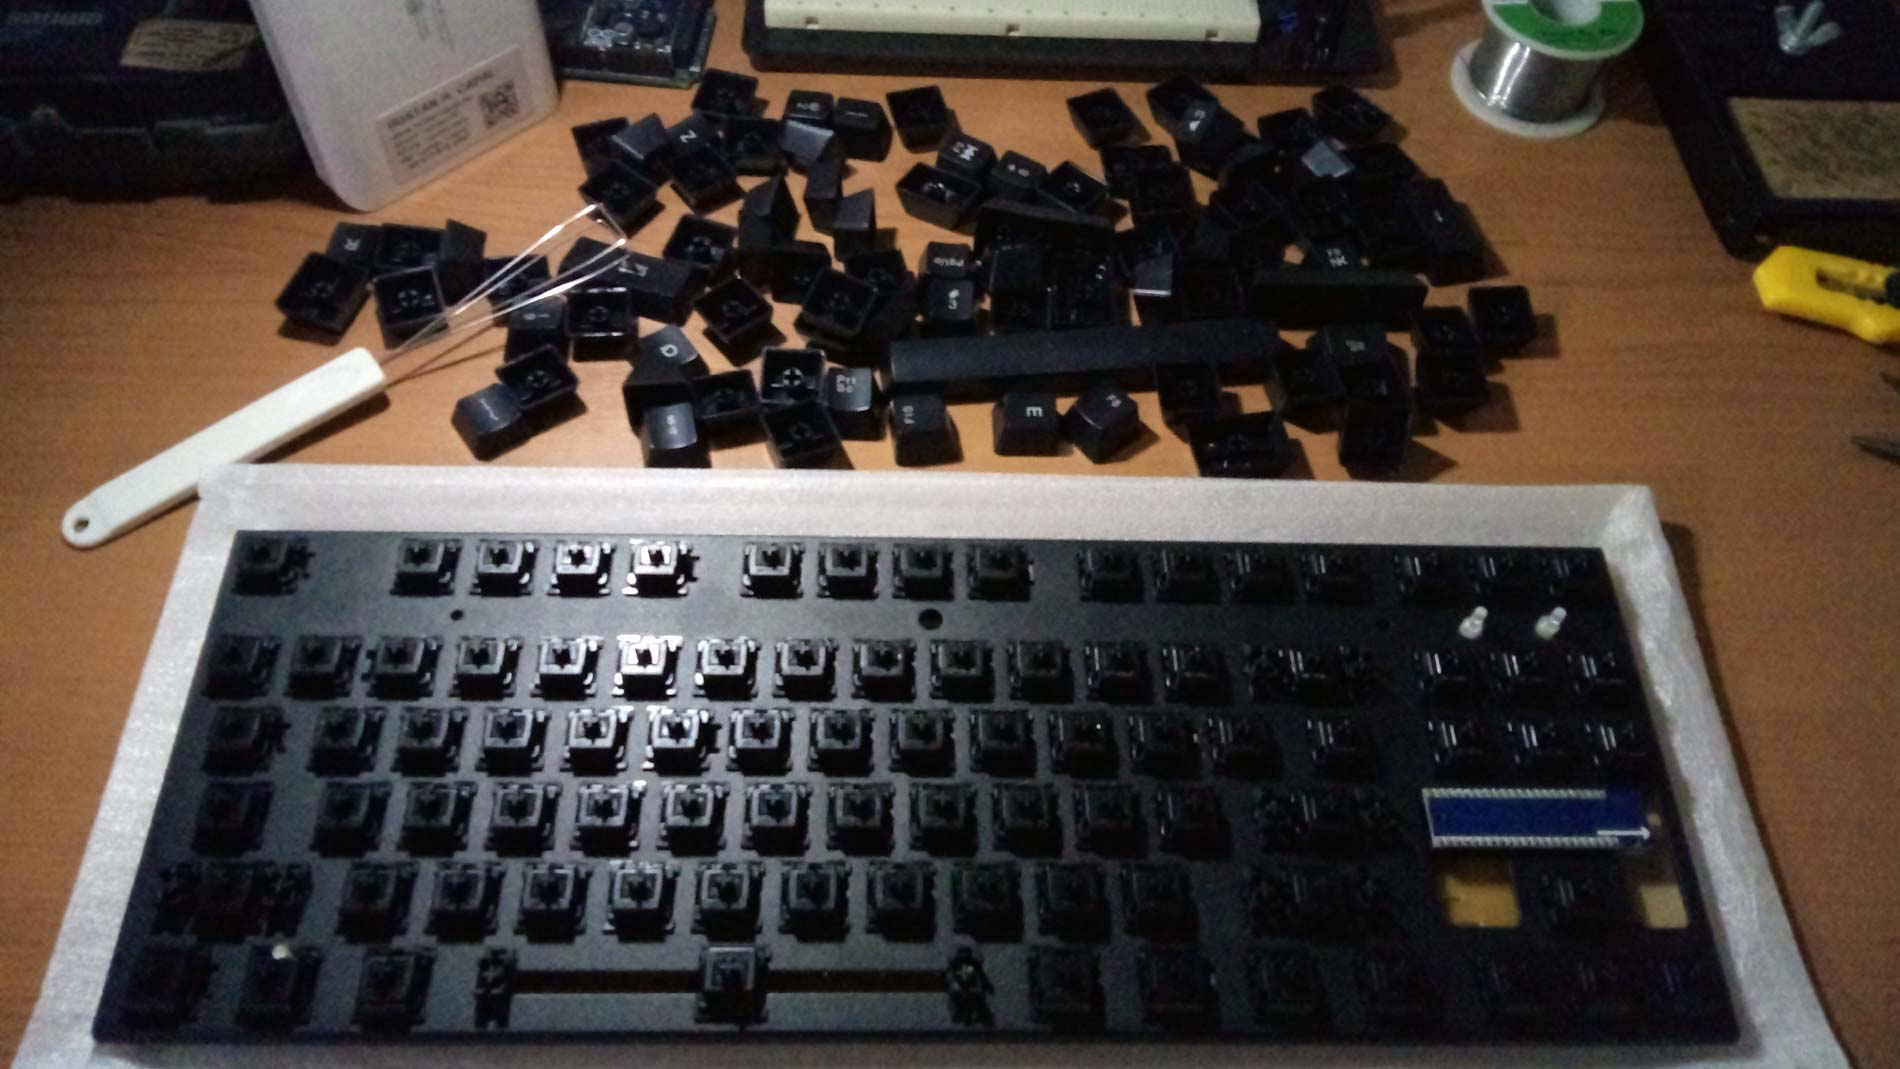
Remove the keycaps. You can remove the keycaps by hand but it is best to use a keycap puller. You can also remove the keycaps before separating the top cover and the base.
Remove the USB cable from the base.
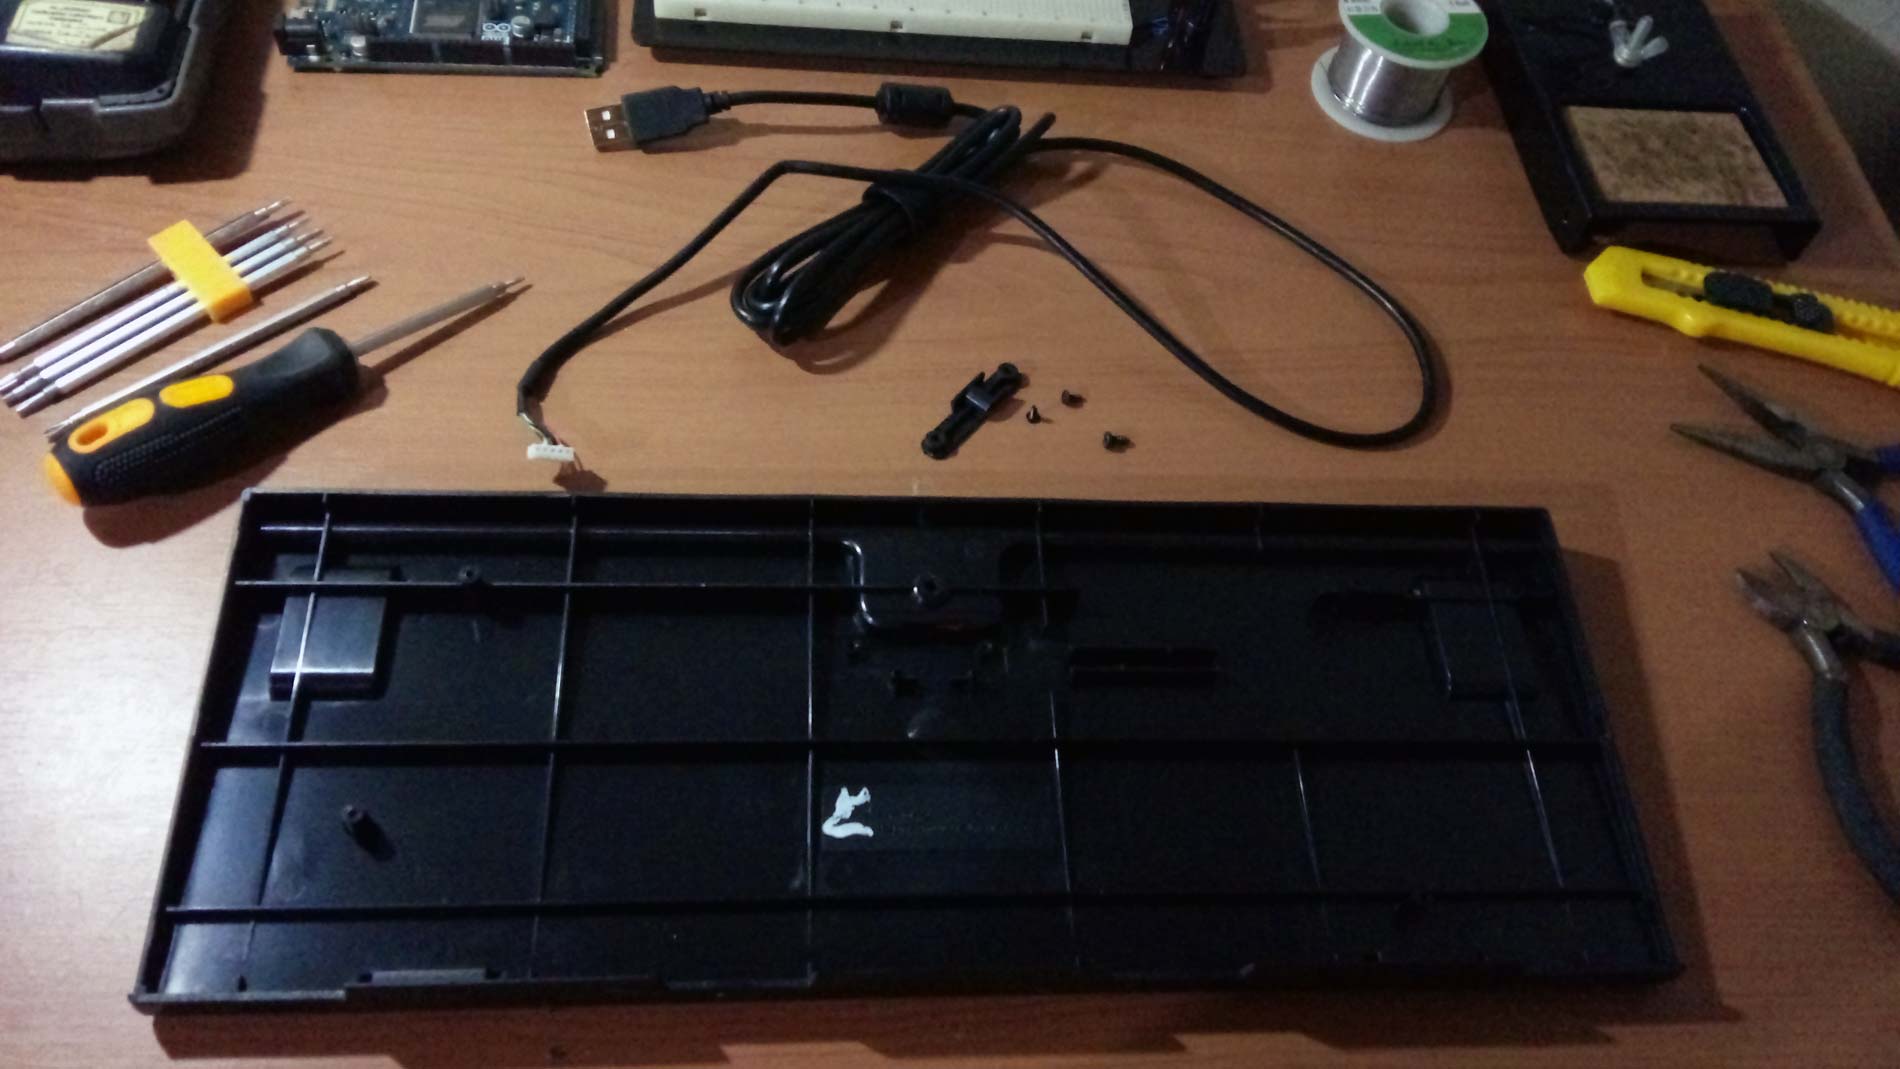
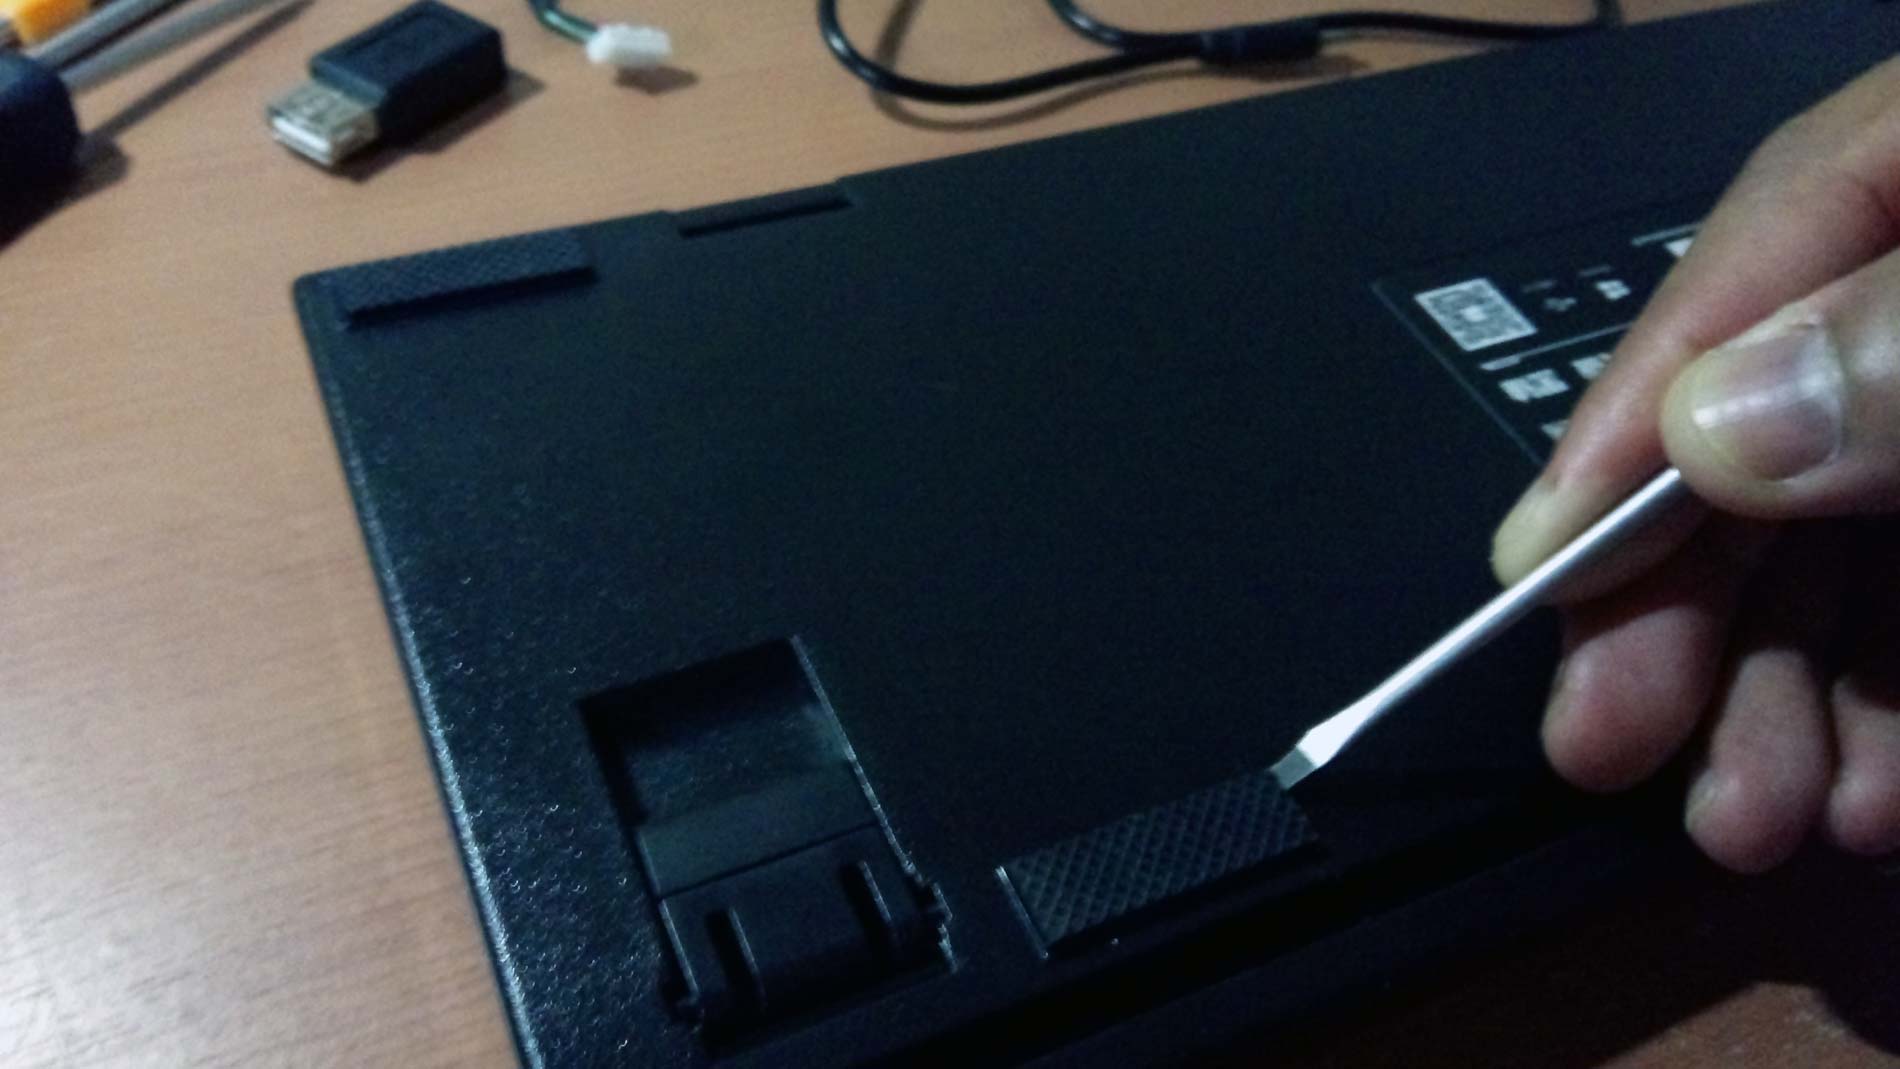
Remove the rubber footings. Set aside, and we will use it later for the new wooden base.
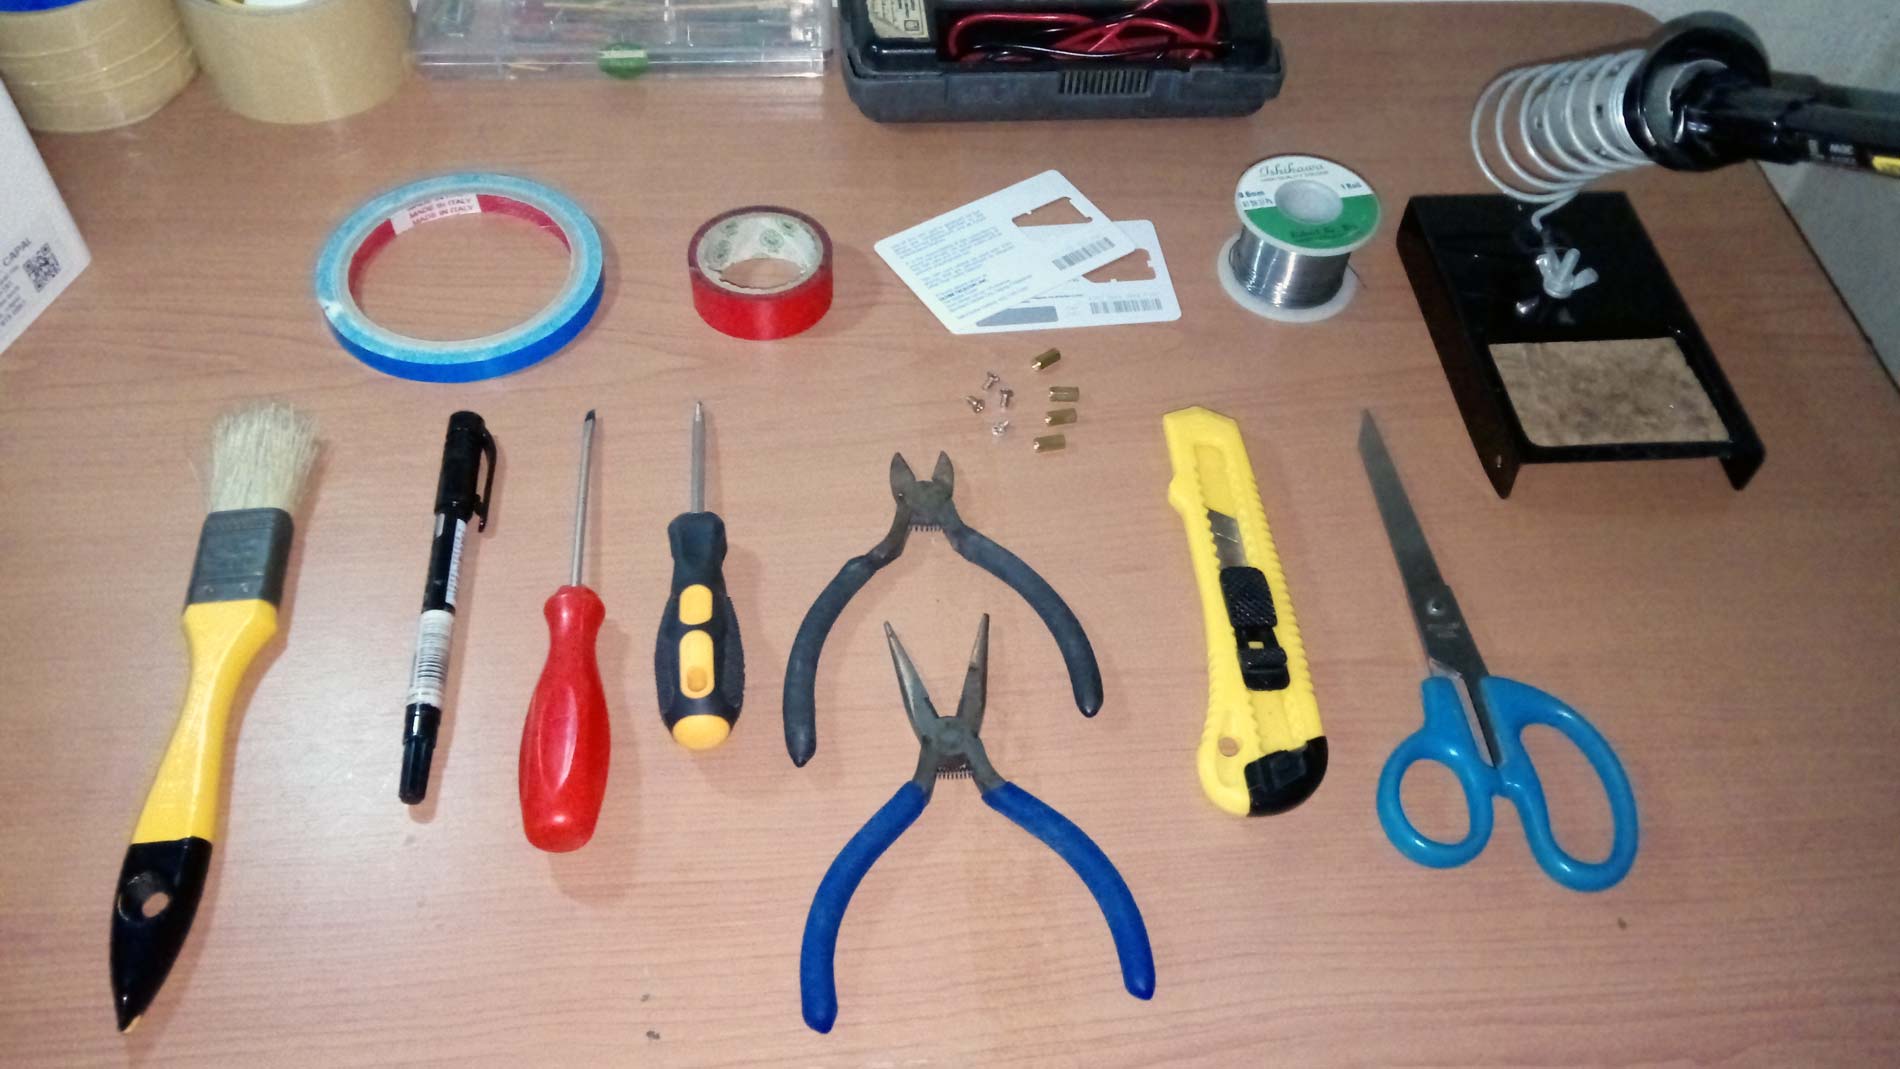
TOOLS, EQUIPMENT, and PARTS
Already available on my electronics toolbox:
- Electrical Tape (for masking live and open wires, and cover for possible electric conductors)
- Old Simcard Housing (for separating the top cover, and base of the keyboard)
- Soldering Lead and Soldering Iron (for soldering activities)
- Paint brush (for dusting)
- Fine Pen marker (for any marking activities)
- Phillip, and Flathead Screwdrivers (for any pushing and popping of screws)
- Hobbyist Wire Cutter, and Pliers (for wire cutting, peeling, and handling)
- 3×10 Brass Stud, and 3×6 bolt (for mounting of the original plastic base on the new wooden base)
- Cutter, and Scrissors (for any cutting activities on small parts)
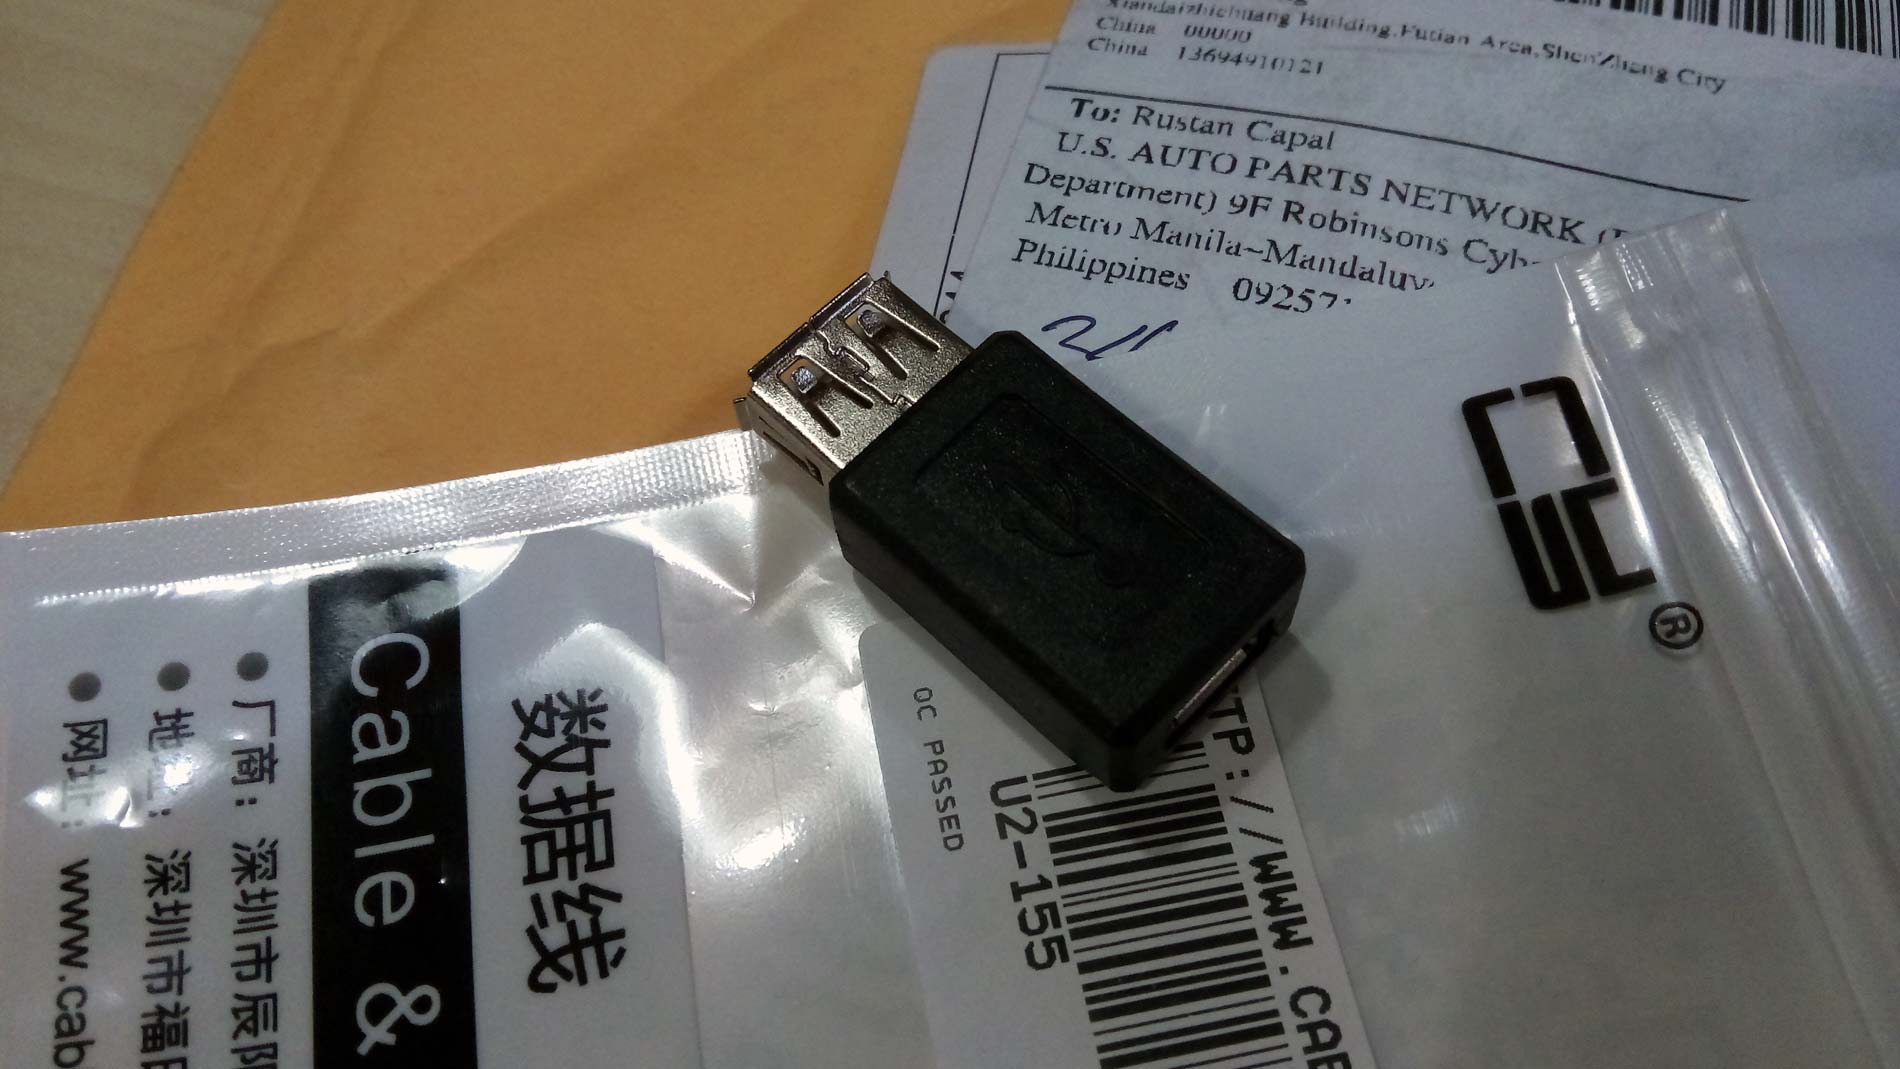
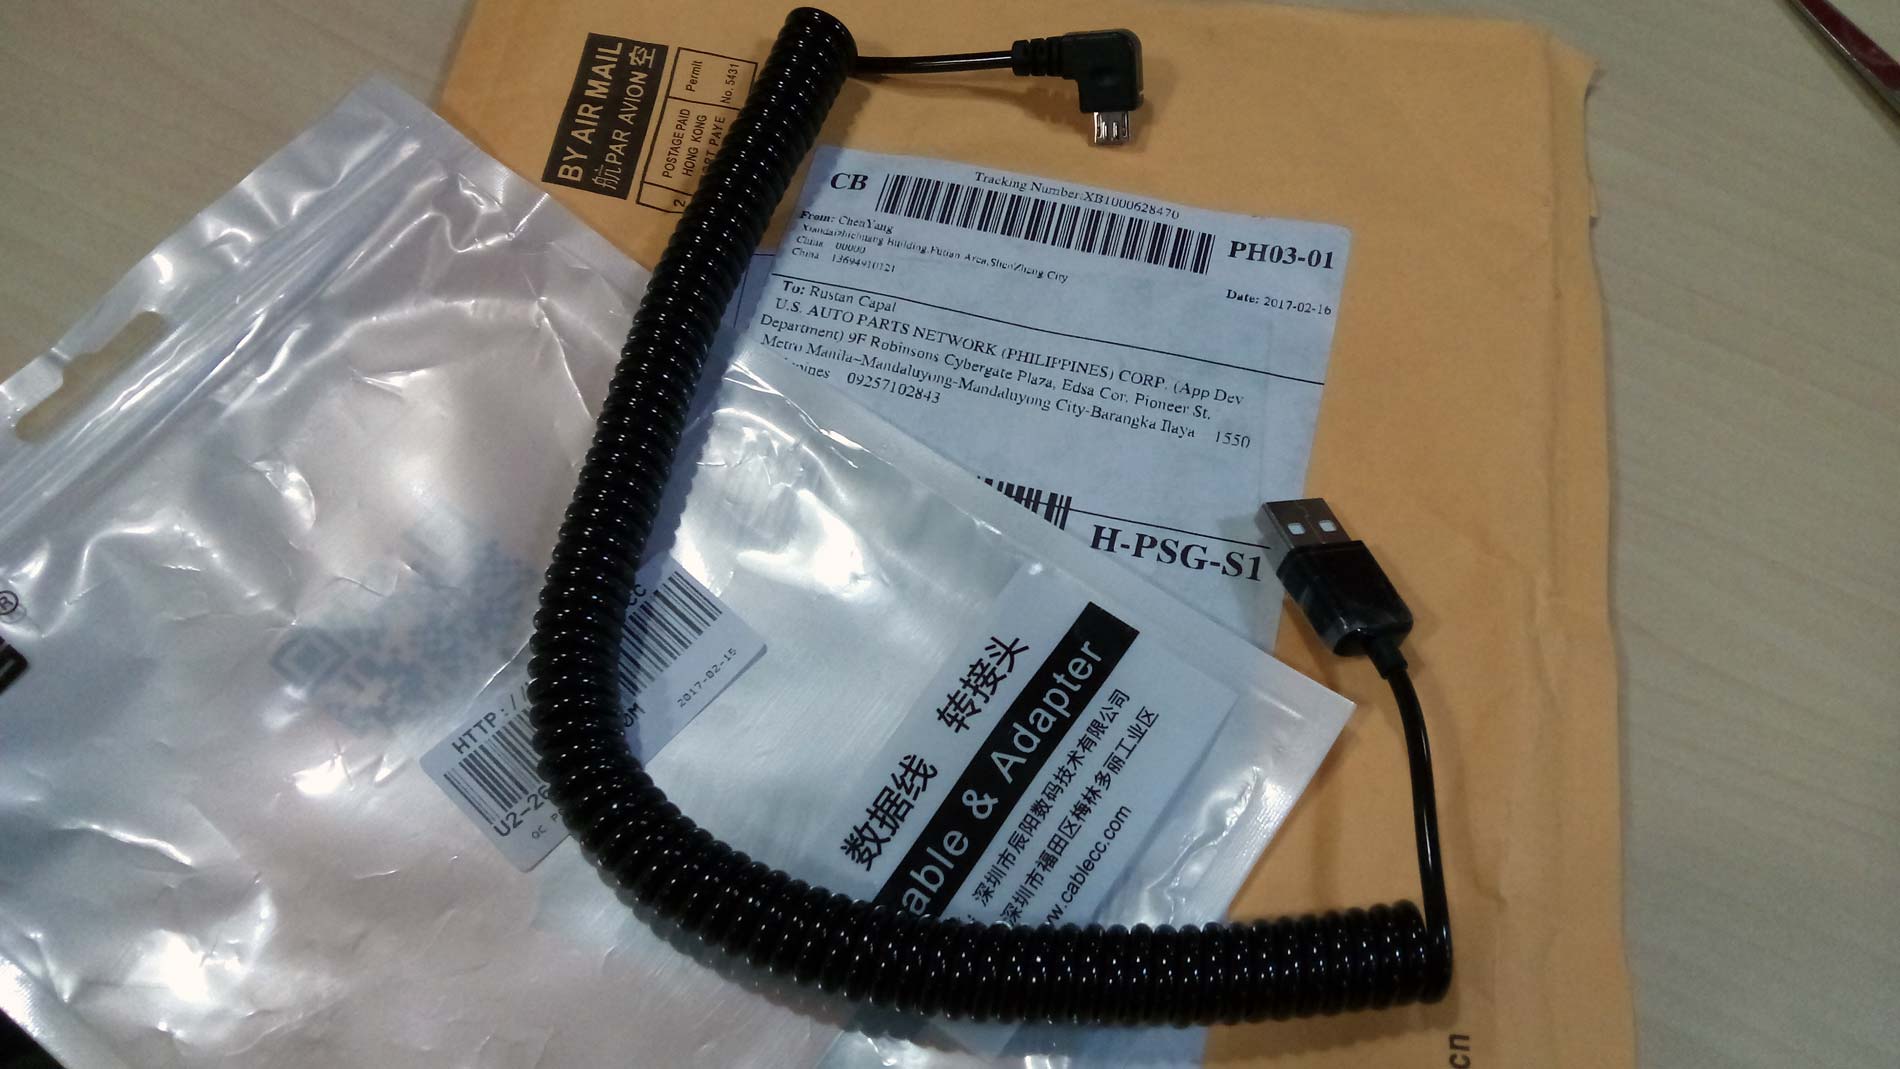
USB 2.0 A Type Female to Female Micro USB Extension Adapter
– for USB connection port of the removable USB cable.
Ordered at Lazada PH.
Price: Php 312.00
300cm Right Angled 90 degree USB 2.0 Micro Male to A Type Male Stretch Data Cable
– will be the new USB cable of the modded Mechanical Keyboard.
Ordered at Lazada PH.
Price: Php 312.00
Scrap Narra Wood
– will be the new top cover, and base
– 7 mm in thickness. For the height and width, just enough to fit on the size of the original plastic cover and base. Plus another 7mm for borders.
Available on my neighboring Furniture Shop.
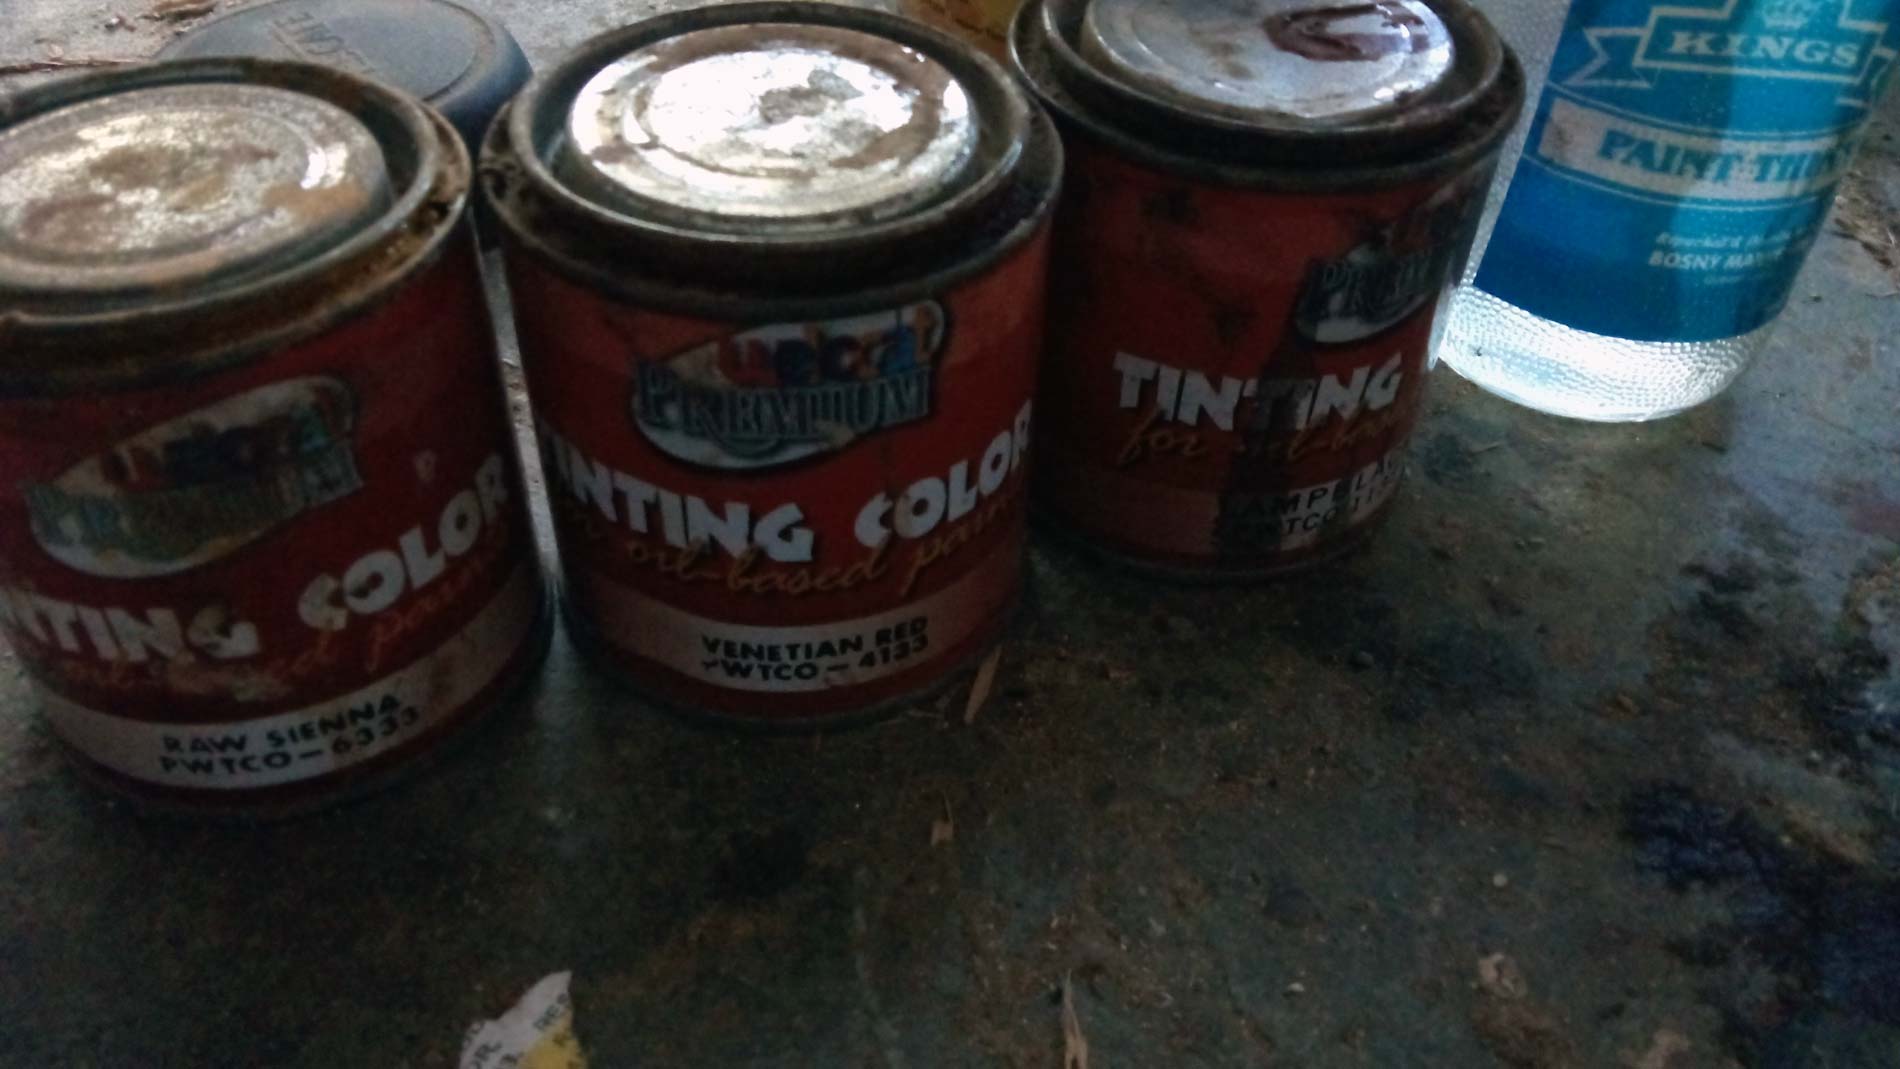
Wood Paints (Colors: Yellow, Red, and Black), and Paint Thinner (for color finish of the wooden case)
– will be mix to attain superb reddish, and brownish color on the wood.
Available on my neighboring Furniture Shop.
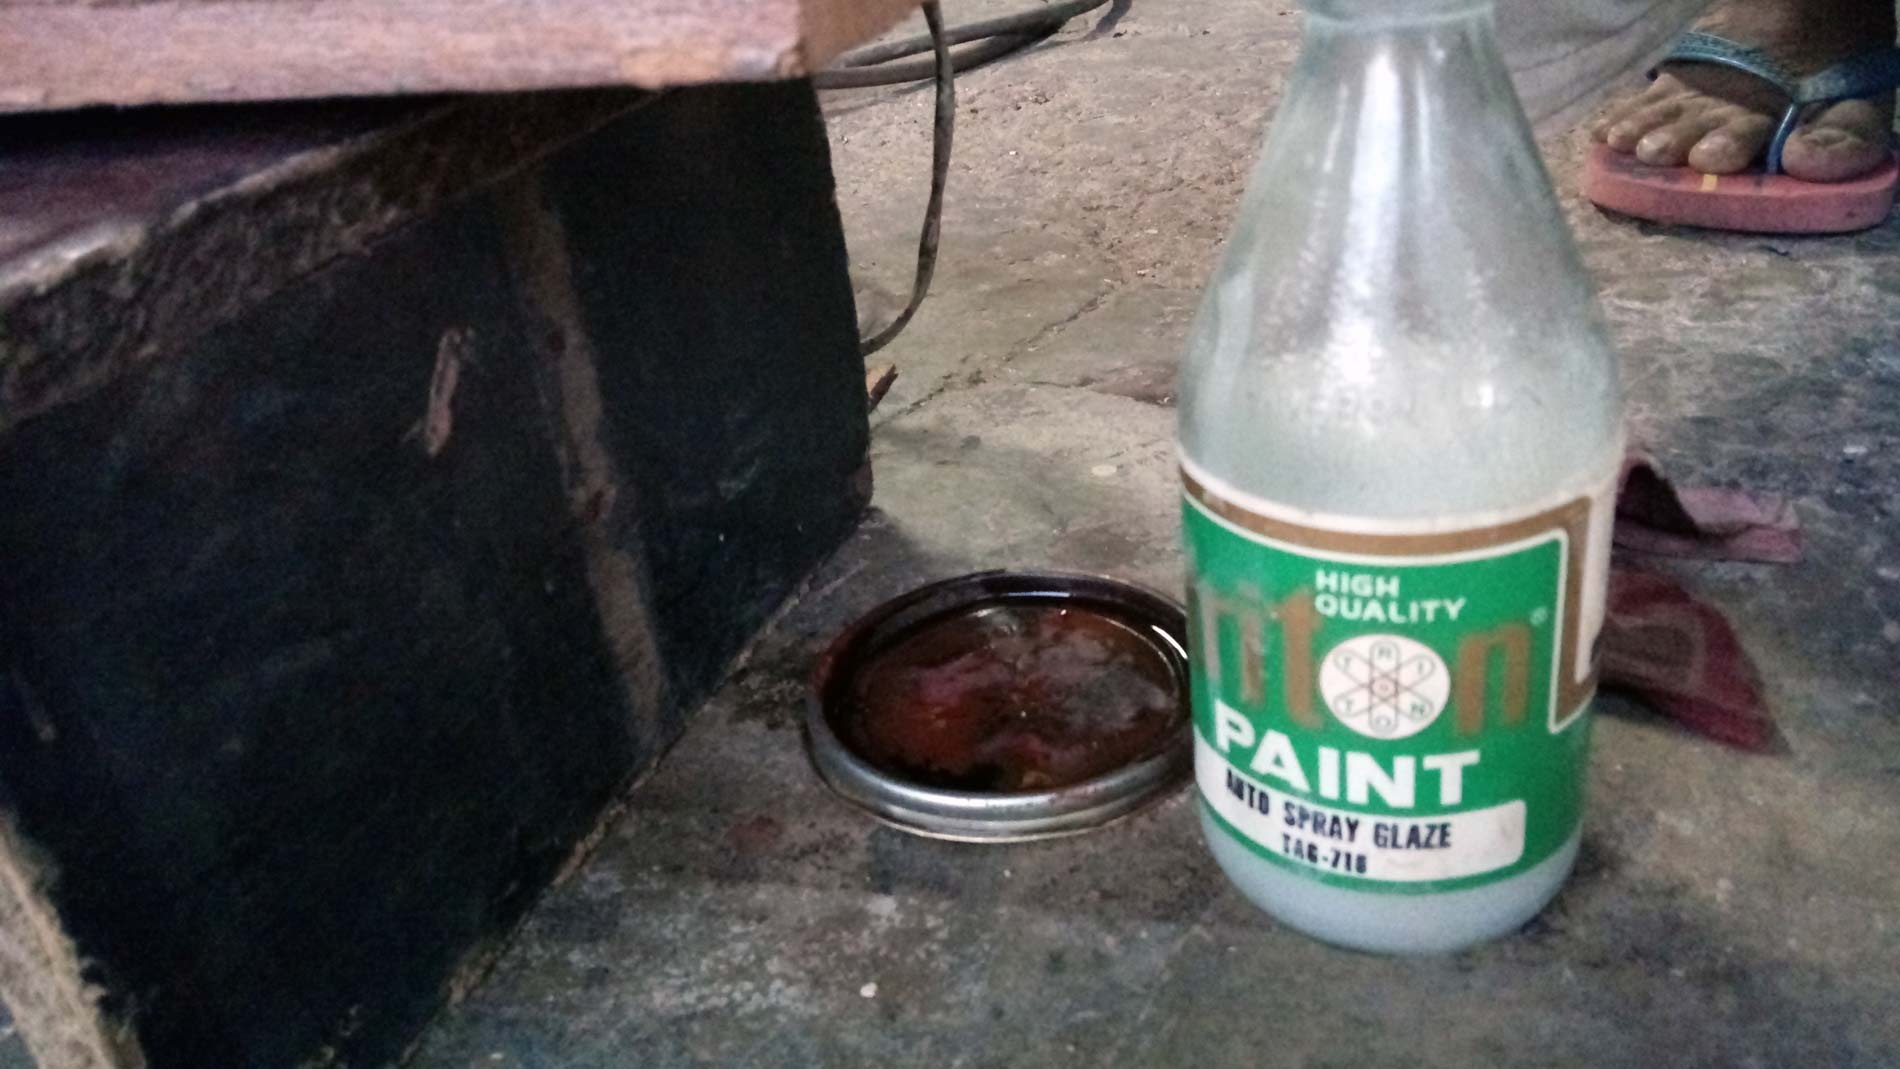
Paint Spray Glaze
-for a glossy wood finish
Available on my neighboring Furniture Shop.
PS: All other tools and equipment for the wood works will be shown and mentioned on the modification processes (e.g. Wood Cutter, Grinder, Air Brush, Blower, Chisel, Sand Papers, Epoxy Clay, Putty, etc.)
MODIFICATIONS
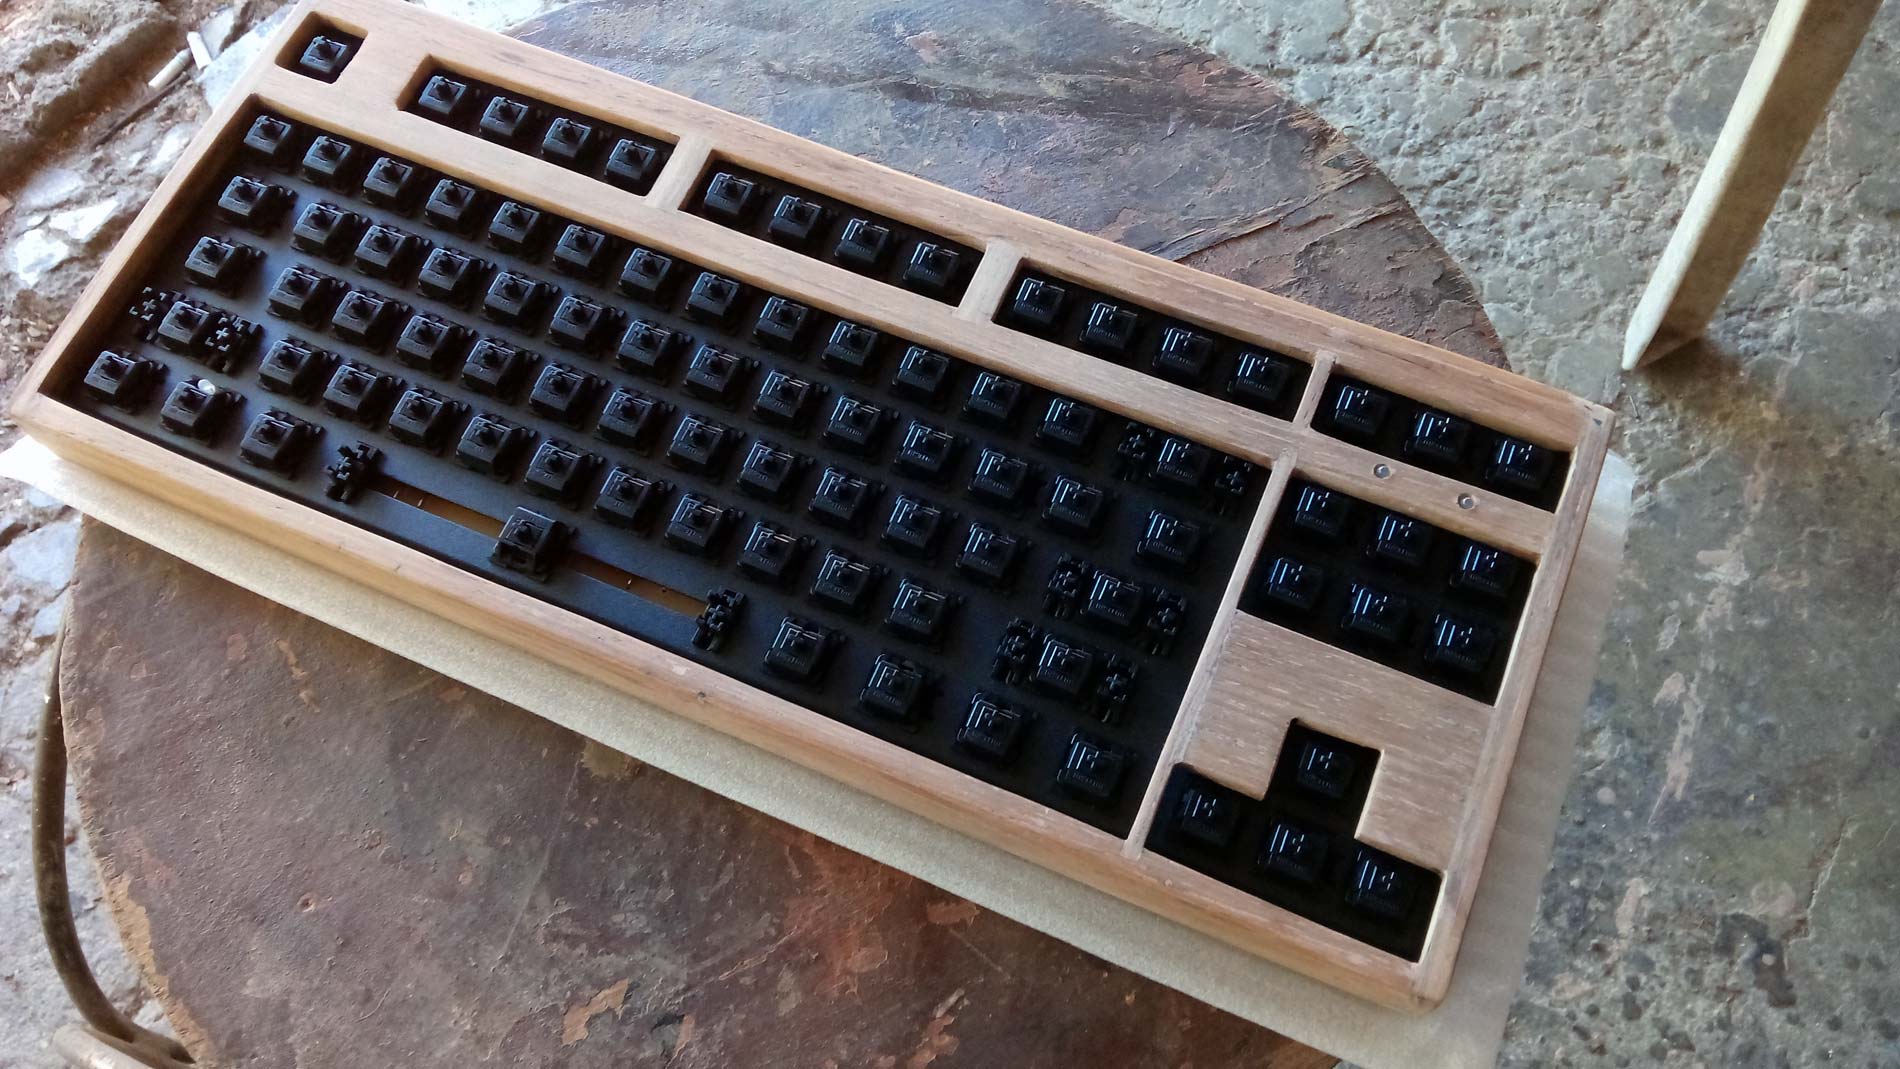
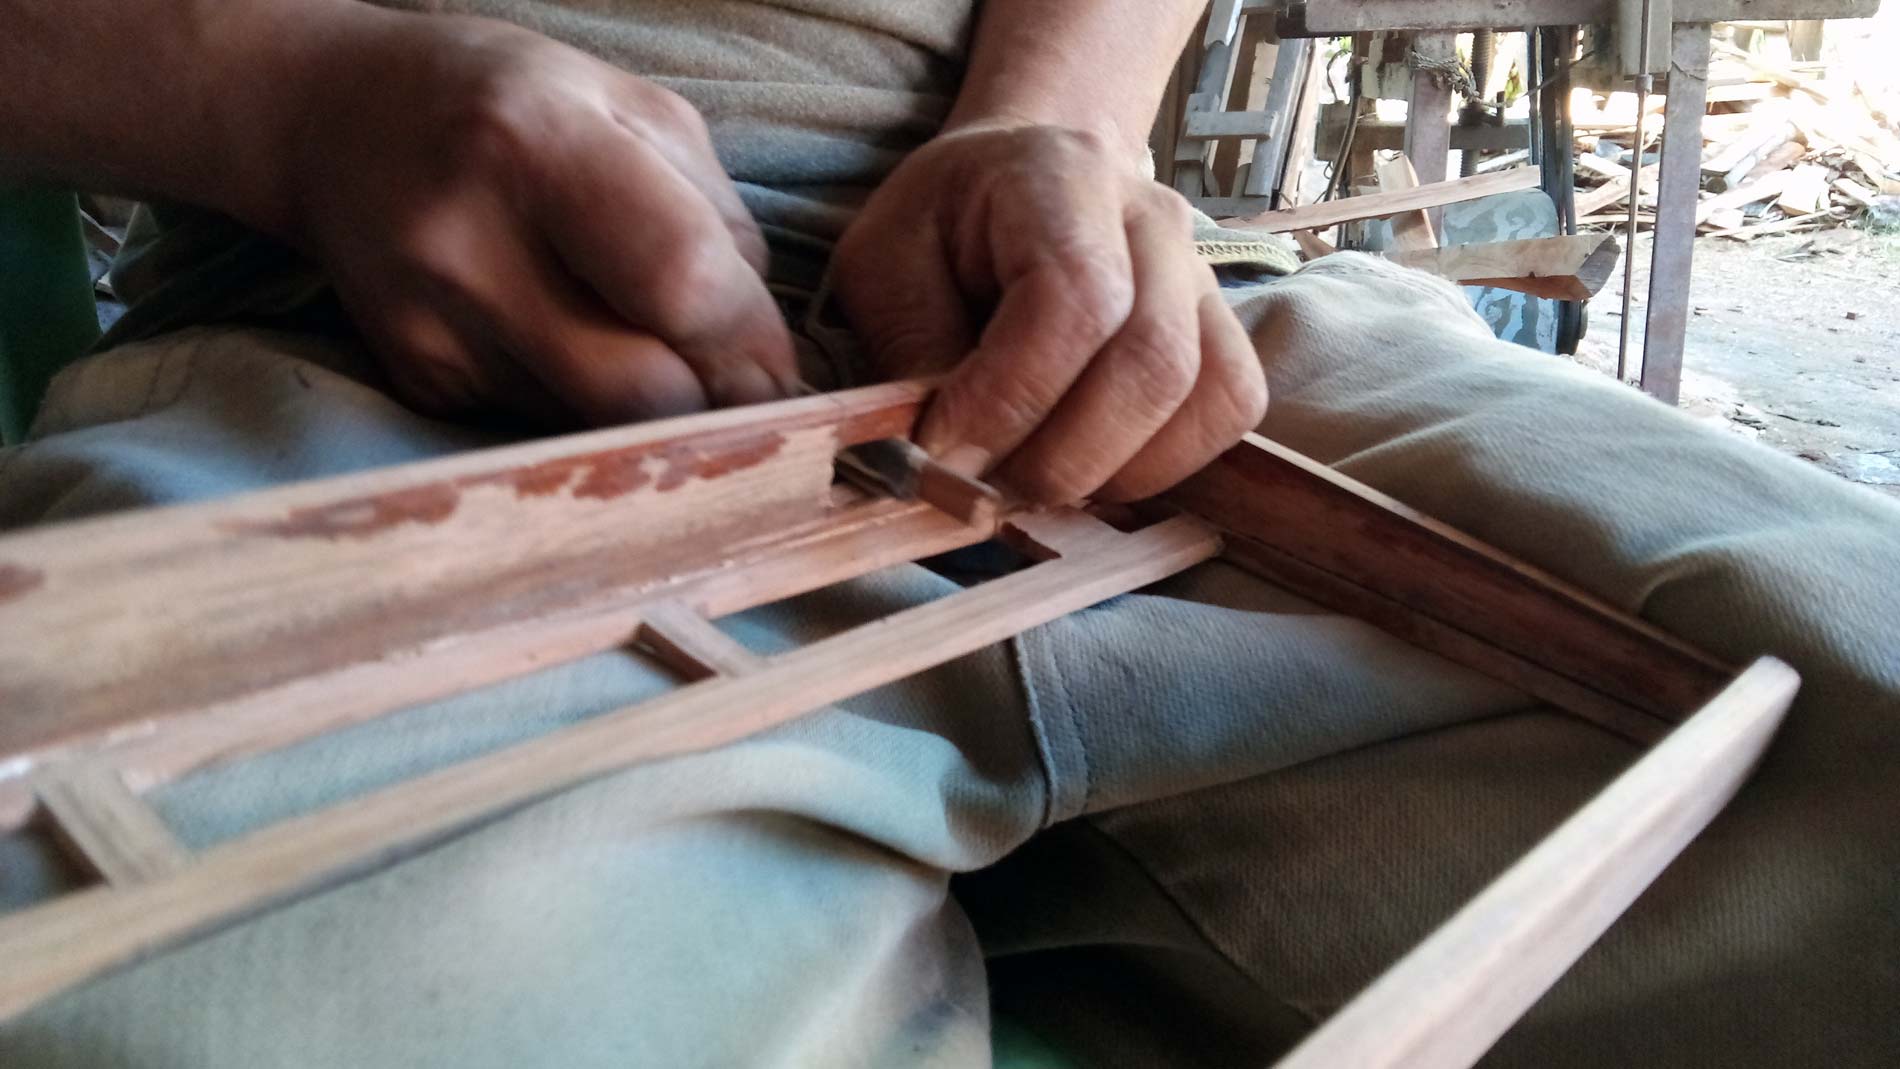
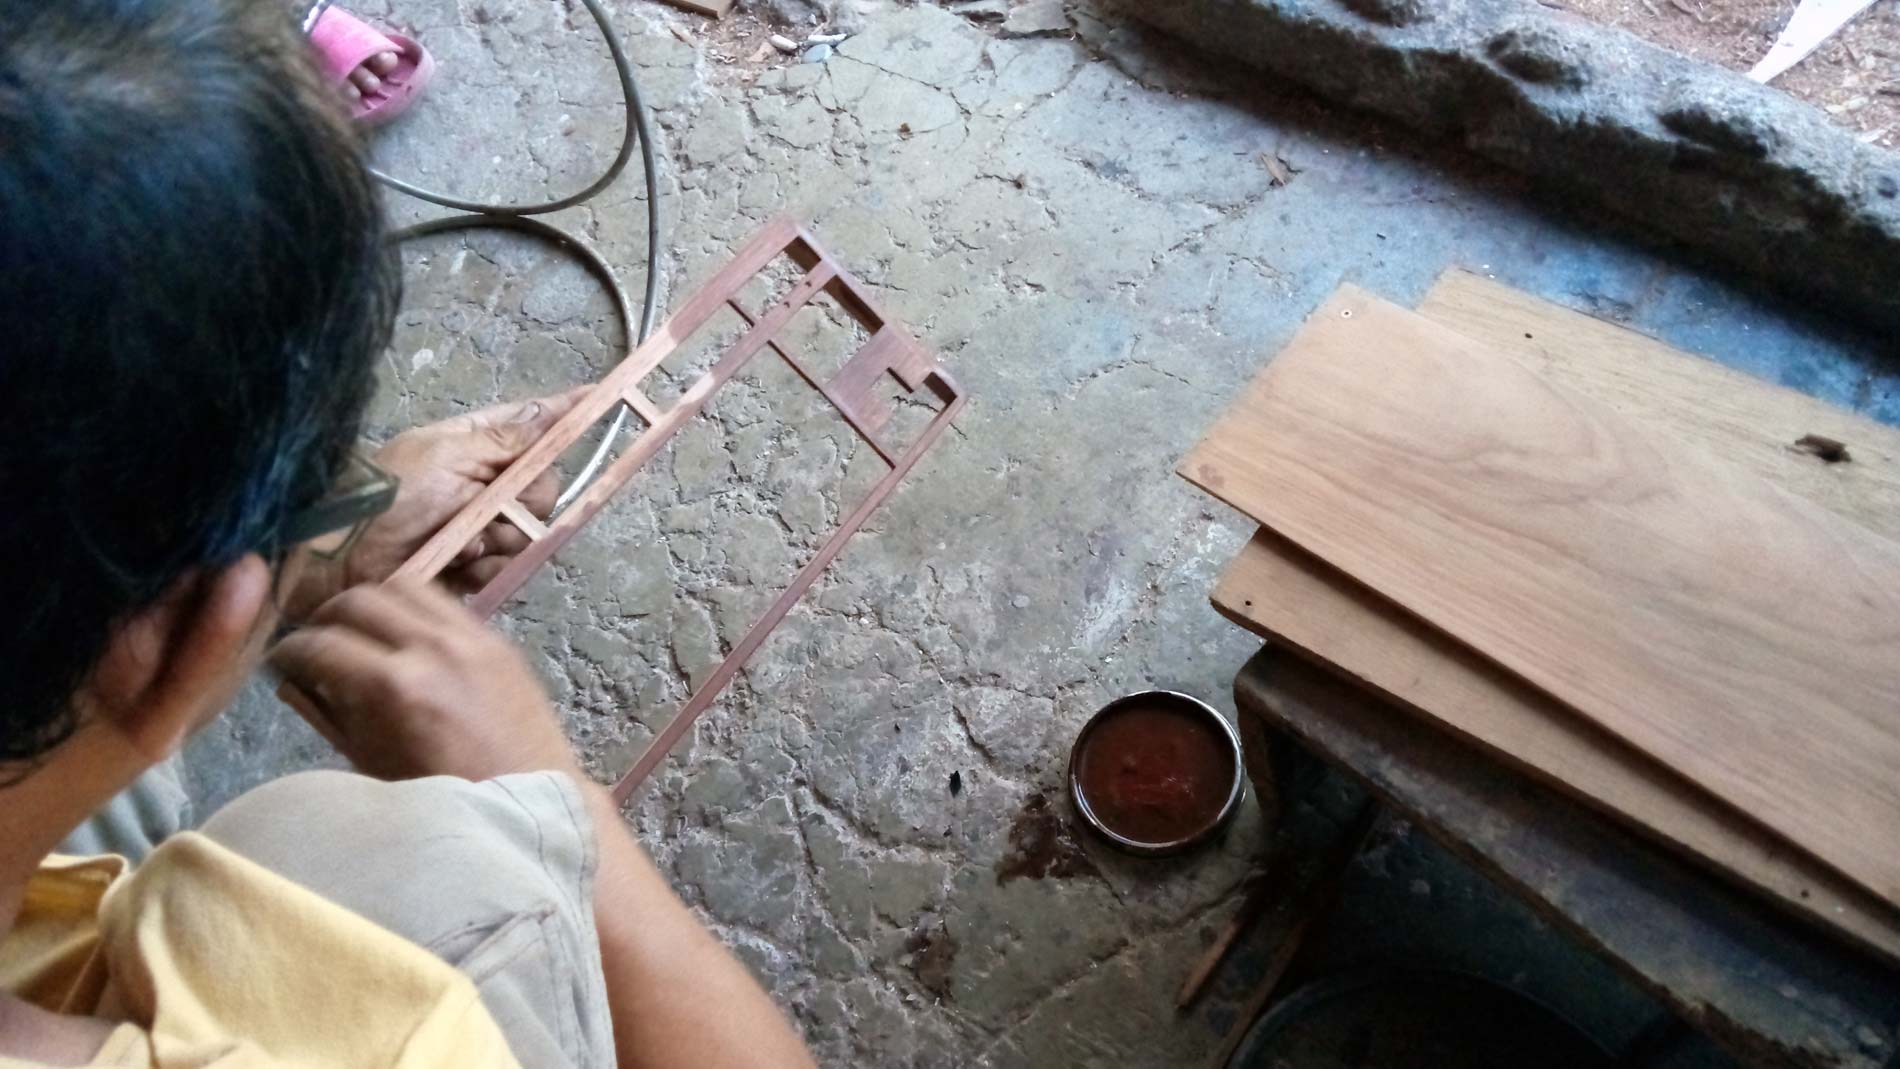
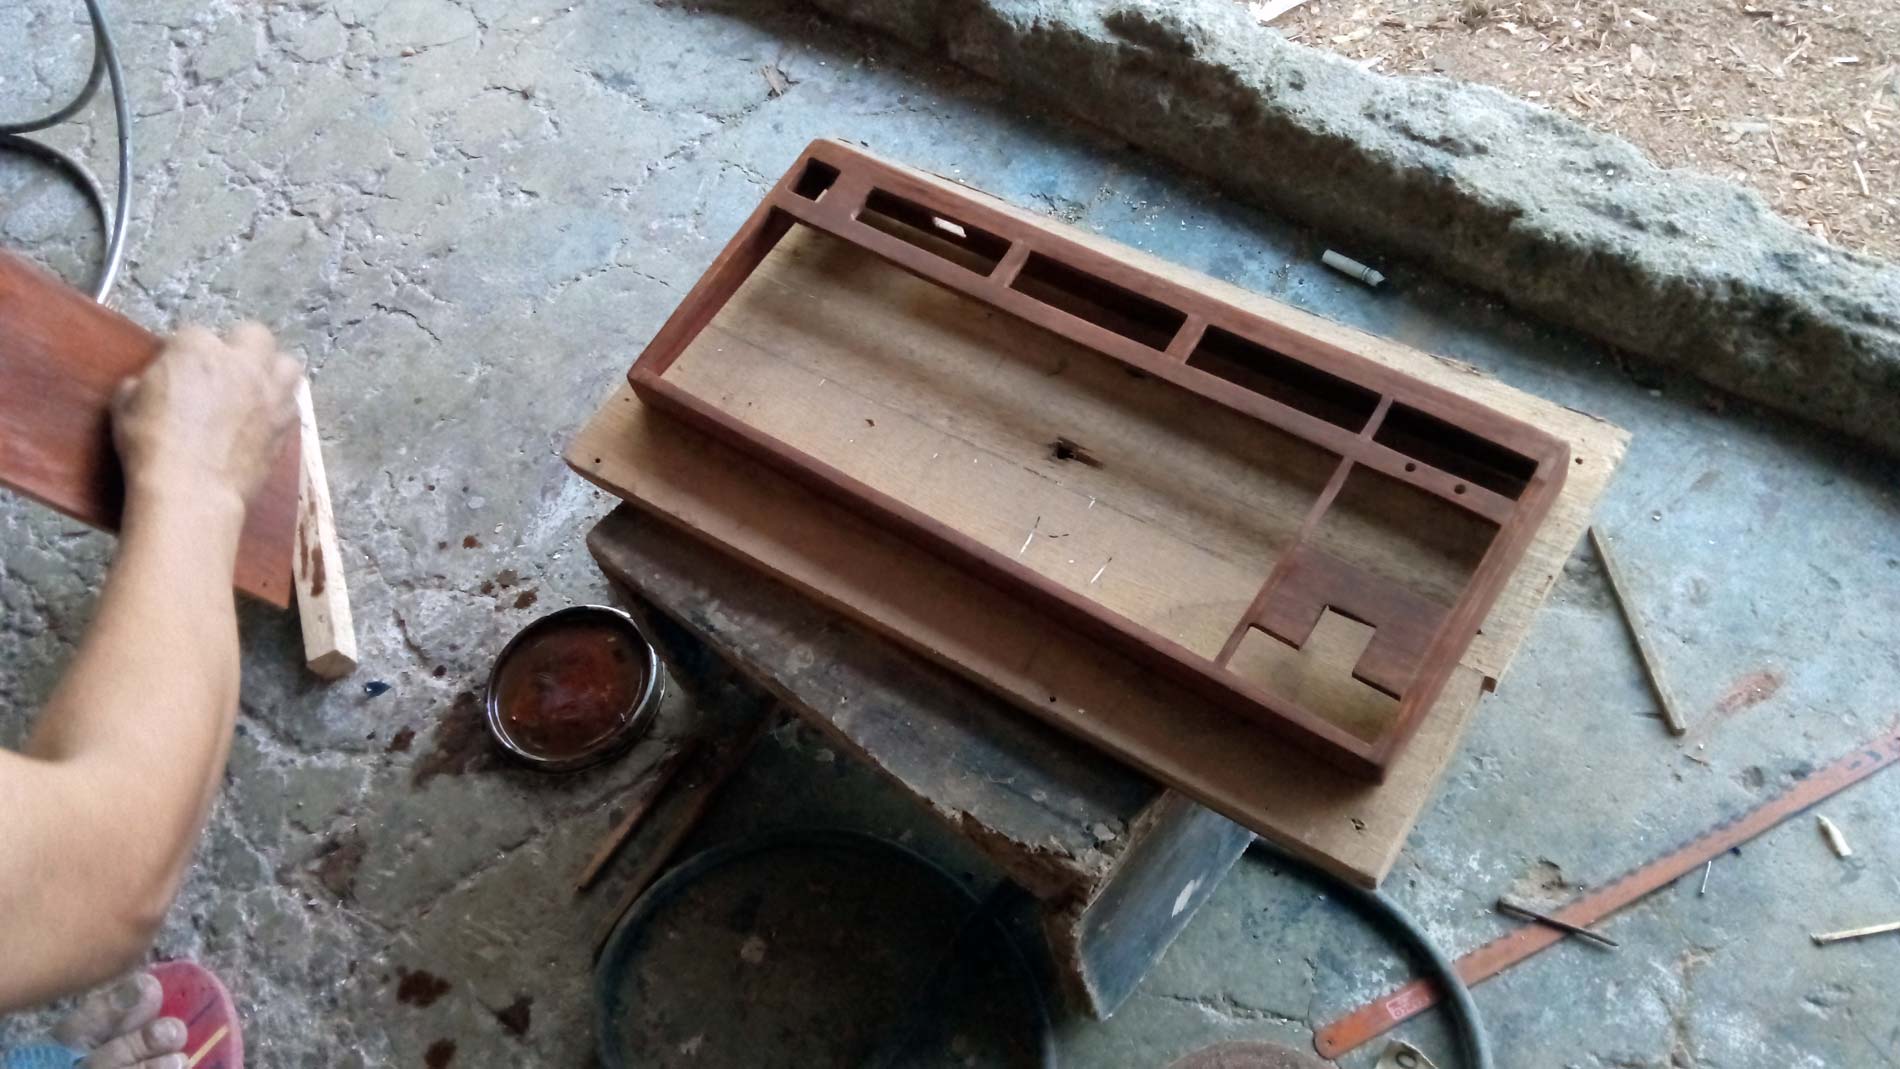
Wooden Top Cover
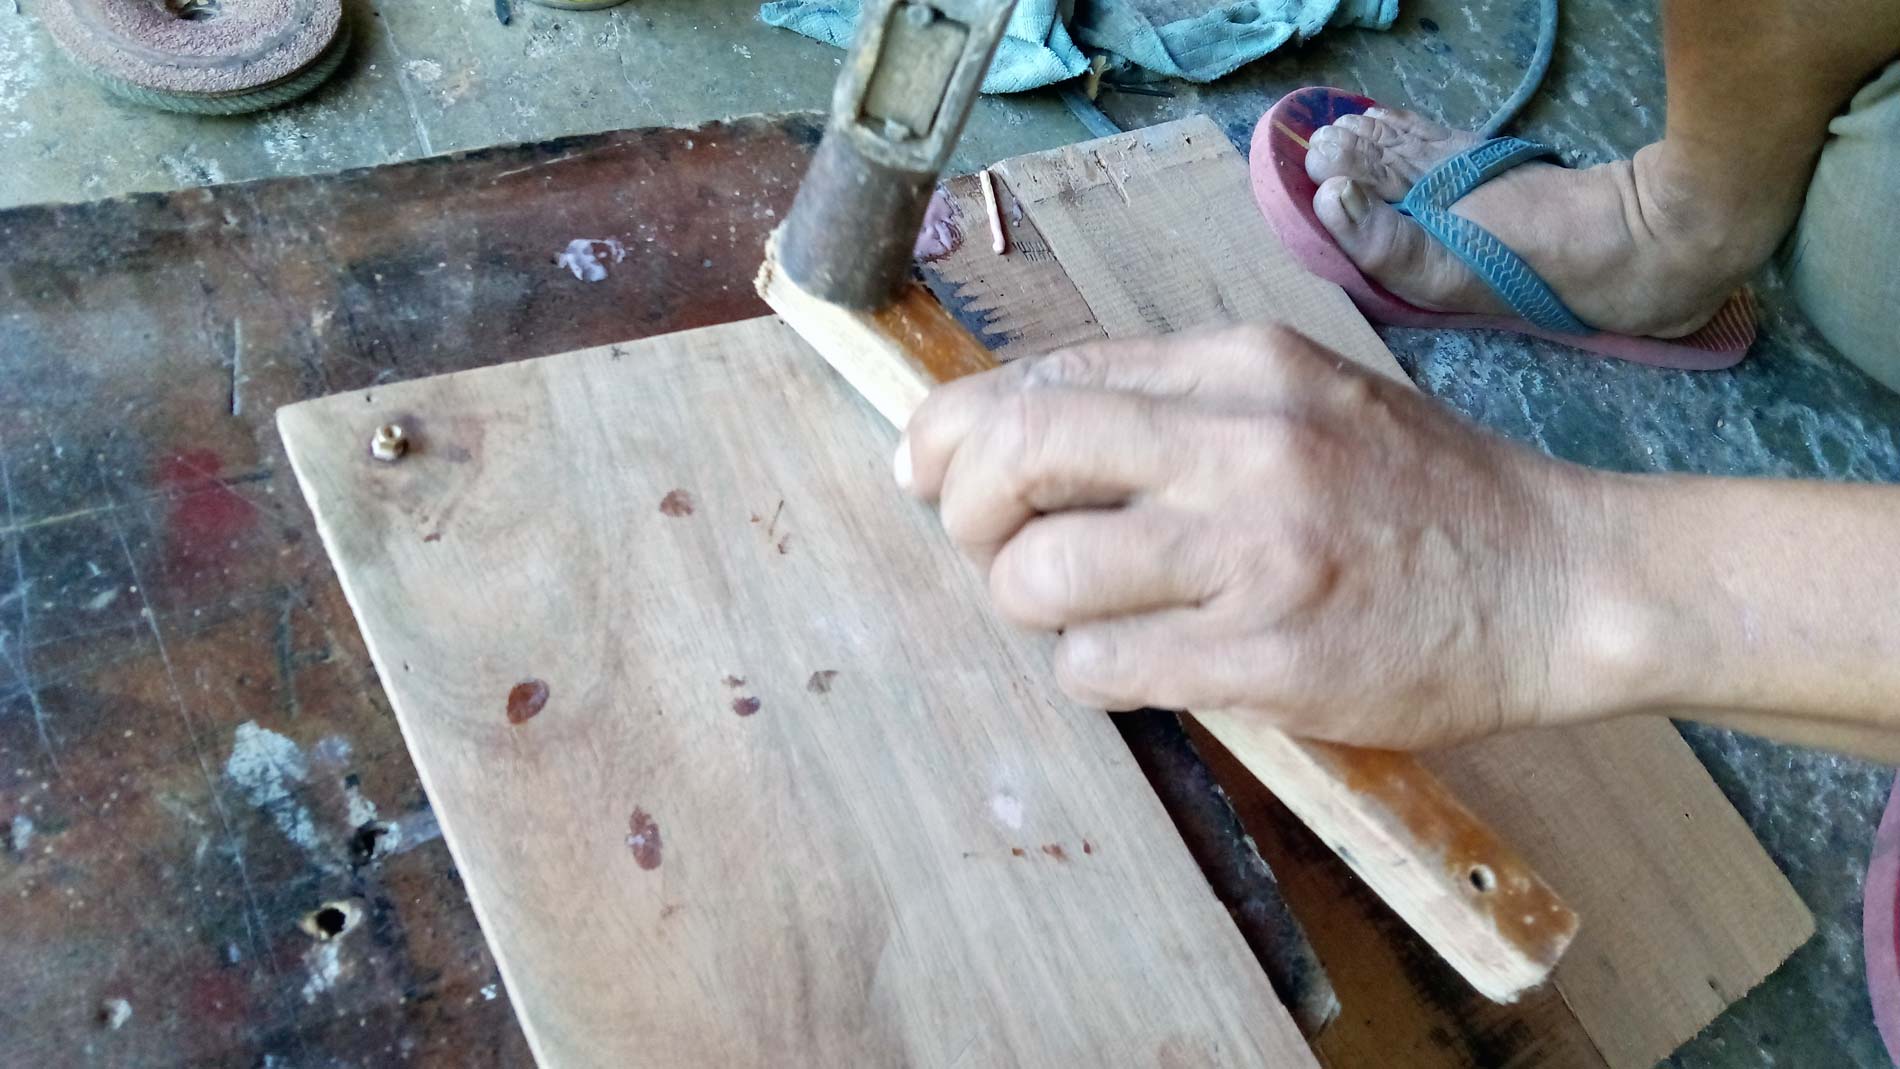
Cut using a wood cutter as patterned on the original plastic top cover. This will be the new top cover of the Surmt CM625 TKL Mechanical Keyboard.
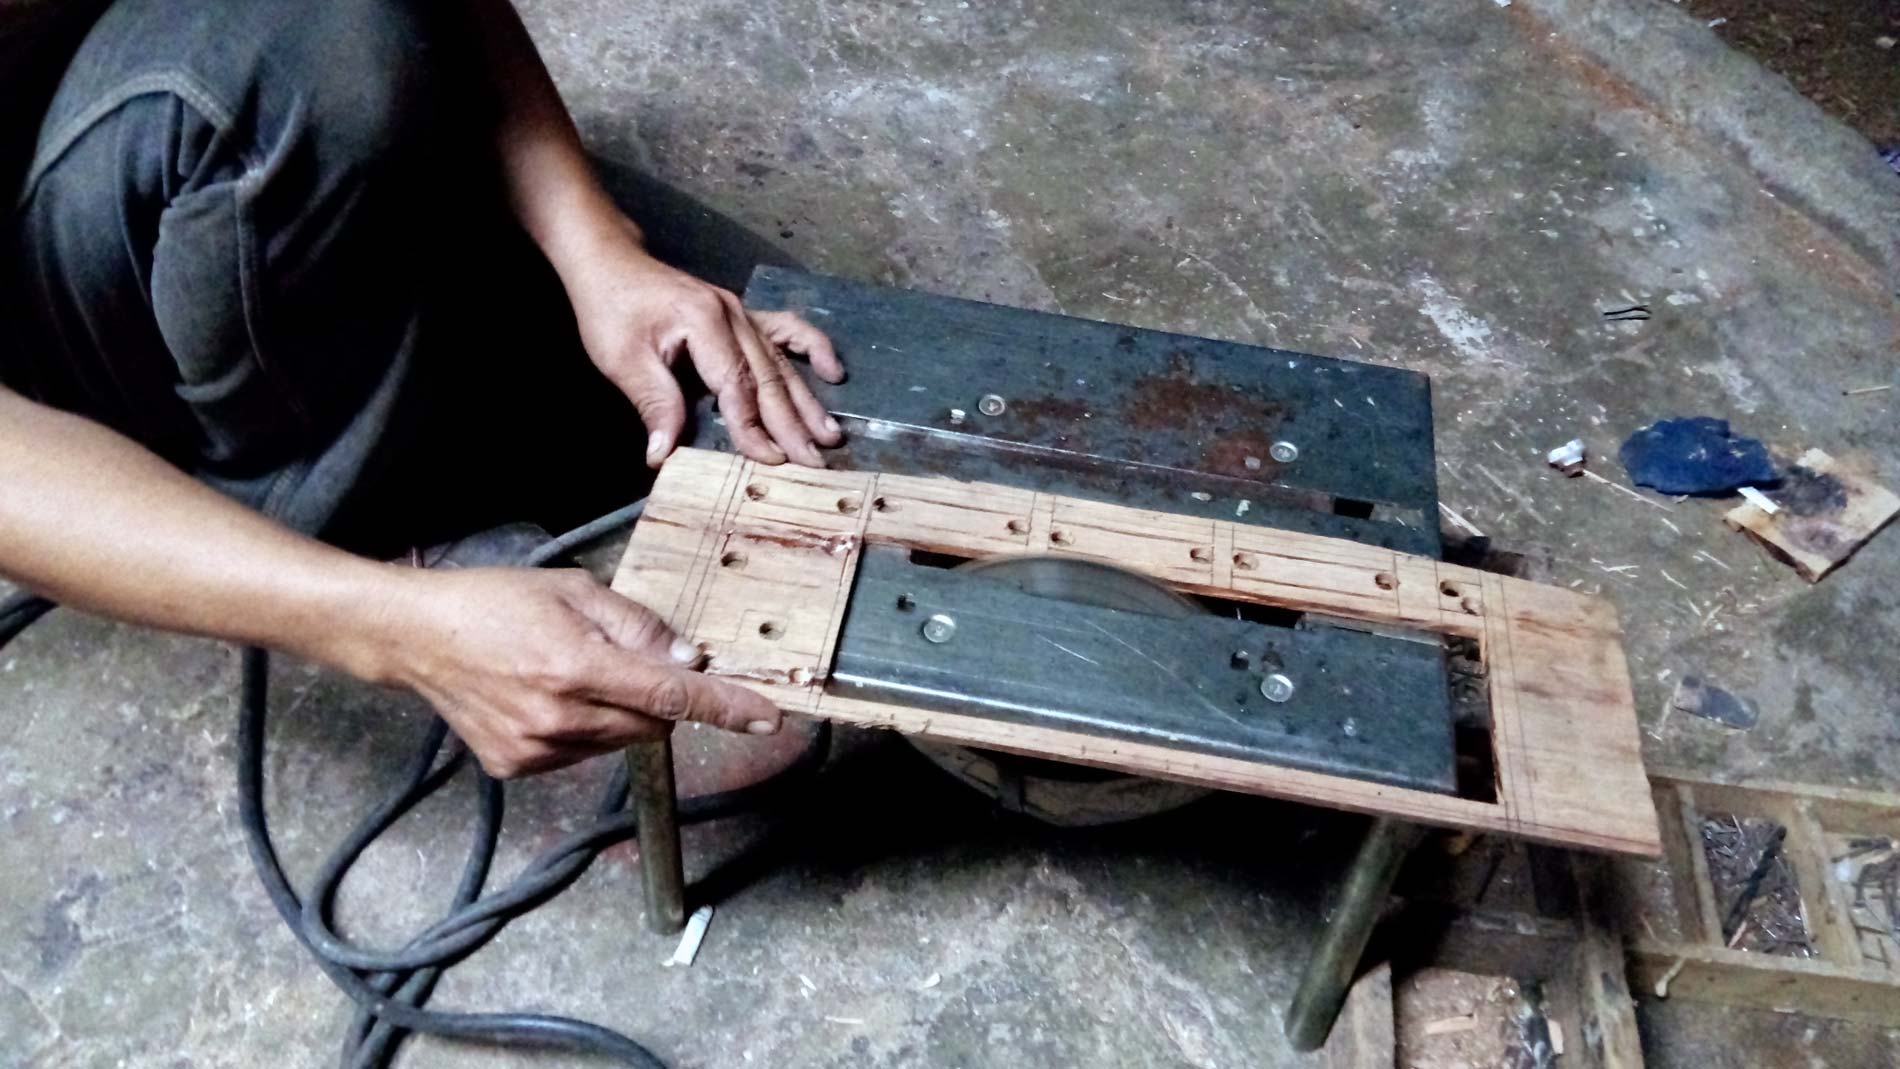
Assemble the whole top cover, and creating a pit for the exposed chip on the top of the plate using a grinder.
Chisel to make necessary adjustment according to the dimension of the chip.
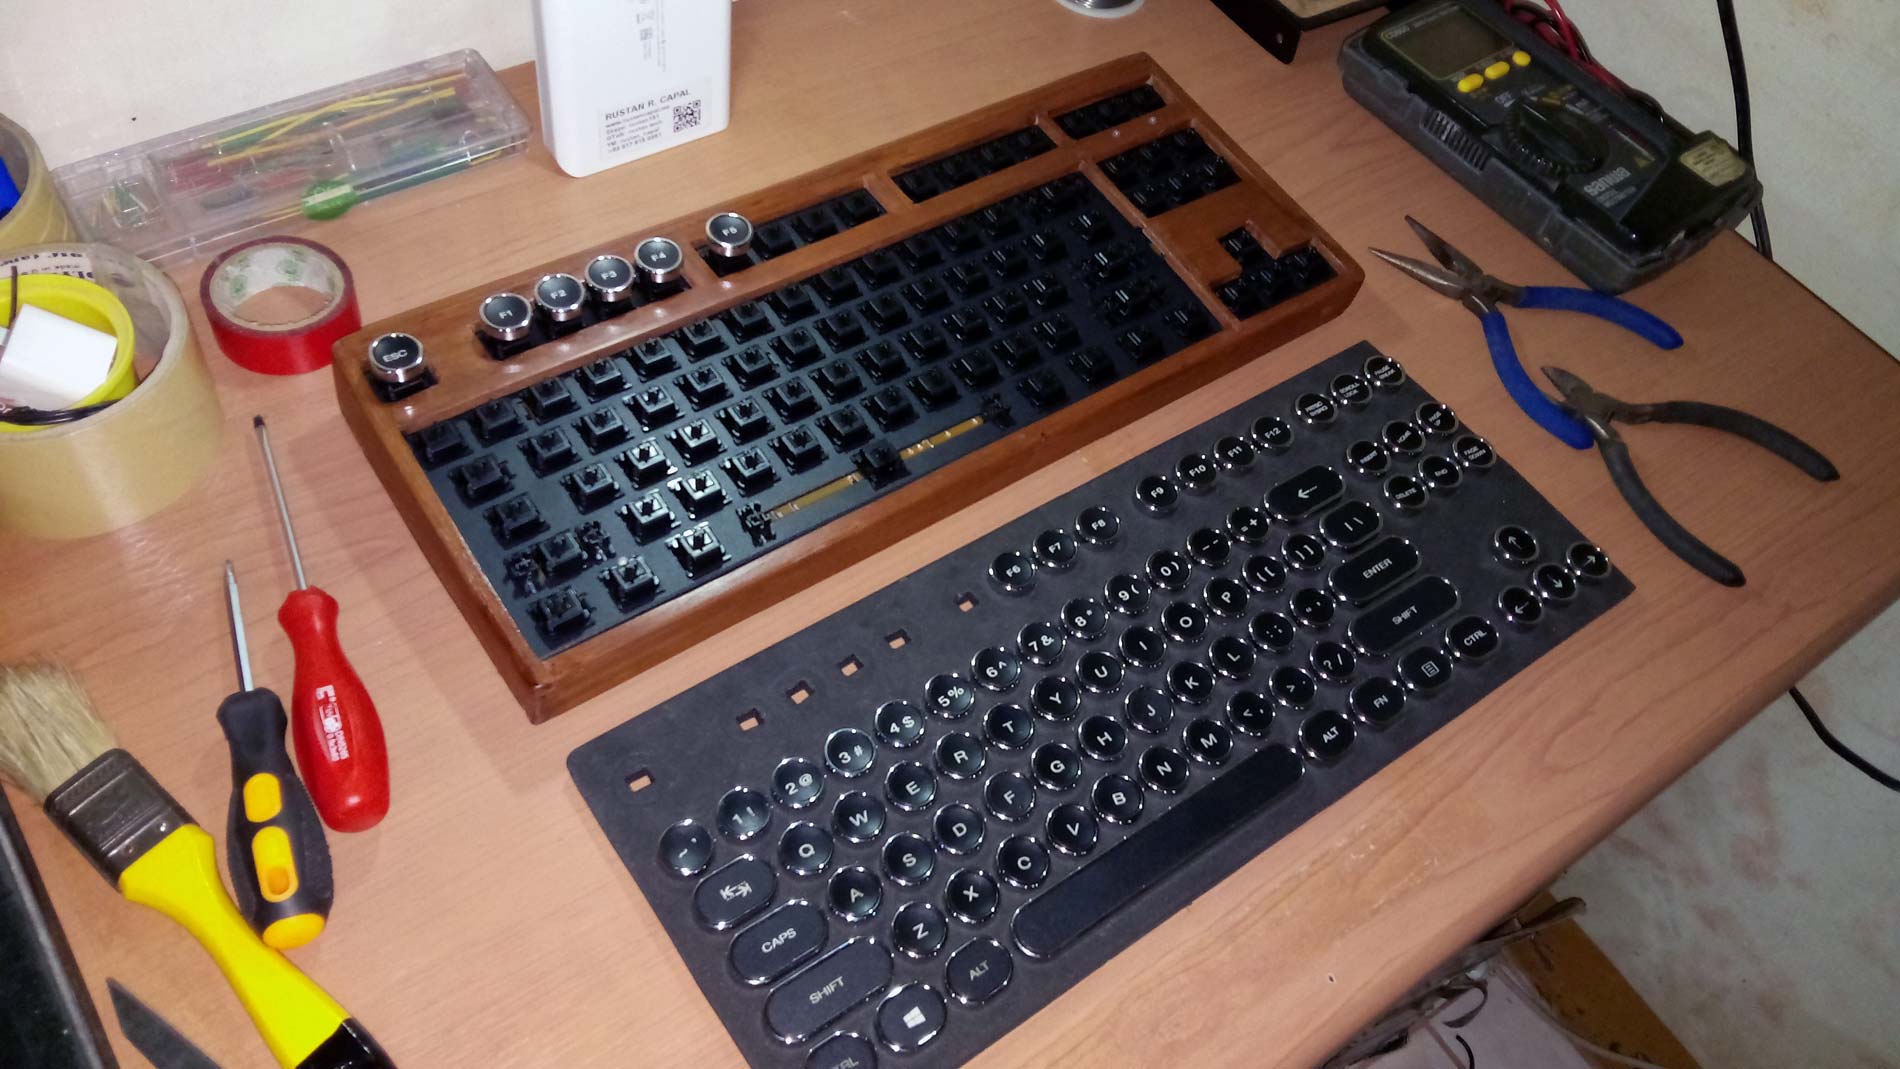
Initial fitting of the top cover to see possible adjustments.
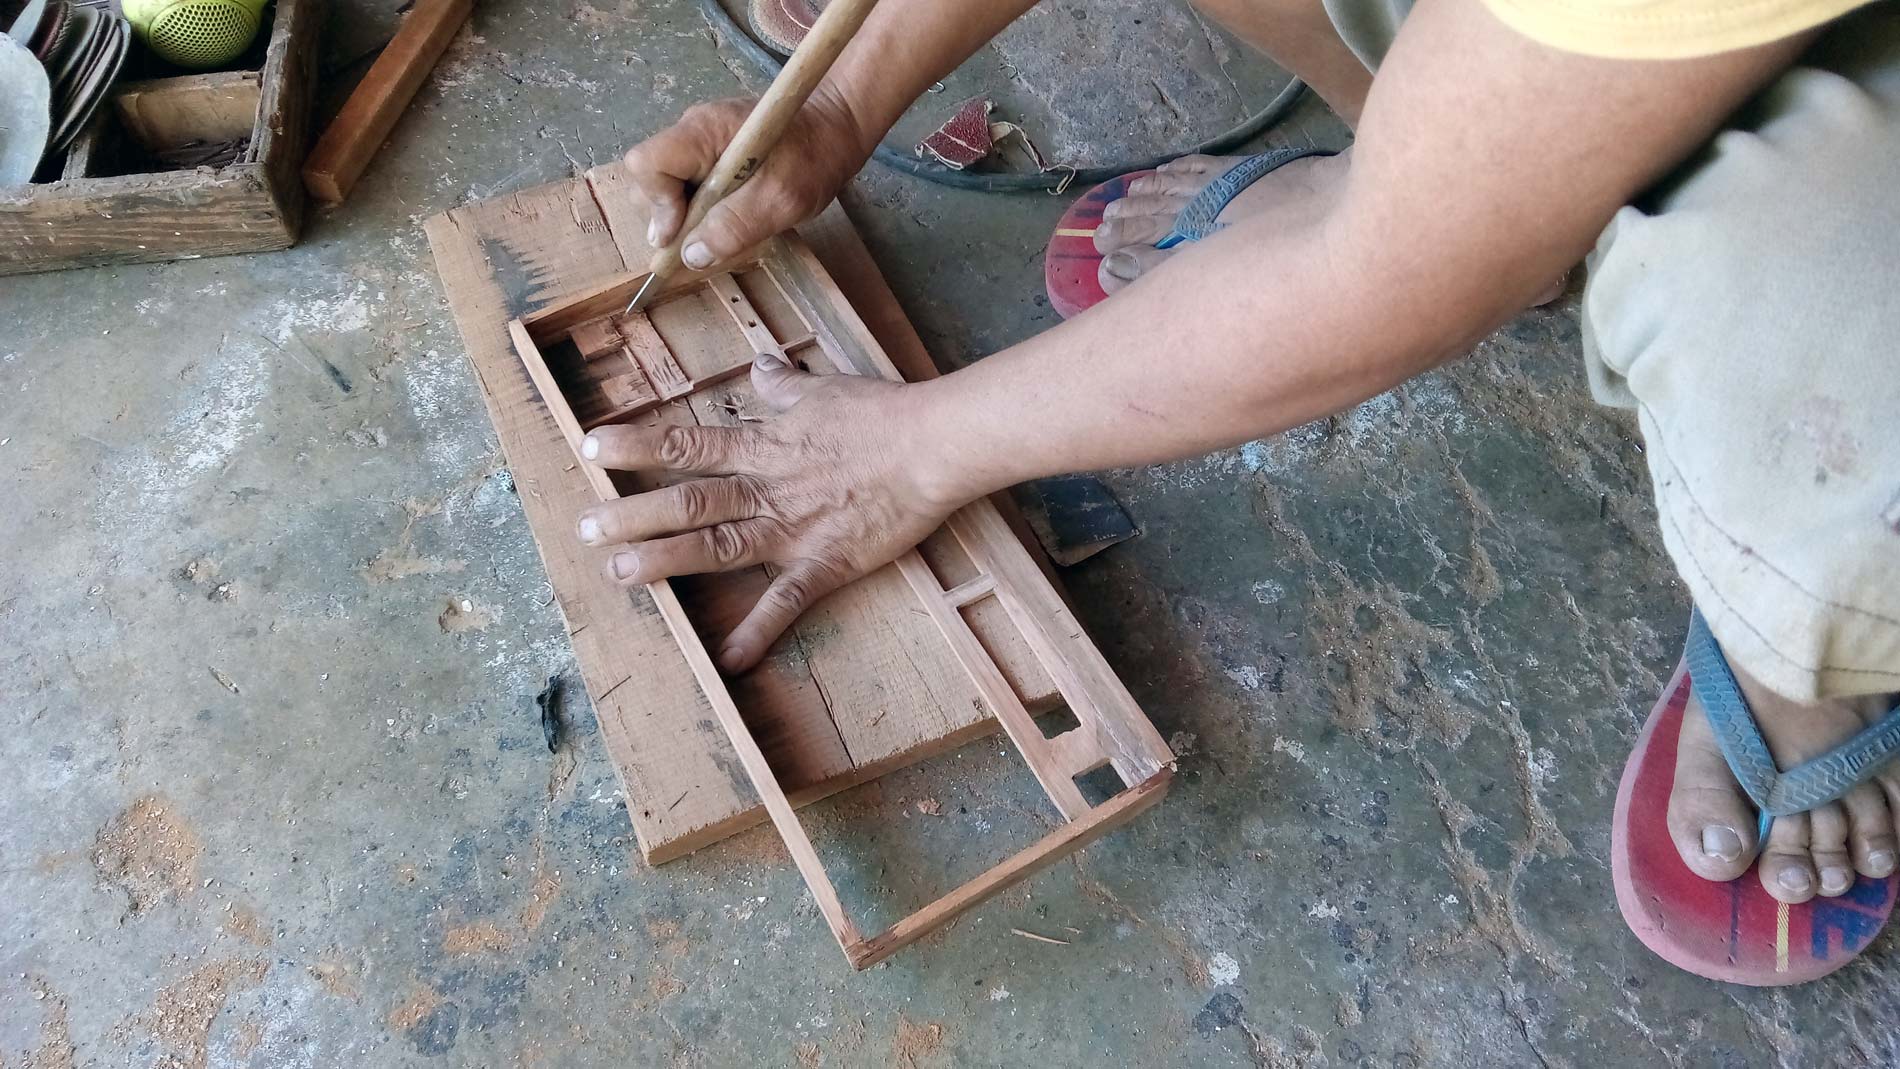
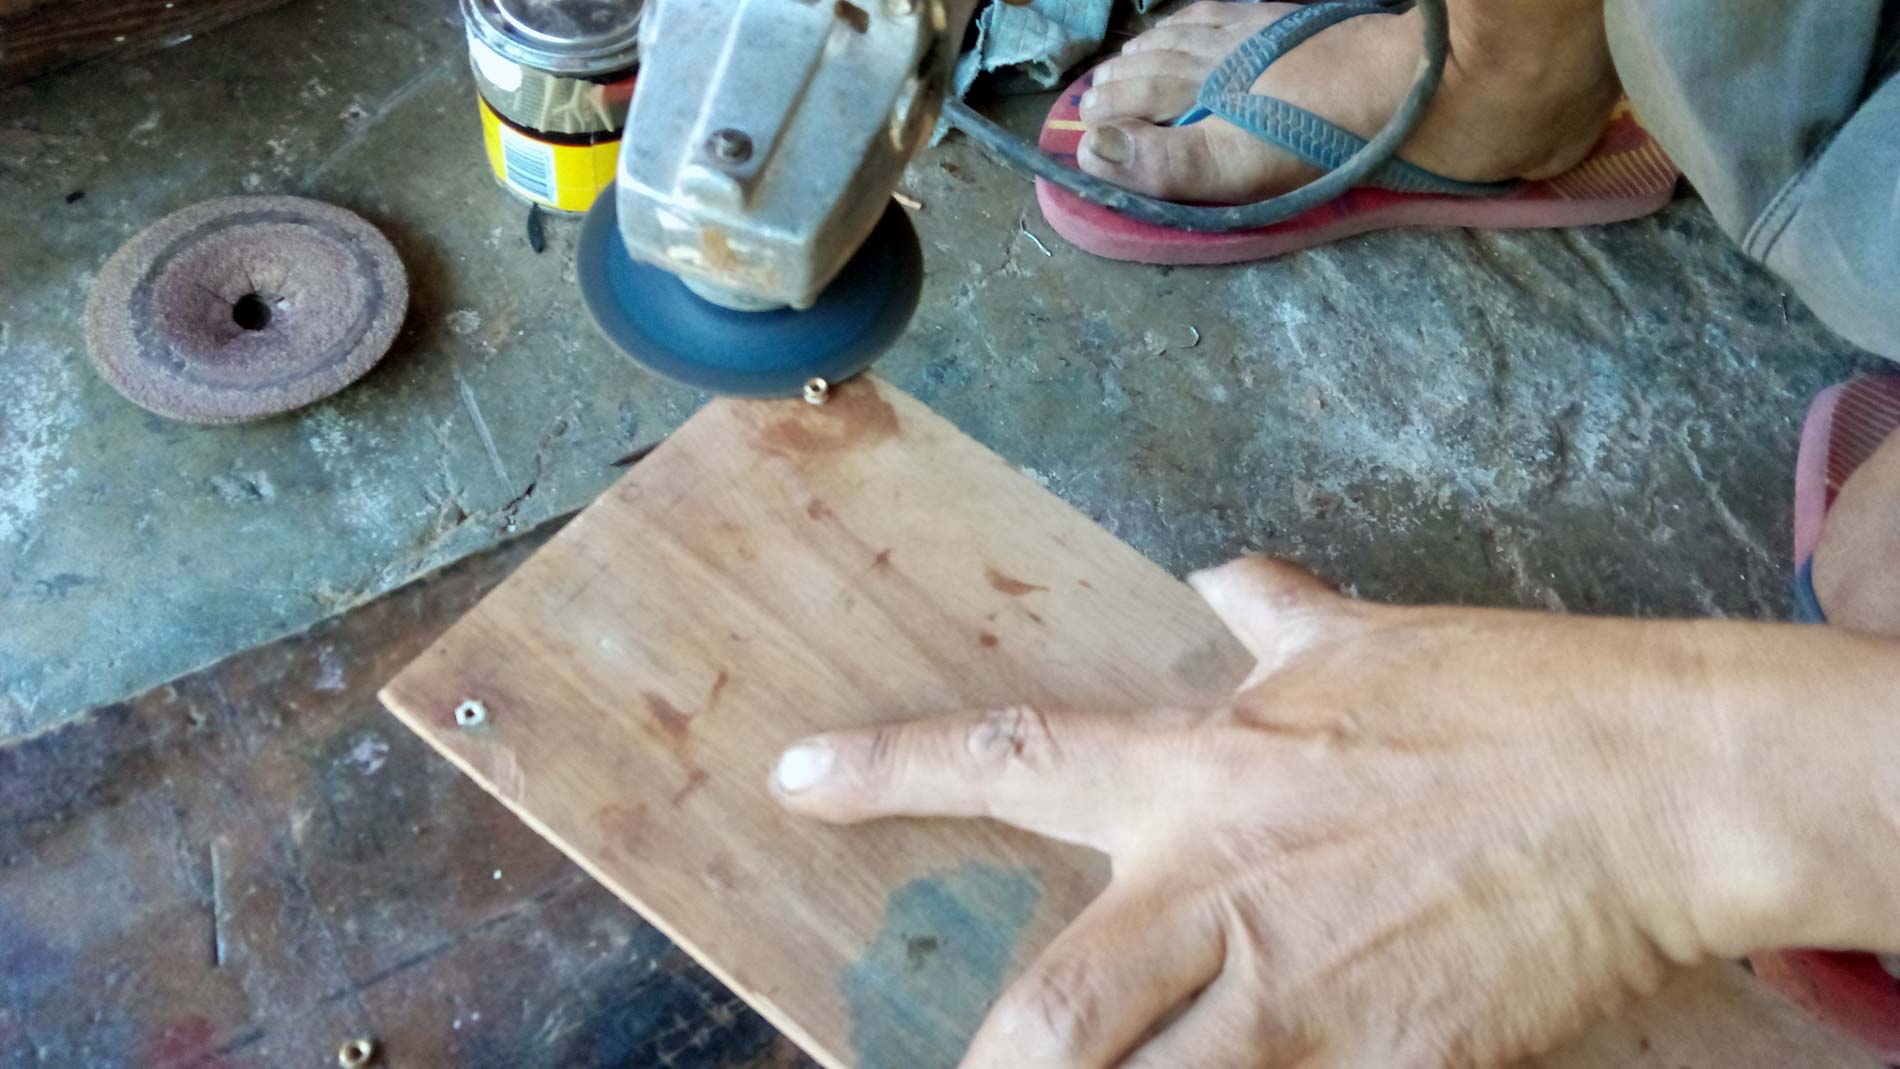
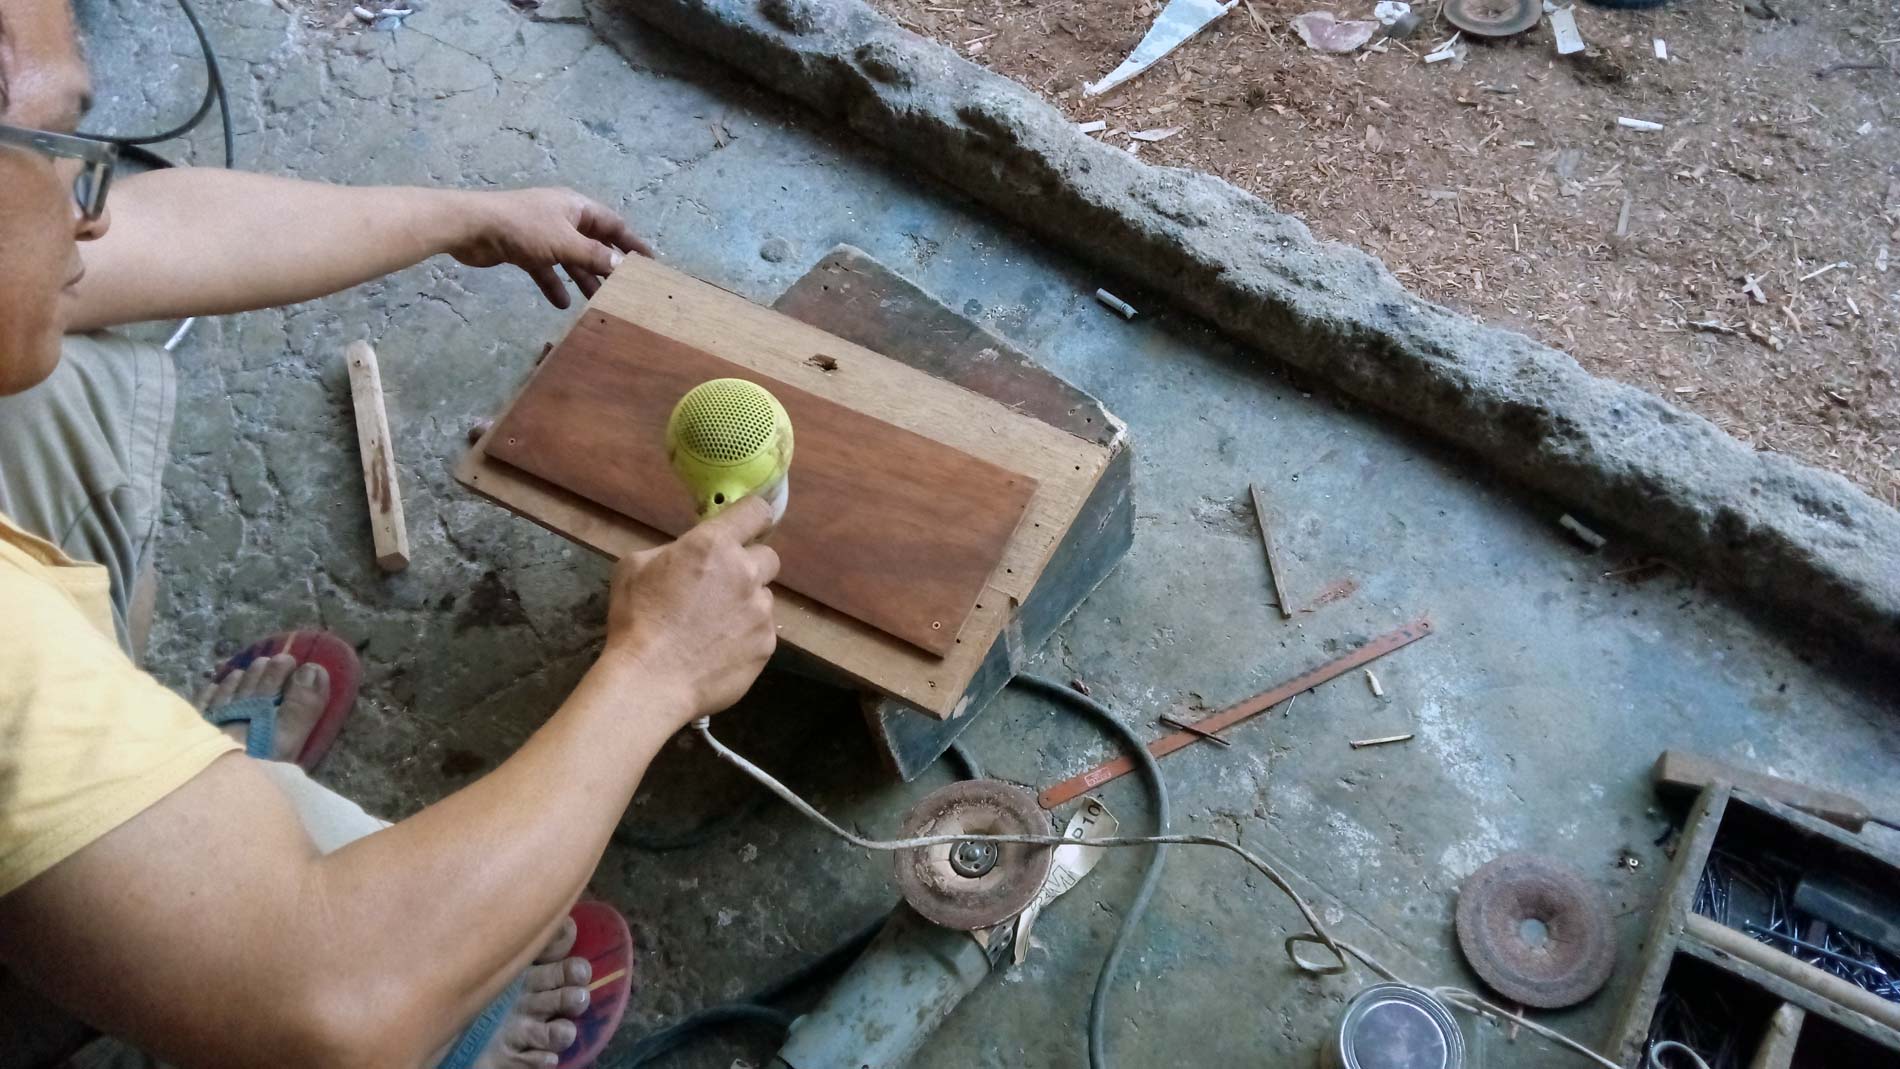
If the plate and pcb are fit, apply putty to cover some holes and crack on the wood, then sand using a fine sand paper.

If all are smooth, fit to see some changes.
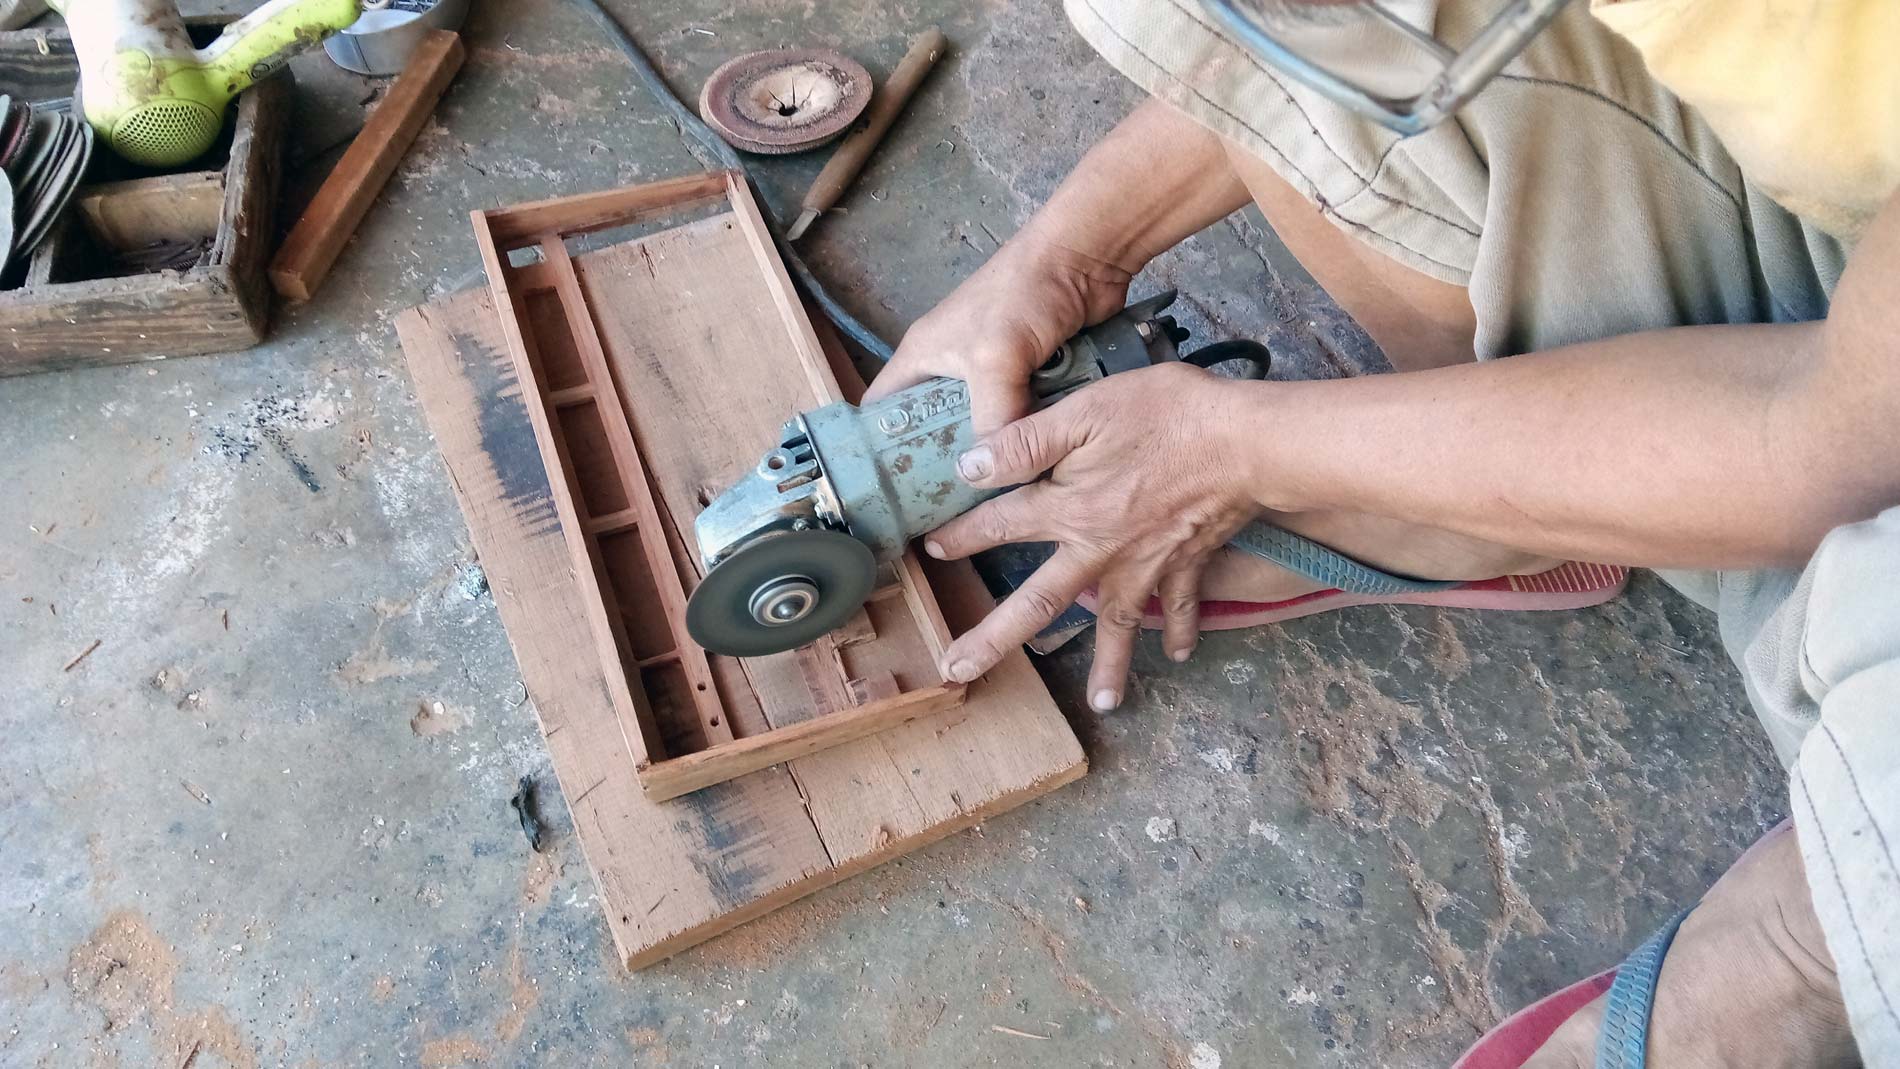
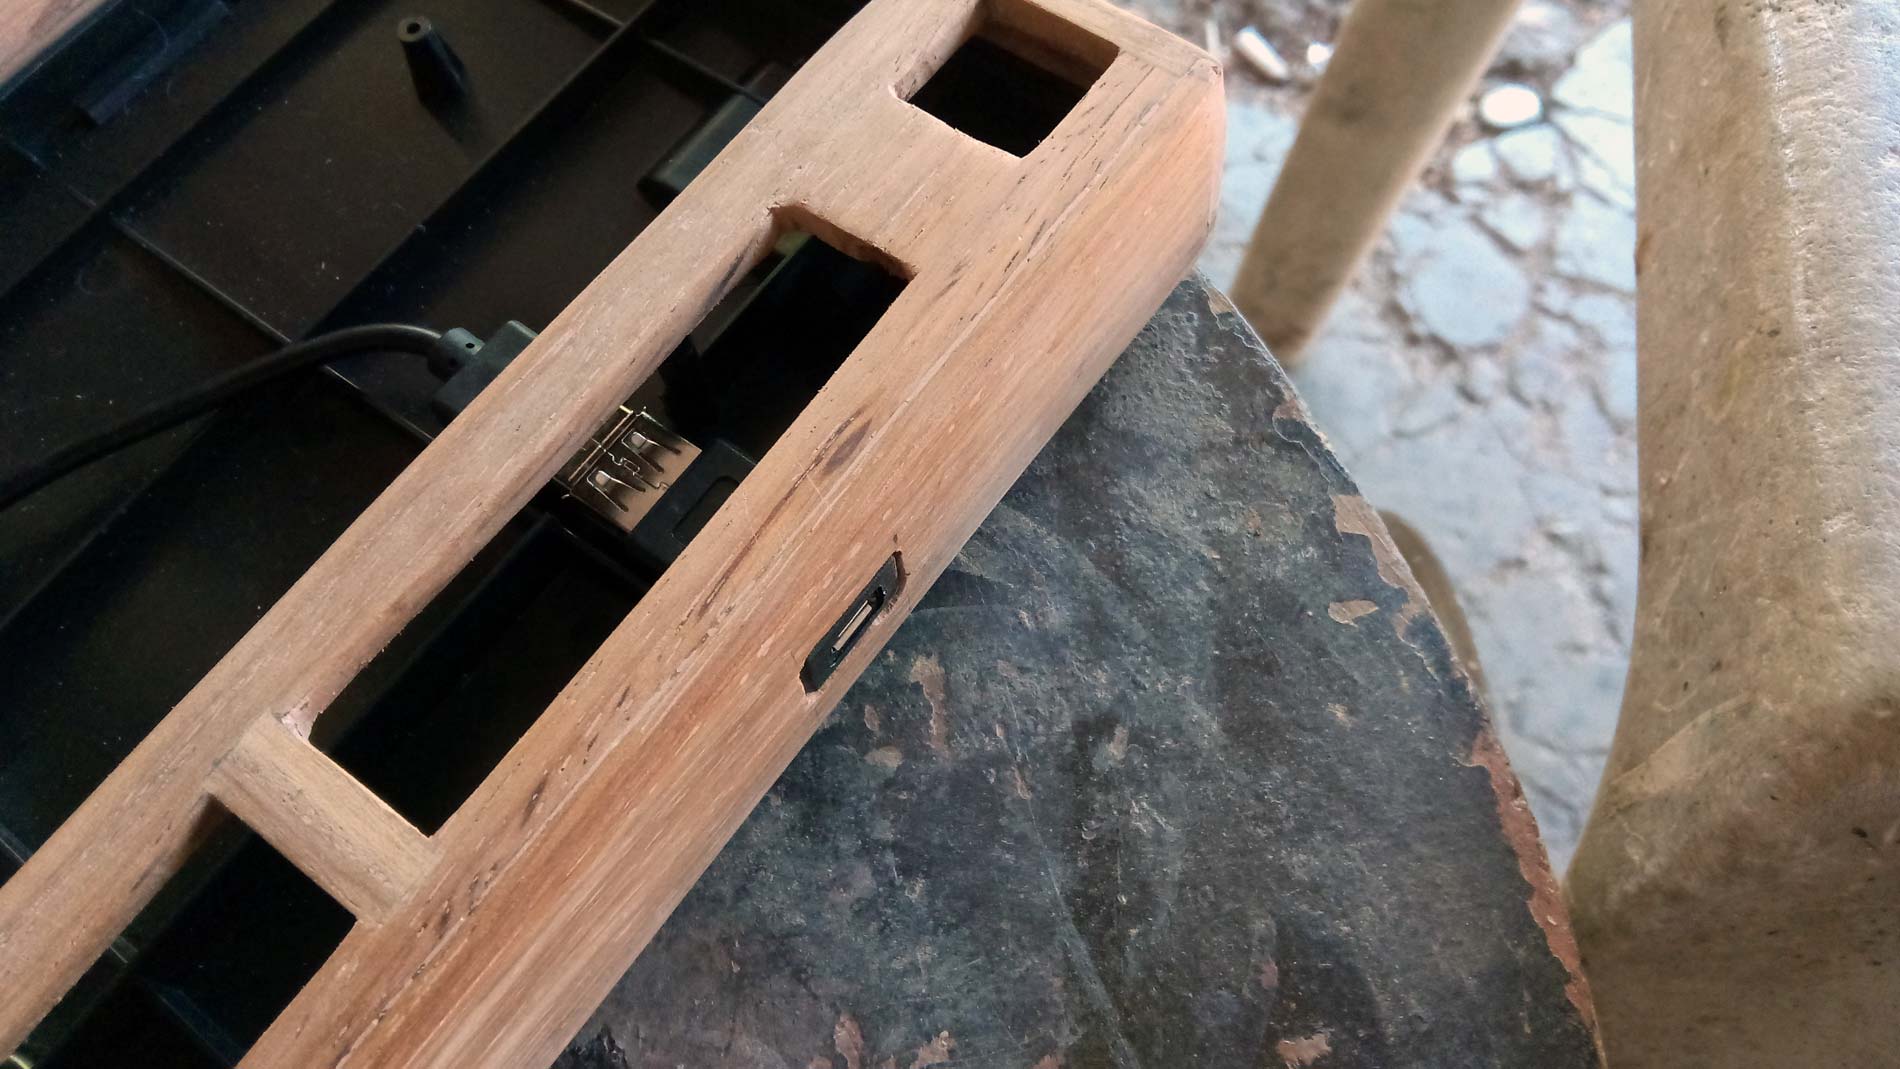
USB Port Hole
Cut-out the hole for the Extension Adapter that will serves as the USB port.
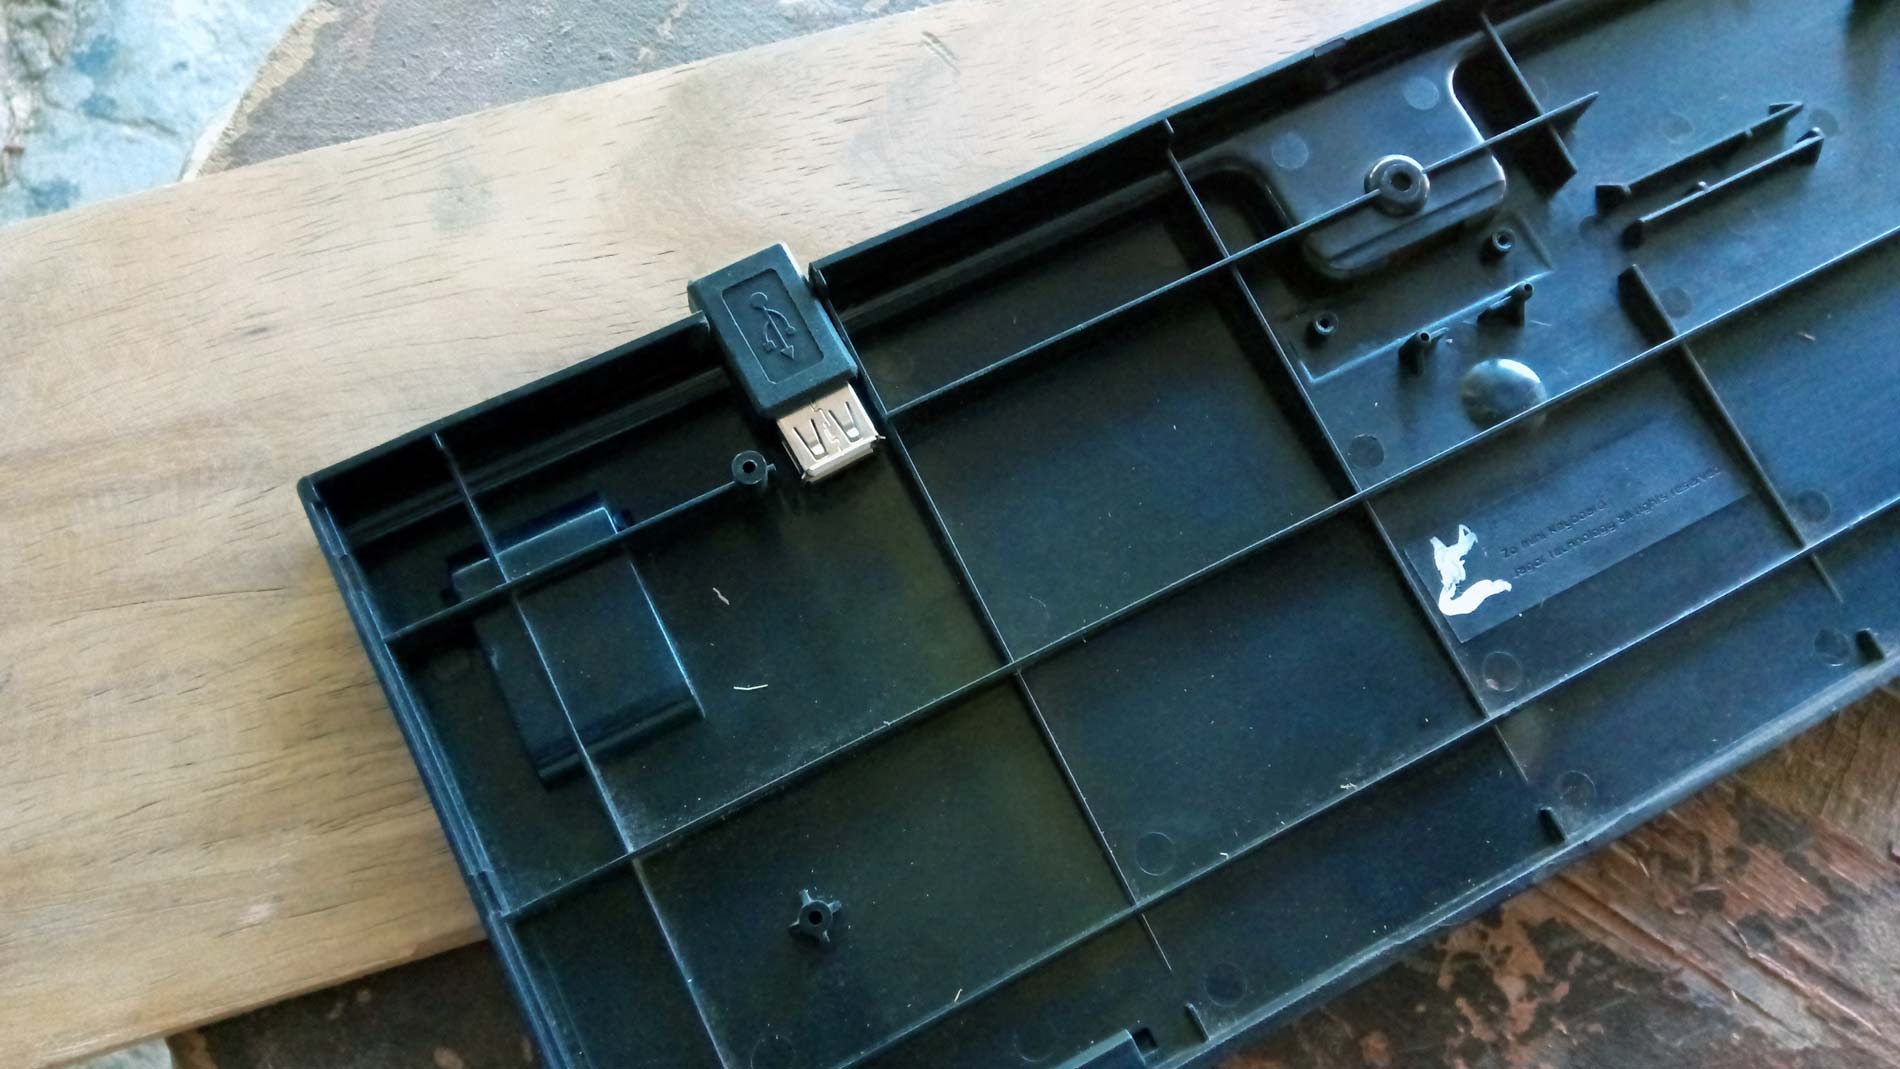
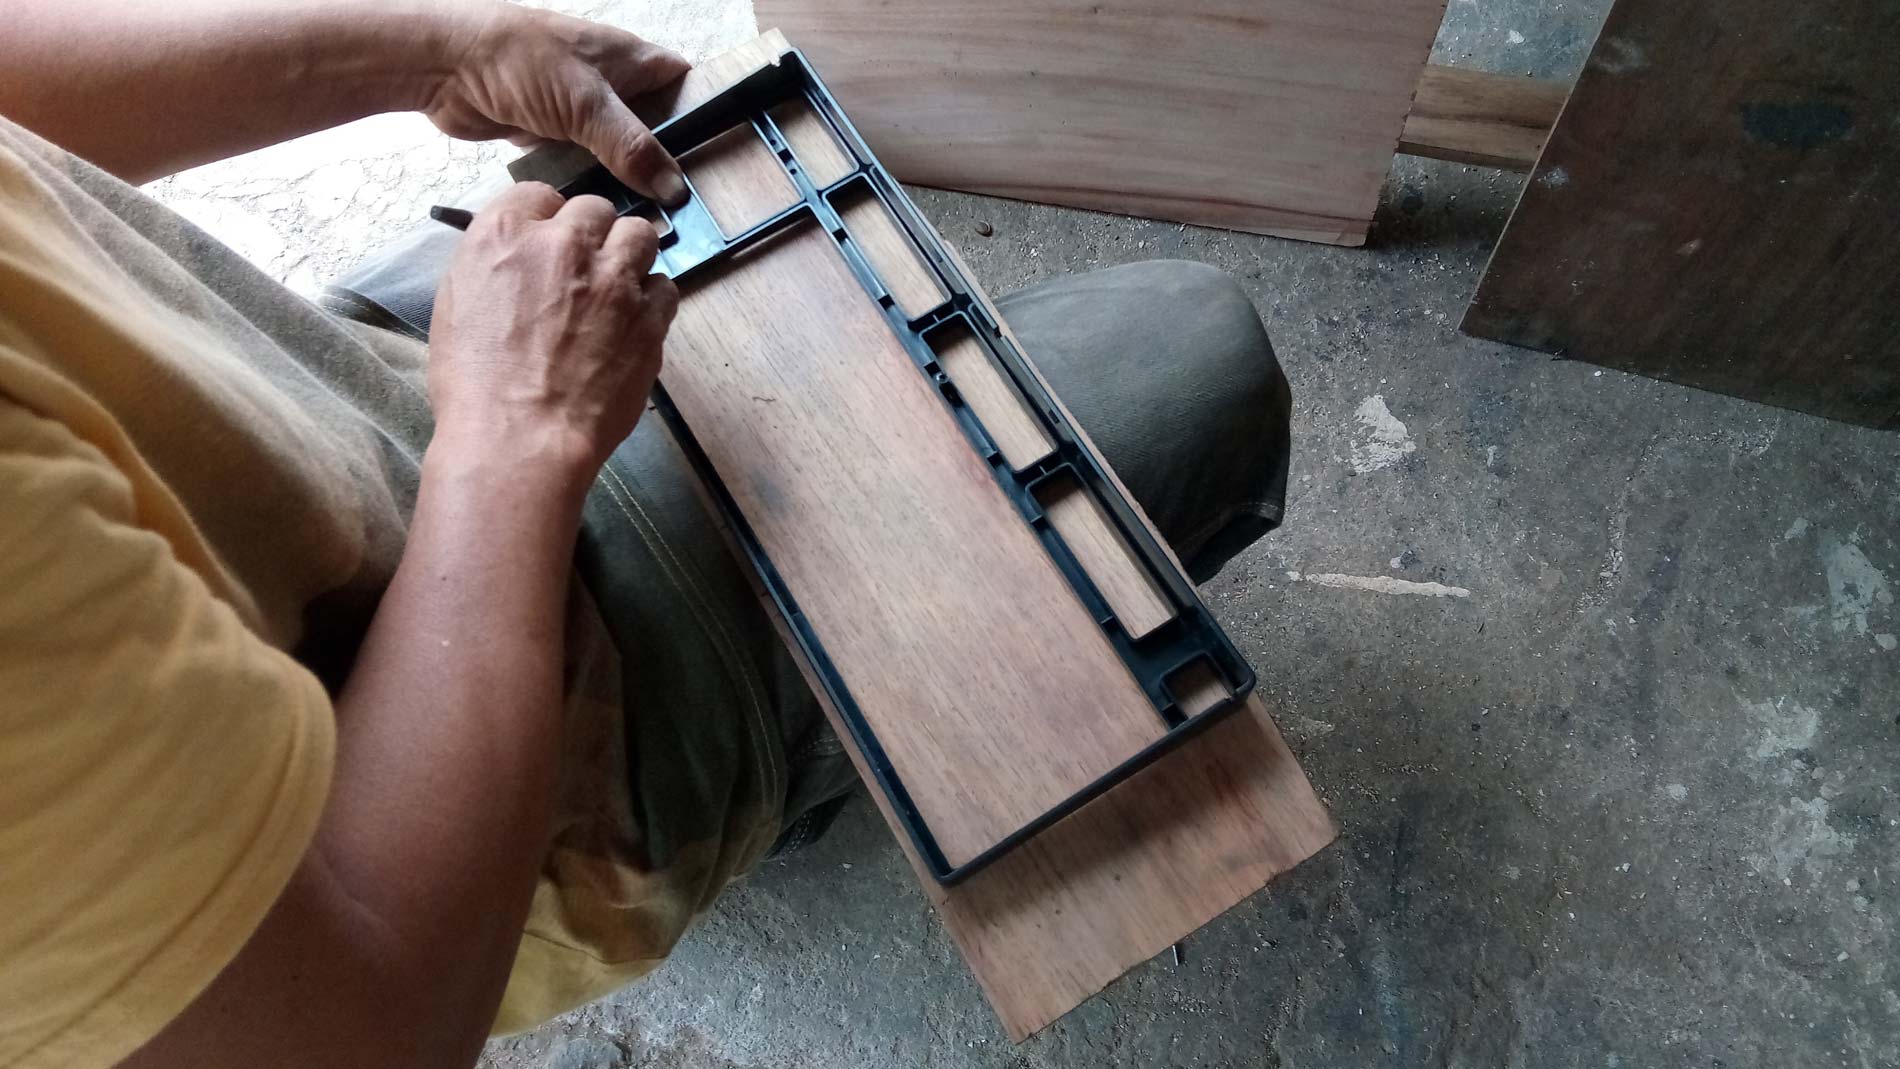
PS: I decided to use the original plastic base instead of nylon or brass stud to have a firm orientation of the plate and PCB on the wooden base.
Mark the size or the hole on the wooden top cover as per dimension of the Extension Adapter that will serves as the USB port.
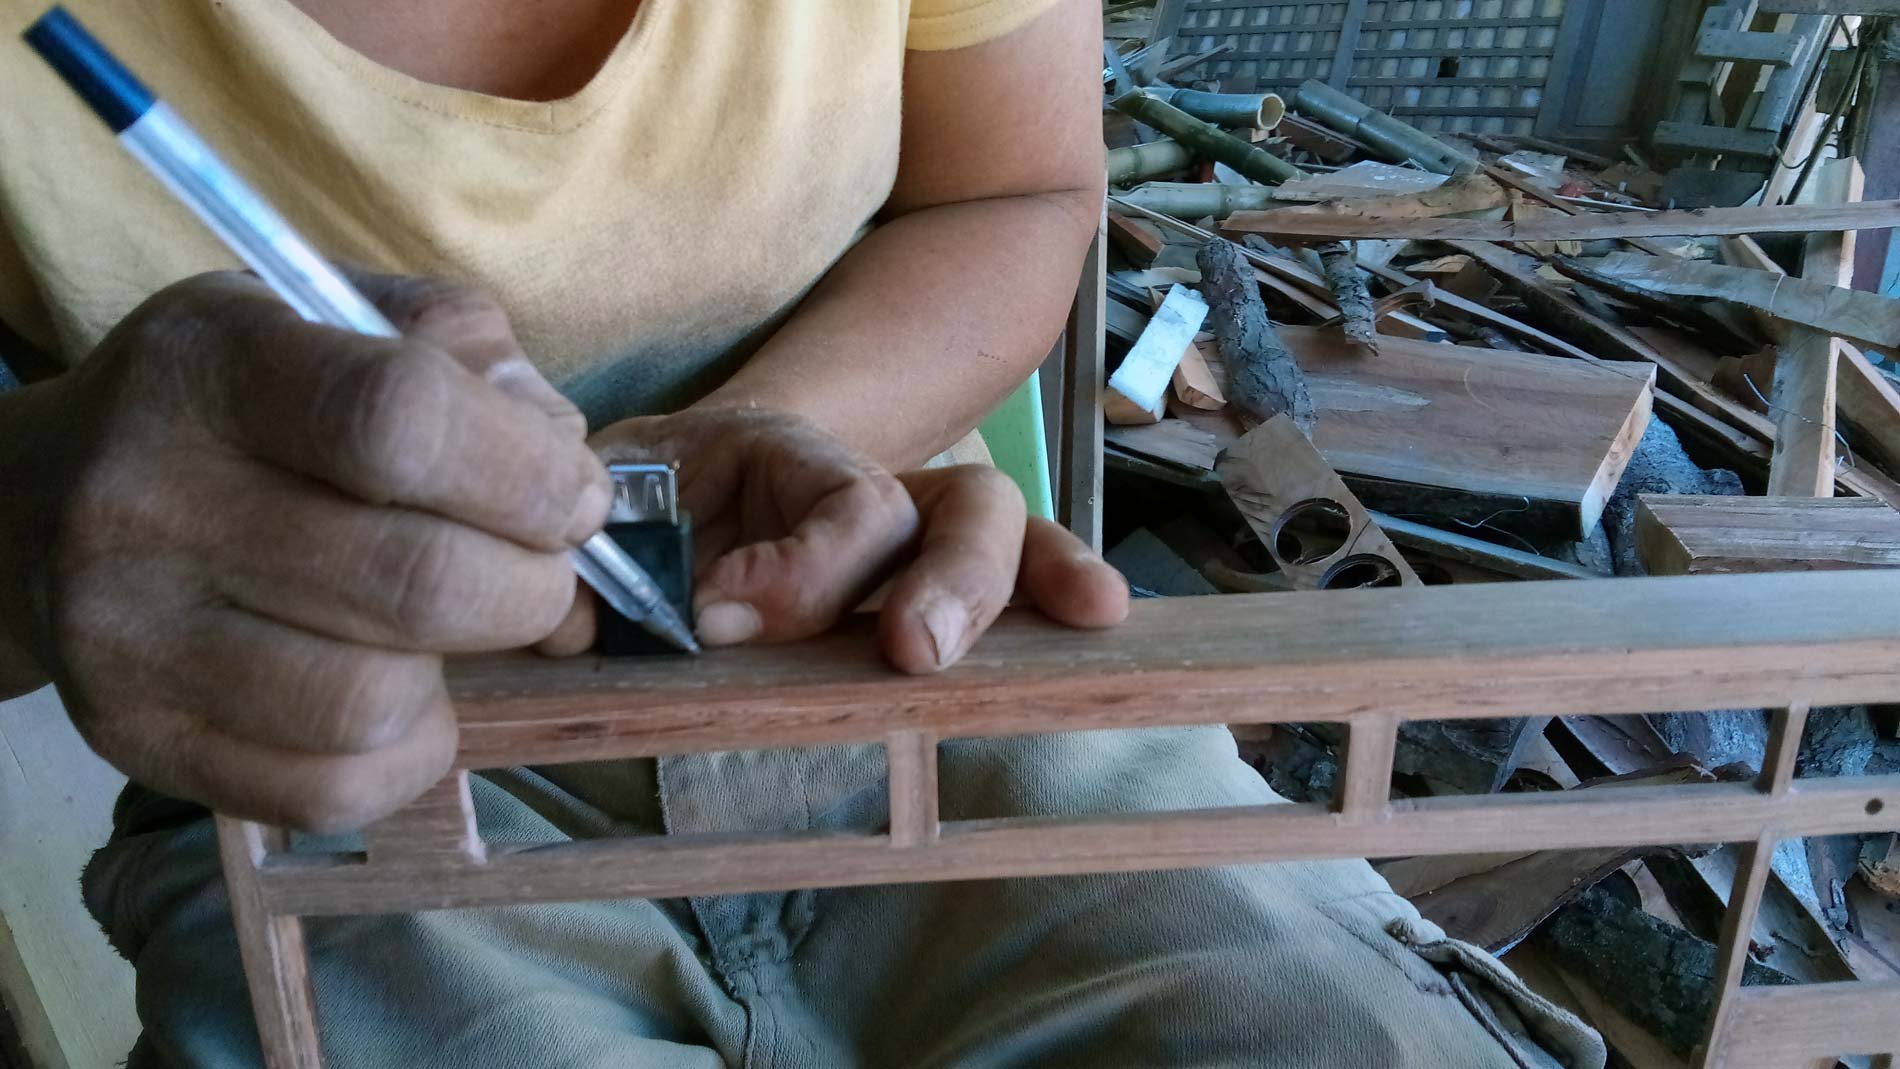
Chisel the created pattern.
Use a fine sand paper to smooth the edges of the hole.
Fit the Extension Adapter on the USB Port Hole including the plastic base to see some possible changes.
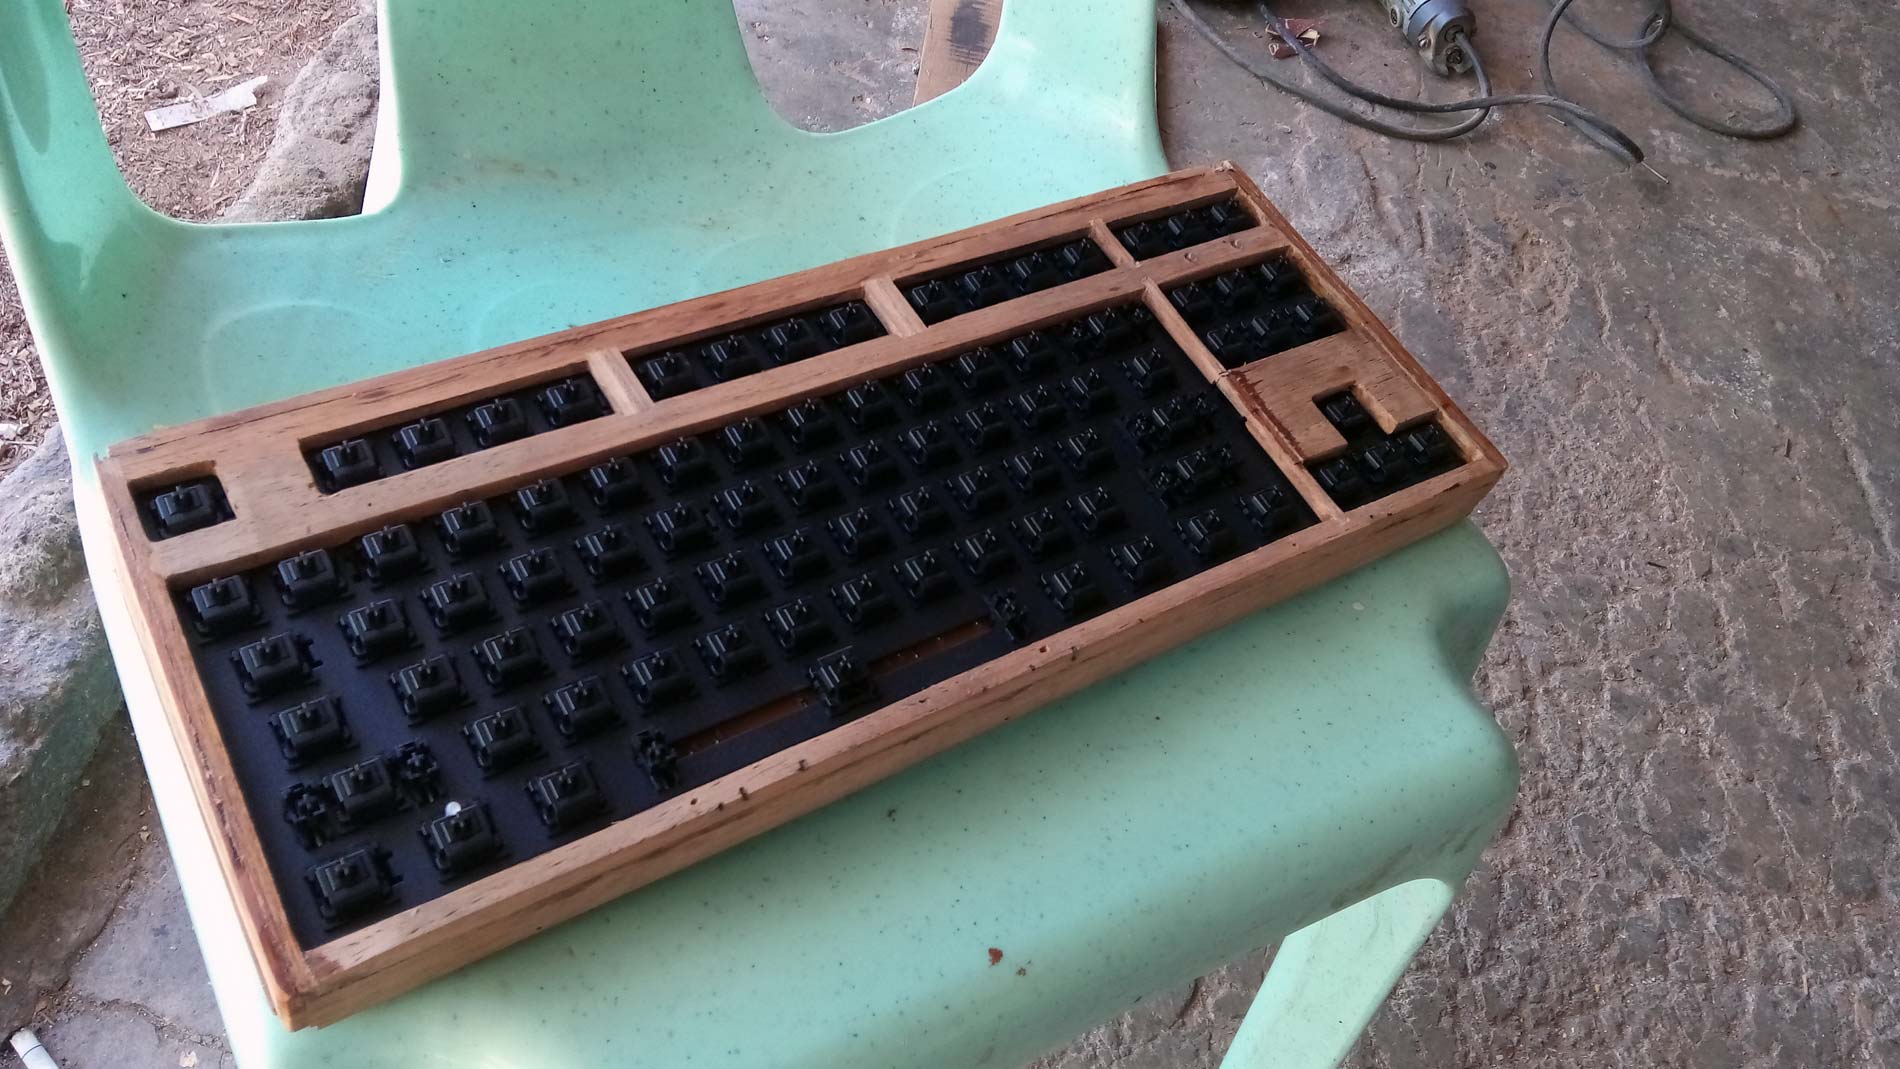
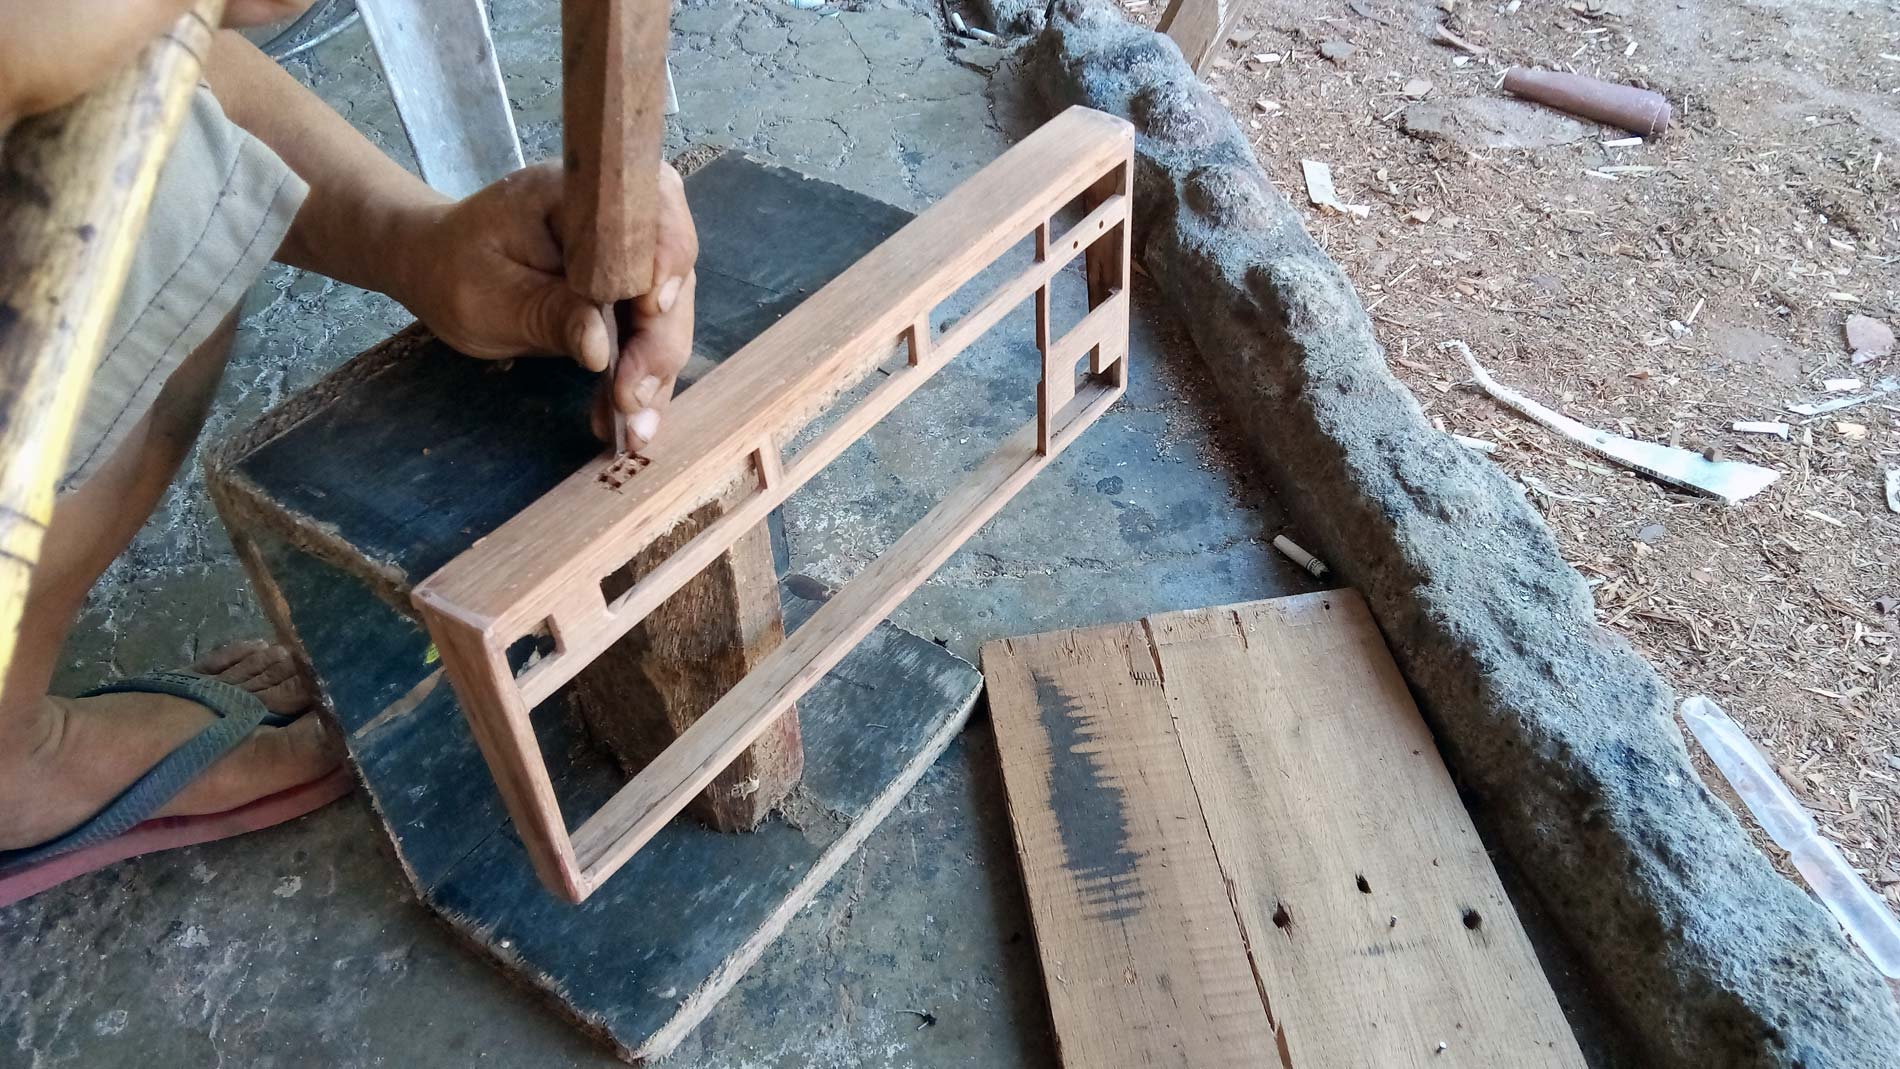
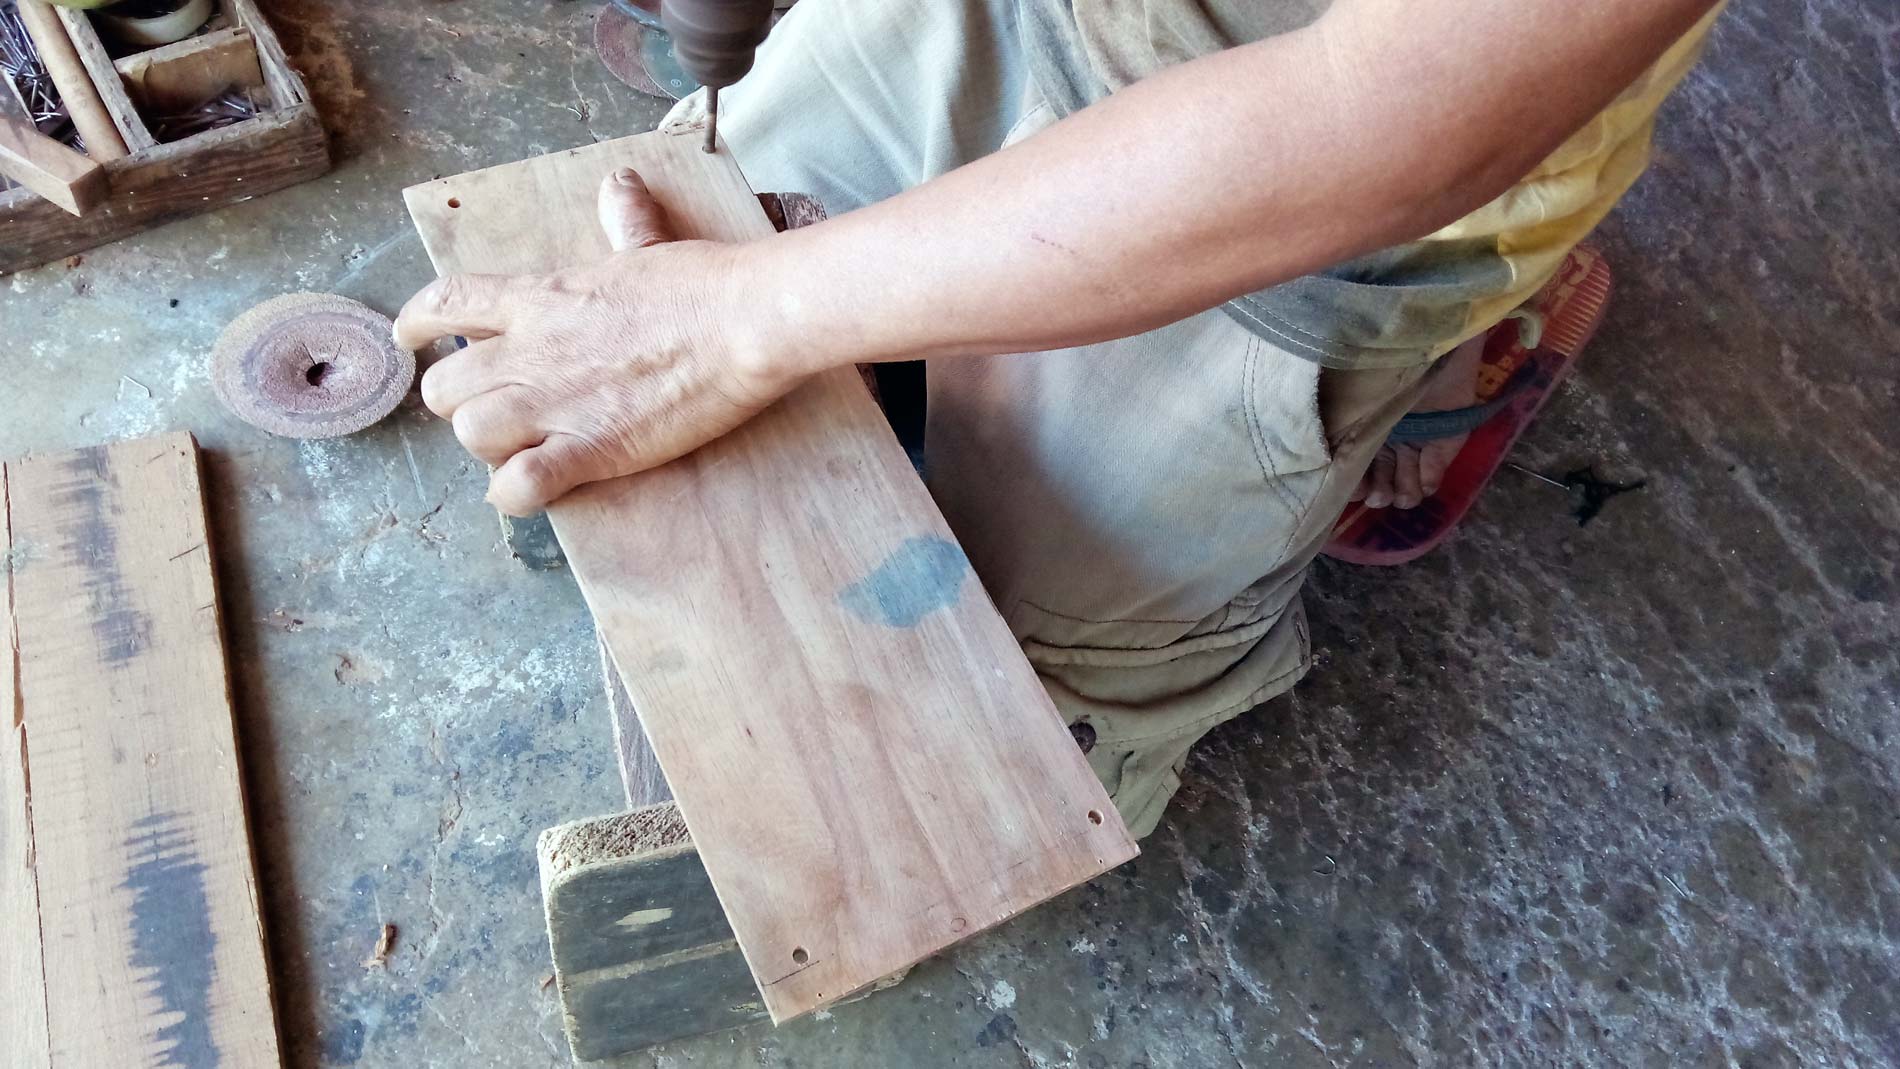
Wooden Base
Create a hole for the 3×10 Brass Stud.
Apply epoxy clay with hardener on the screw hole for a firm grip of the wood on brass stud.
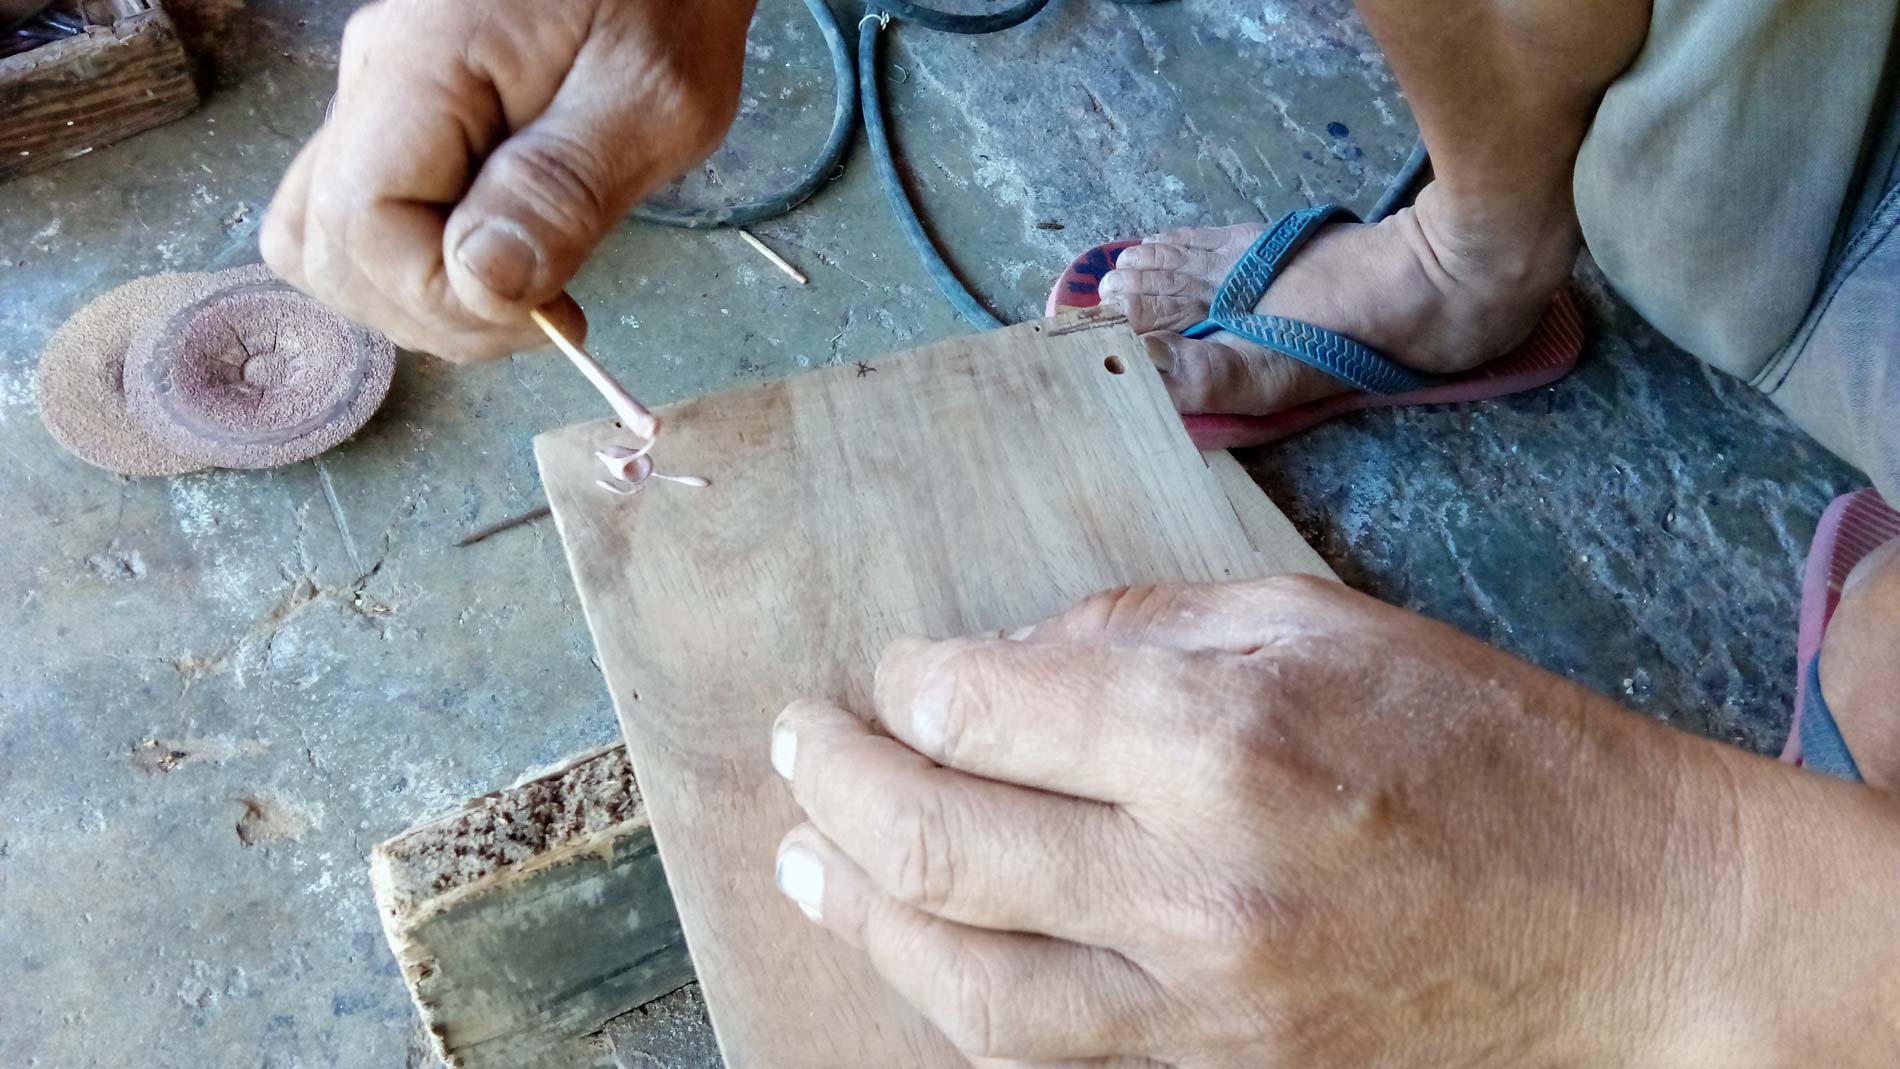
Put the brass stud on screw hole that will be use as point of attachment of the plastic base on the new wooden base.
Cut the excess part of the brass stud using a grinder.
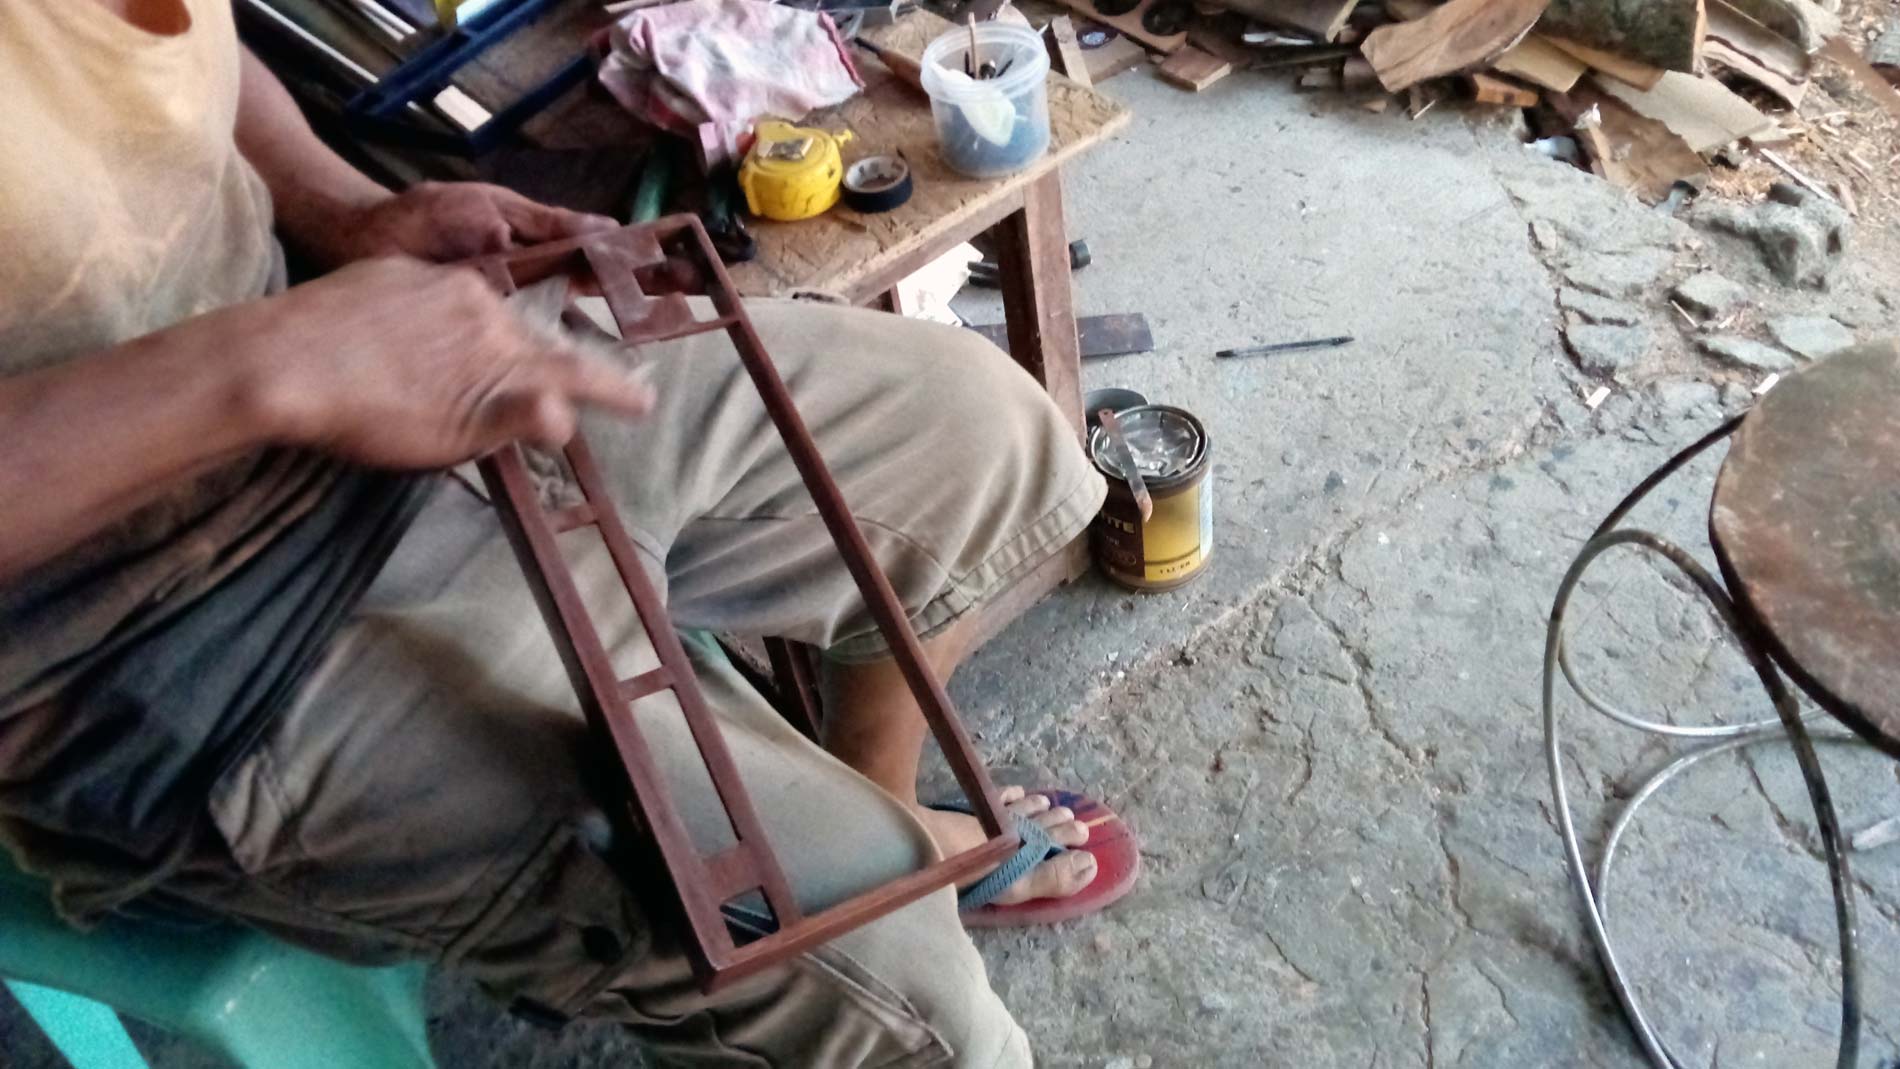
Wooden Paint
Mix the yellow, red, black, and paint thinner.
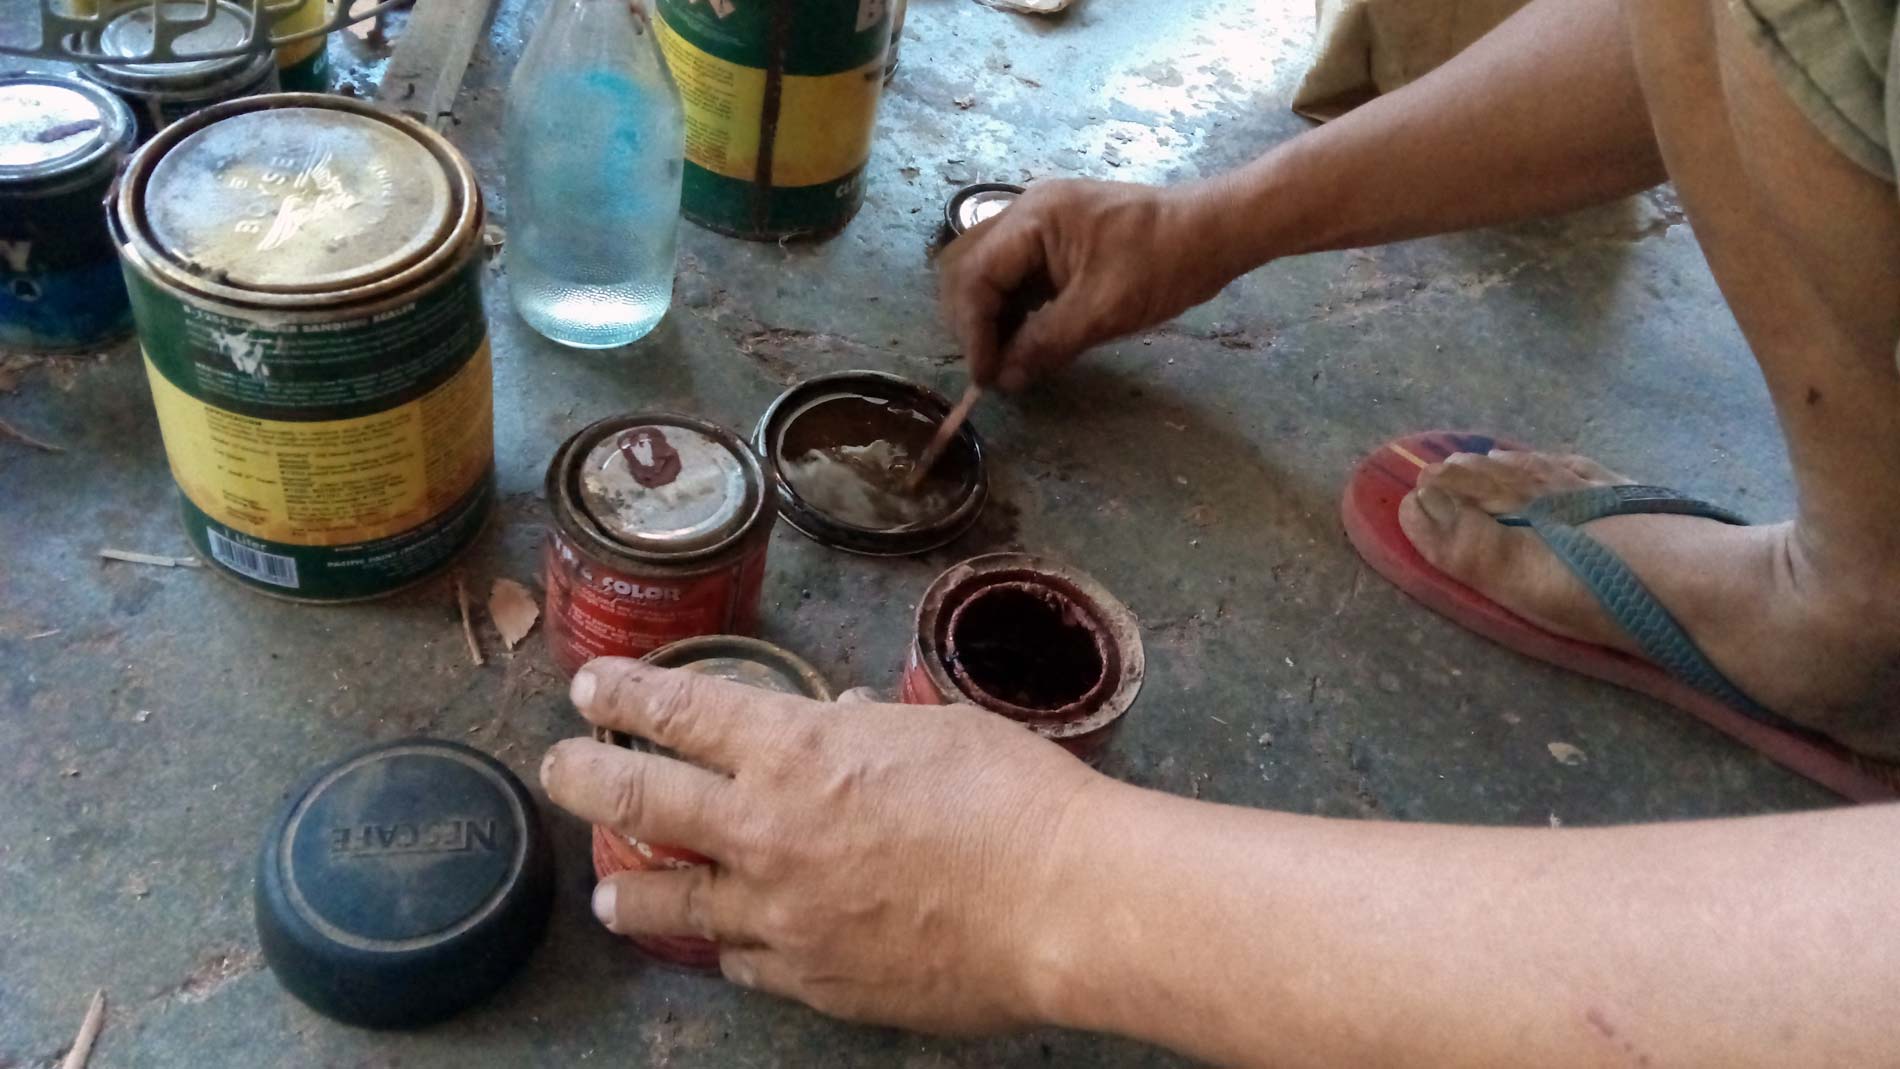
Use a cloth to apply the paint on the wood.
Blow-dry the paint using a blower.

Clear Varnish
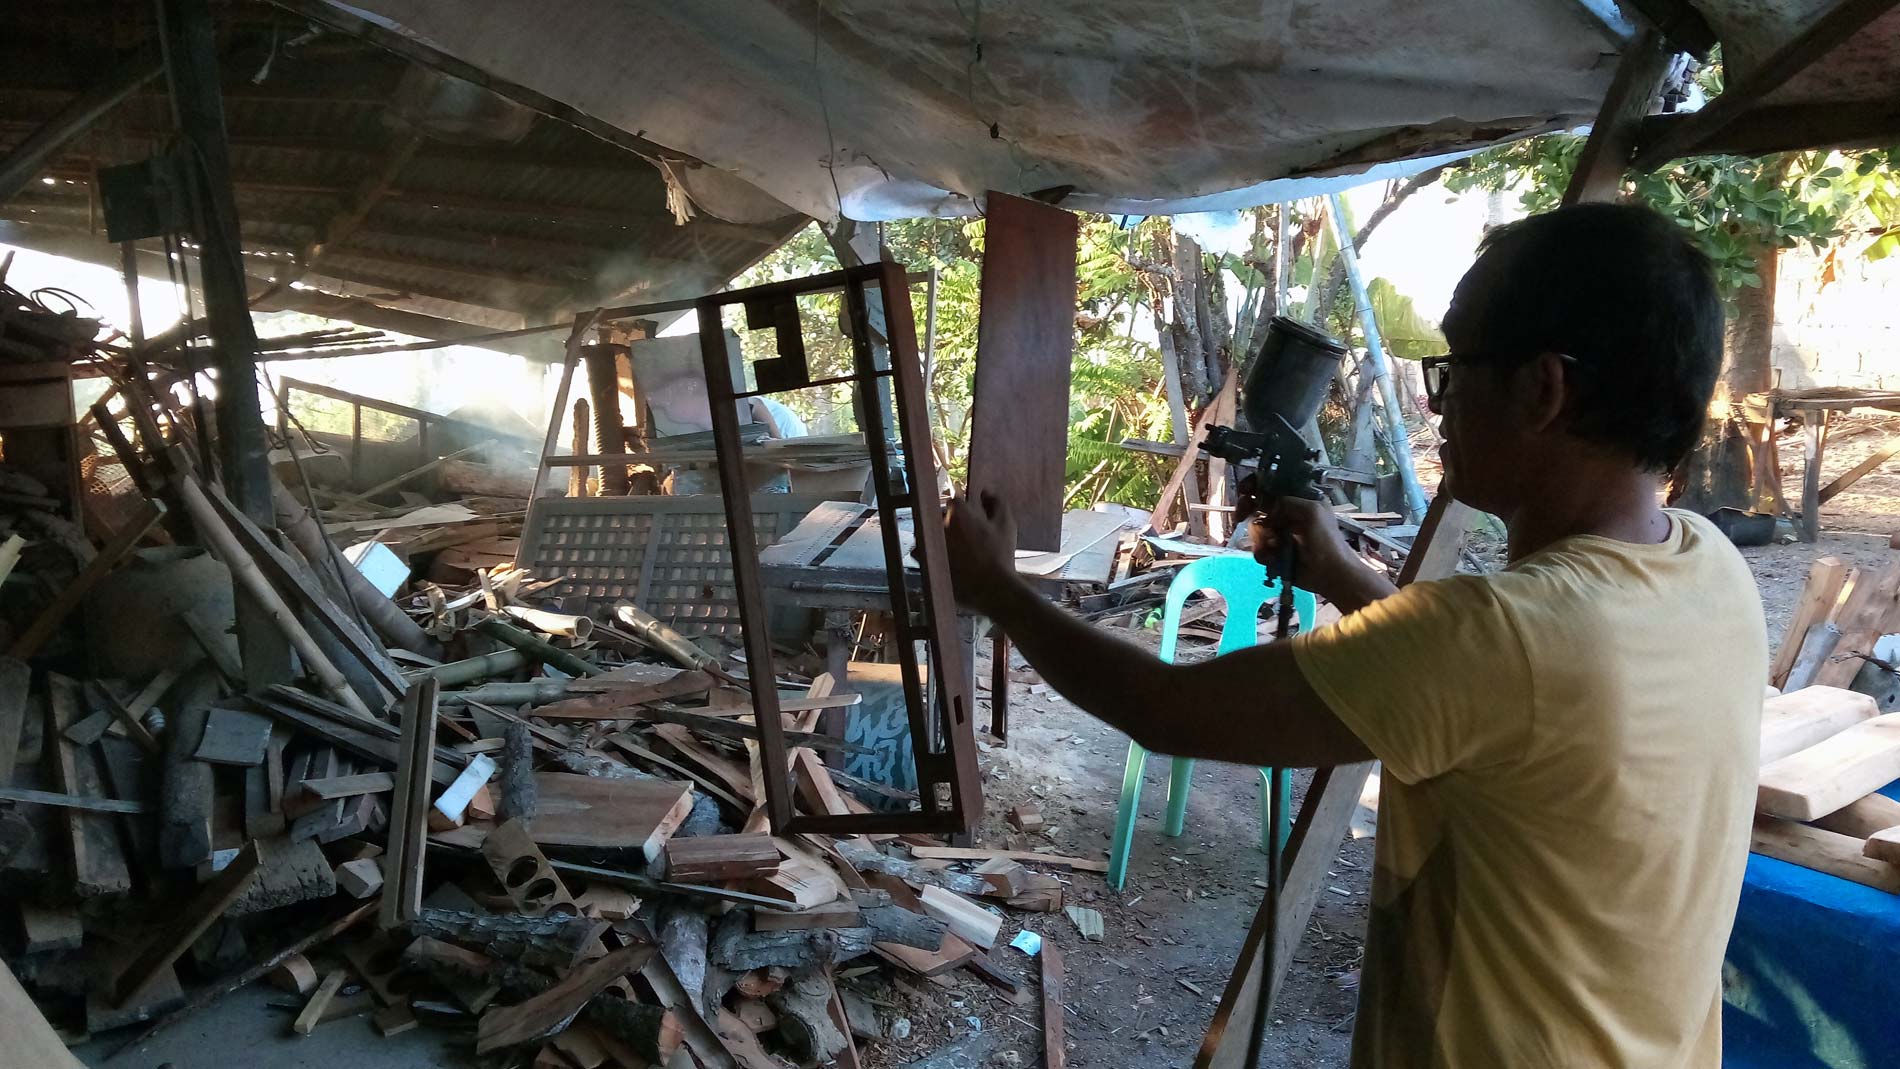
Apply clear varnish using Air Spray (initial coating).
Sand the initial coat using used sand paper to have a clean finish.
Apply again a clear varnish using Air Spray (second coating).
Let it dry naturally for 15 to 30 minutes to allow varnish absorption.
Apply some finishing touches.
- Spot painting any light area.
- Using a cloth, rub with Paint Spray Glaze for a glossy wood finish.
Wooden, and Plastic Base attachment
Using Phillip screwdriver, attach the bases using 3×6 bolt.
Removable USB
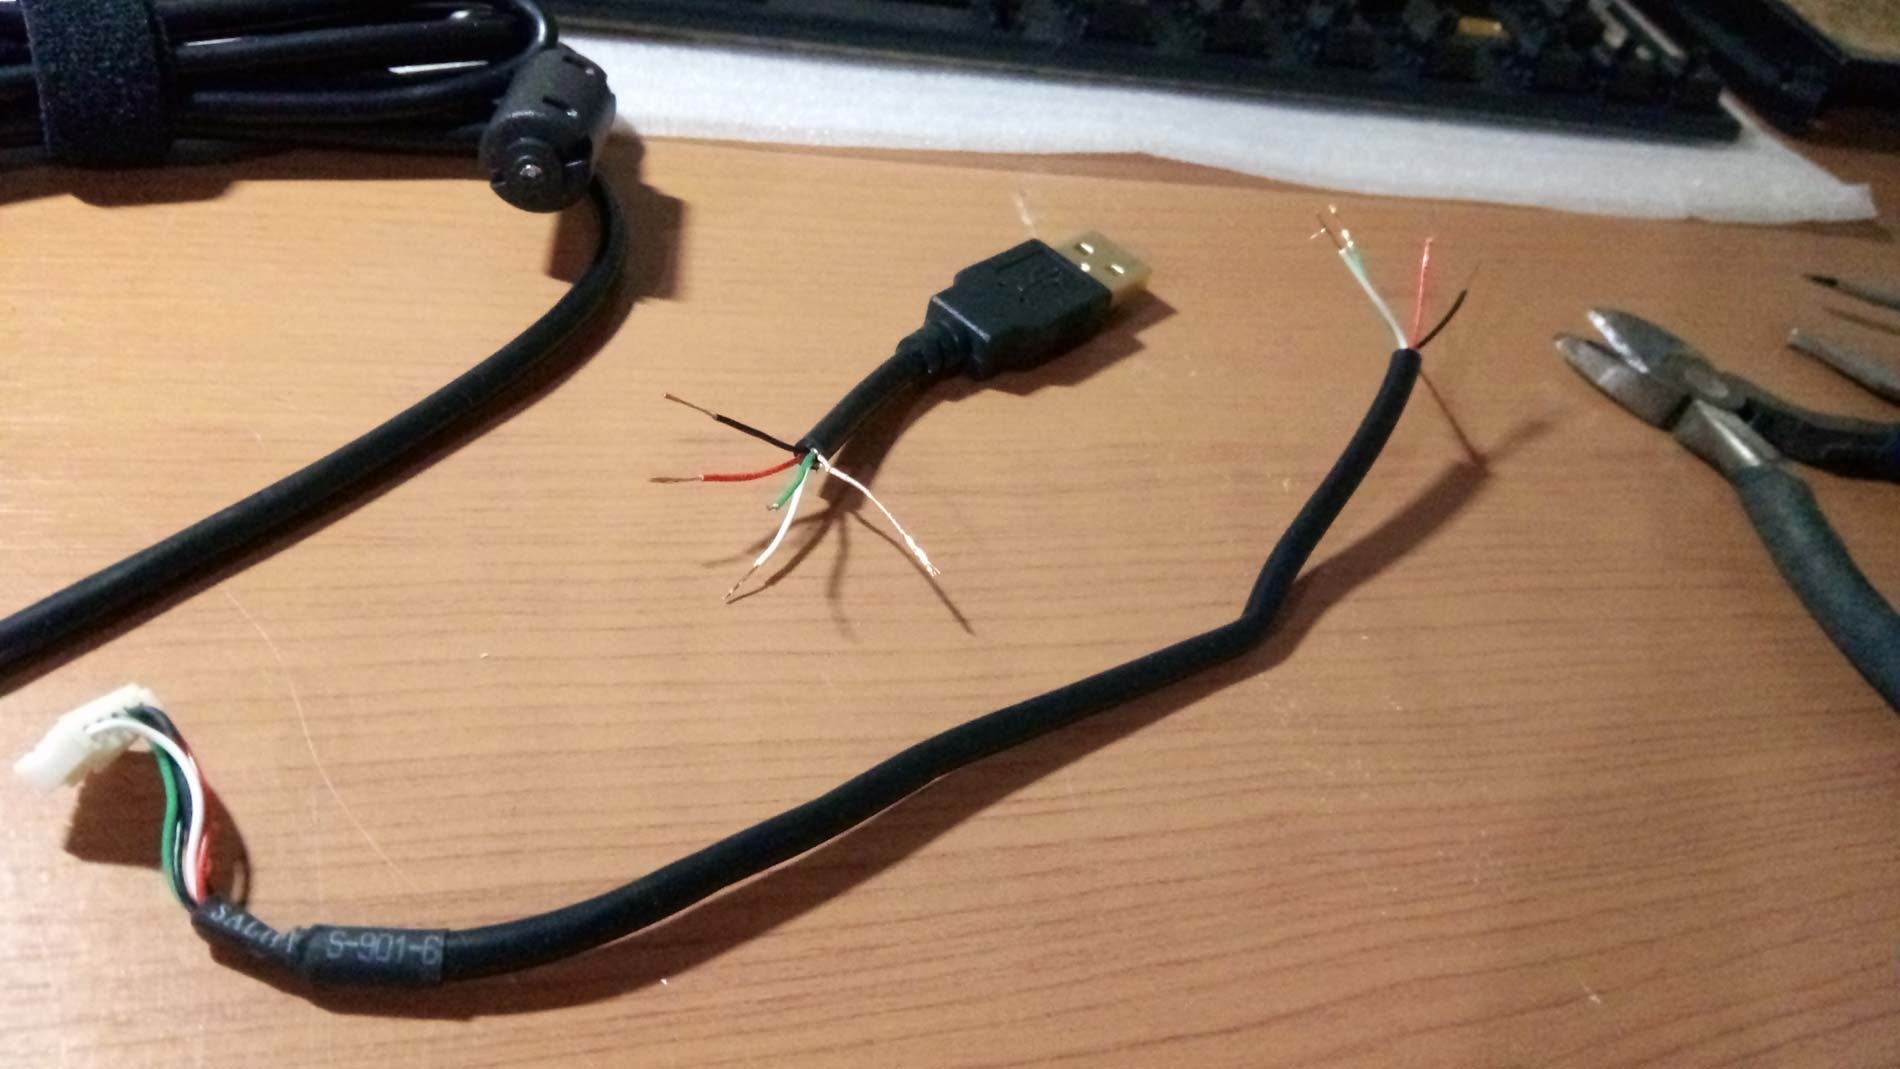
Cut the original USB cord (plug, and wire connection to the PCB) just enough to fit between the PCB and plastic base.
Strip the wires on both end using a hobbyist plier and wire cutter (I have no wire stripper tho).
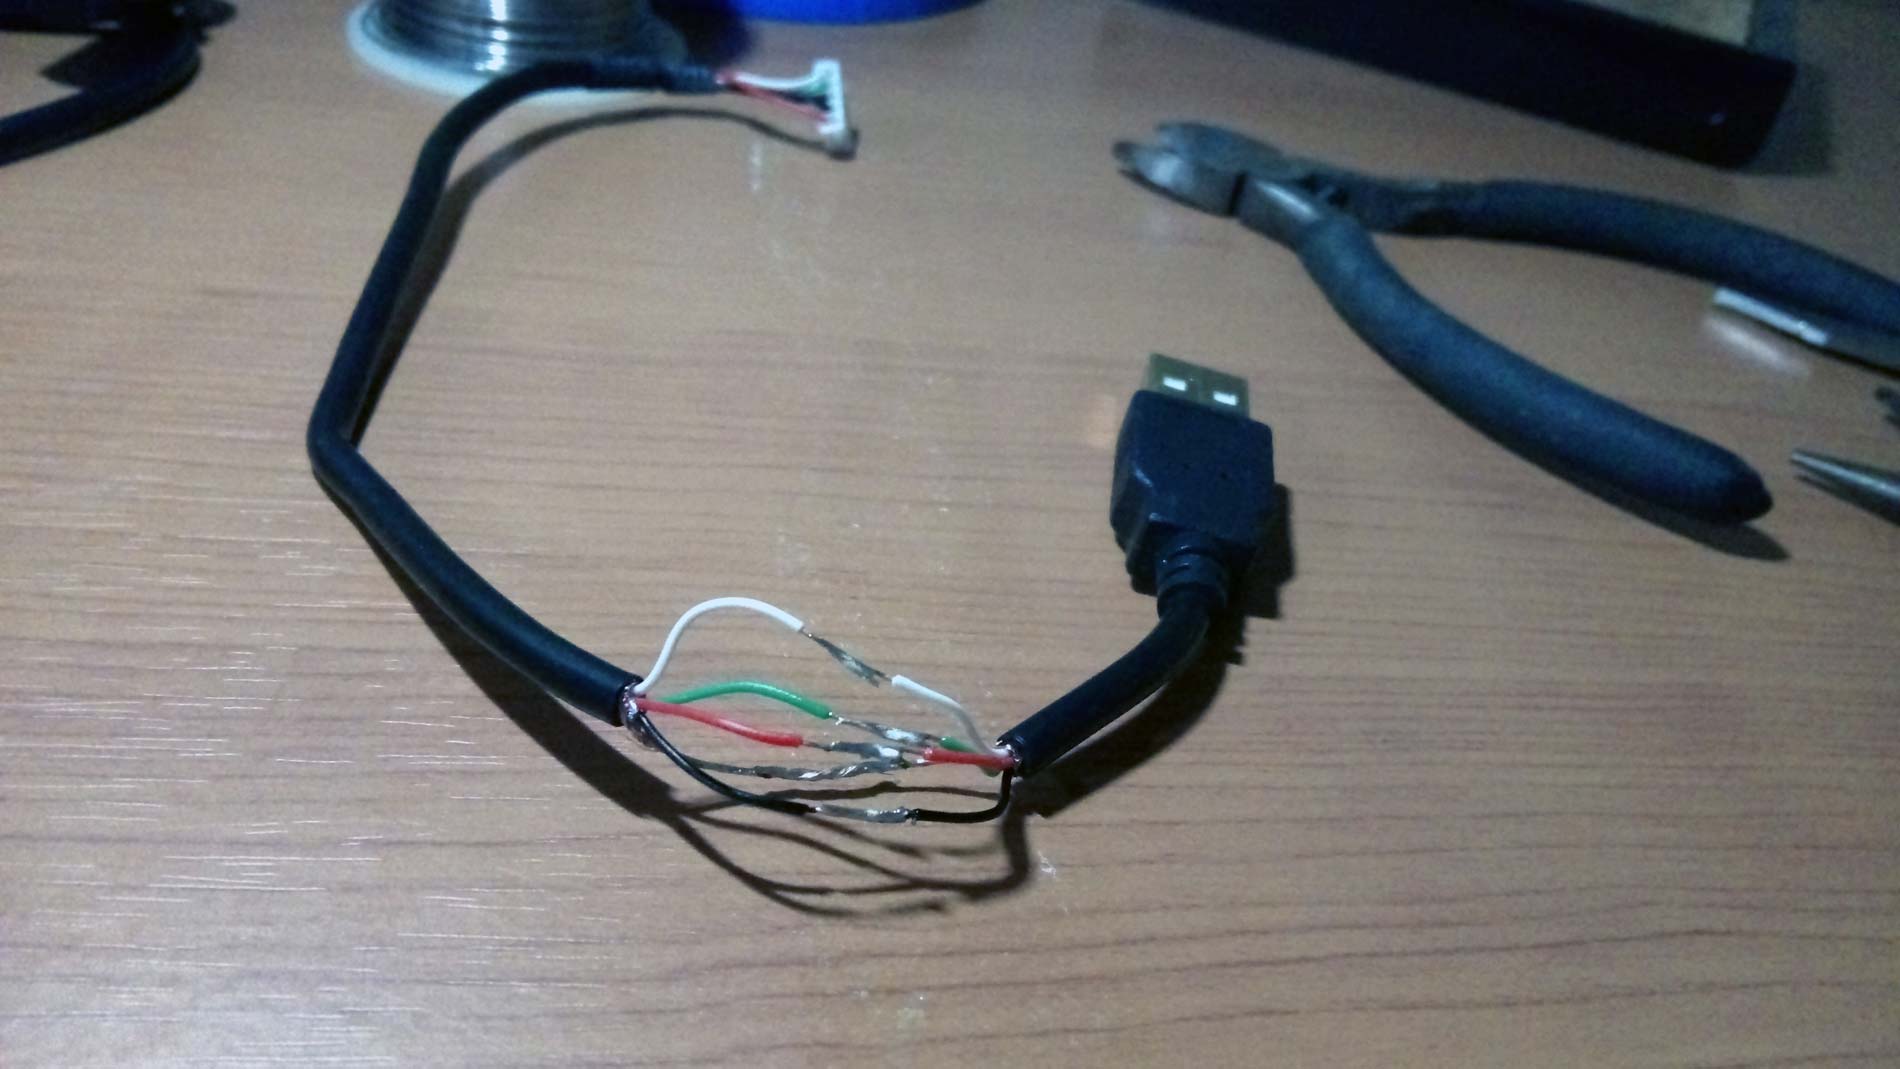
Connect both ends of the wires of the USB cable using a solder (make sure to connect the same wire colors).
Use an electrical tape to cover the soldered wires to avoid short circuit.
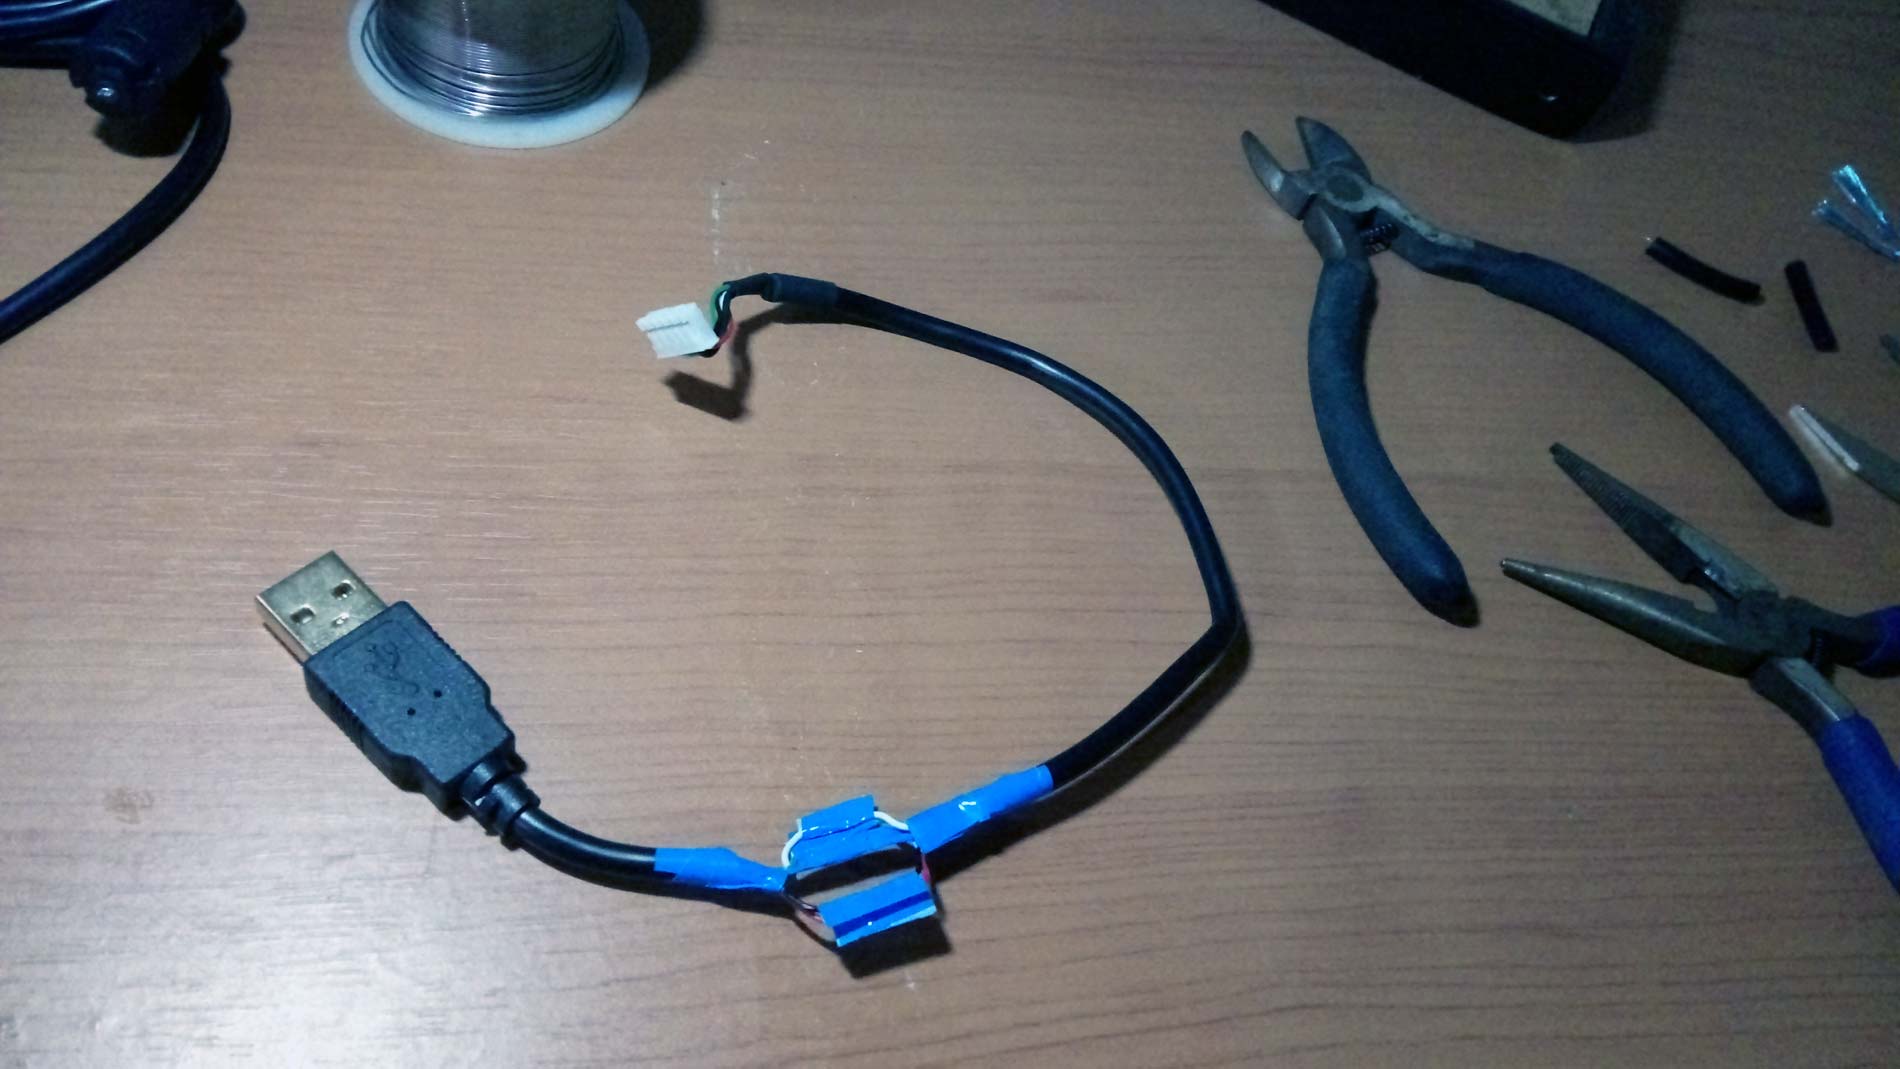
Connect the Extension Adapter, and the new USB cable to be use then make a test if the keys are working.
Putting all together now
- Attach all the necessary components (Top Cover, Base, Removable USB conversion, and Plate and PCB).
- Attach the cable of the USB connection using an electrical tape to avoid misalignment during closing the top cover. Take note of the other possible cause of short-circuit (screw heads), also apply electrical tape on them.
- Attached the new Top Cover, and Base using a wood screw (a 3/4 x 2 or 3 mm will do since the borders are 7 mm in thickness). Application of the screws are in the bottom of the base.
- Attached the rubber footings (the ones that I detached during the disassembly).

Install Keycaps
I preferred to use my old Typewritter Keycaps on this modified keyboard and let’s see what it looks like 🙂
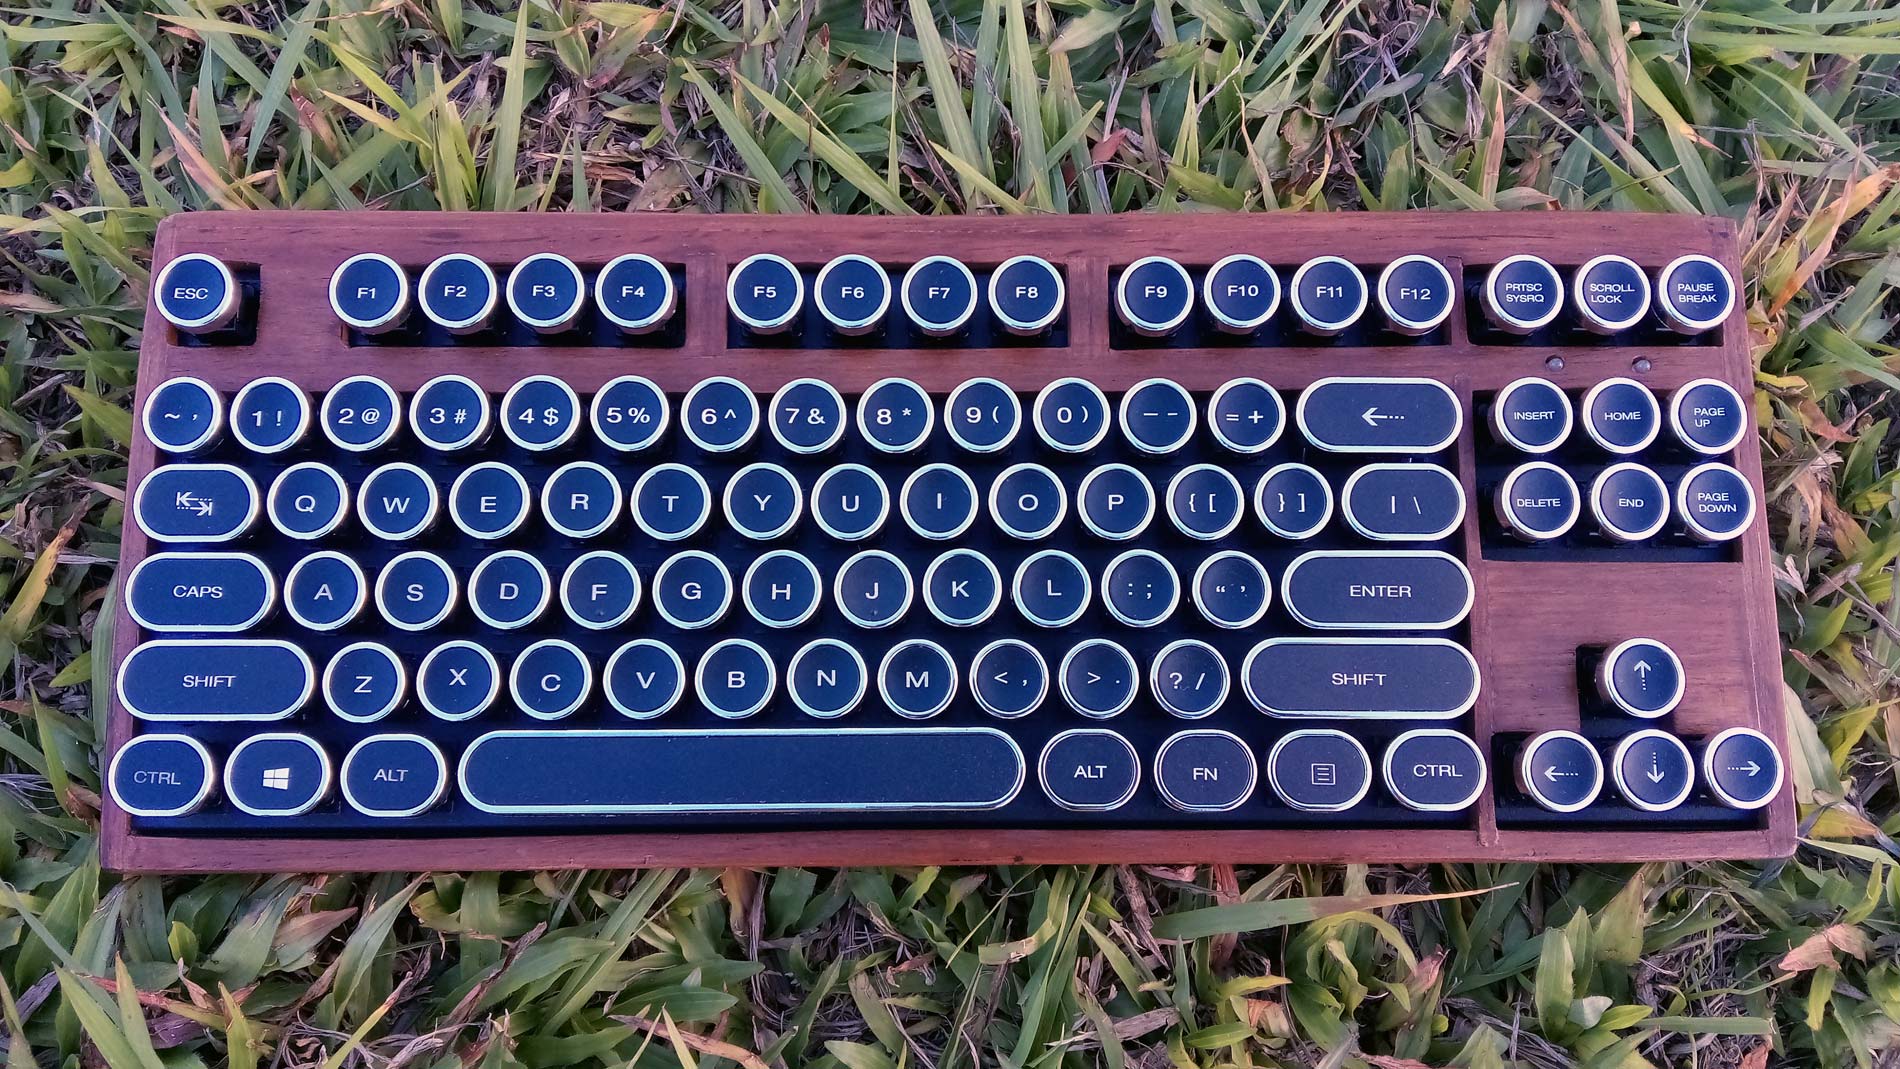
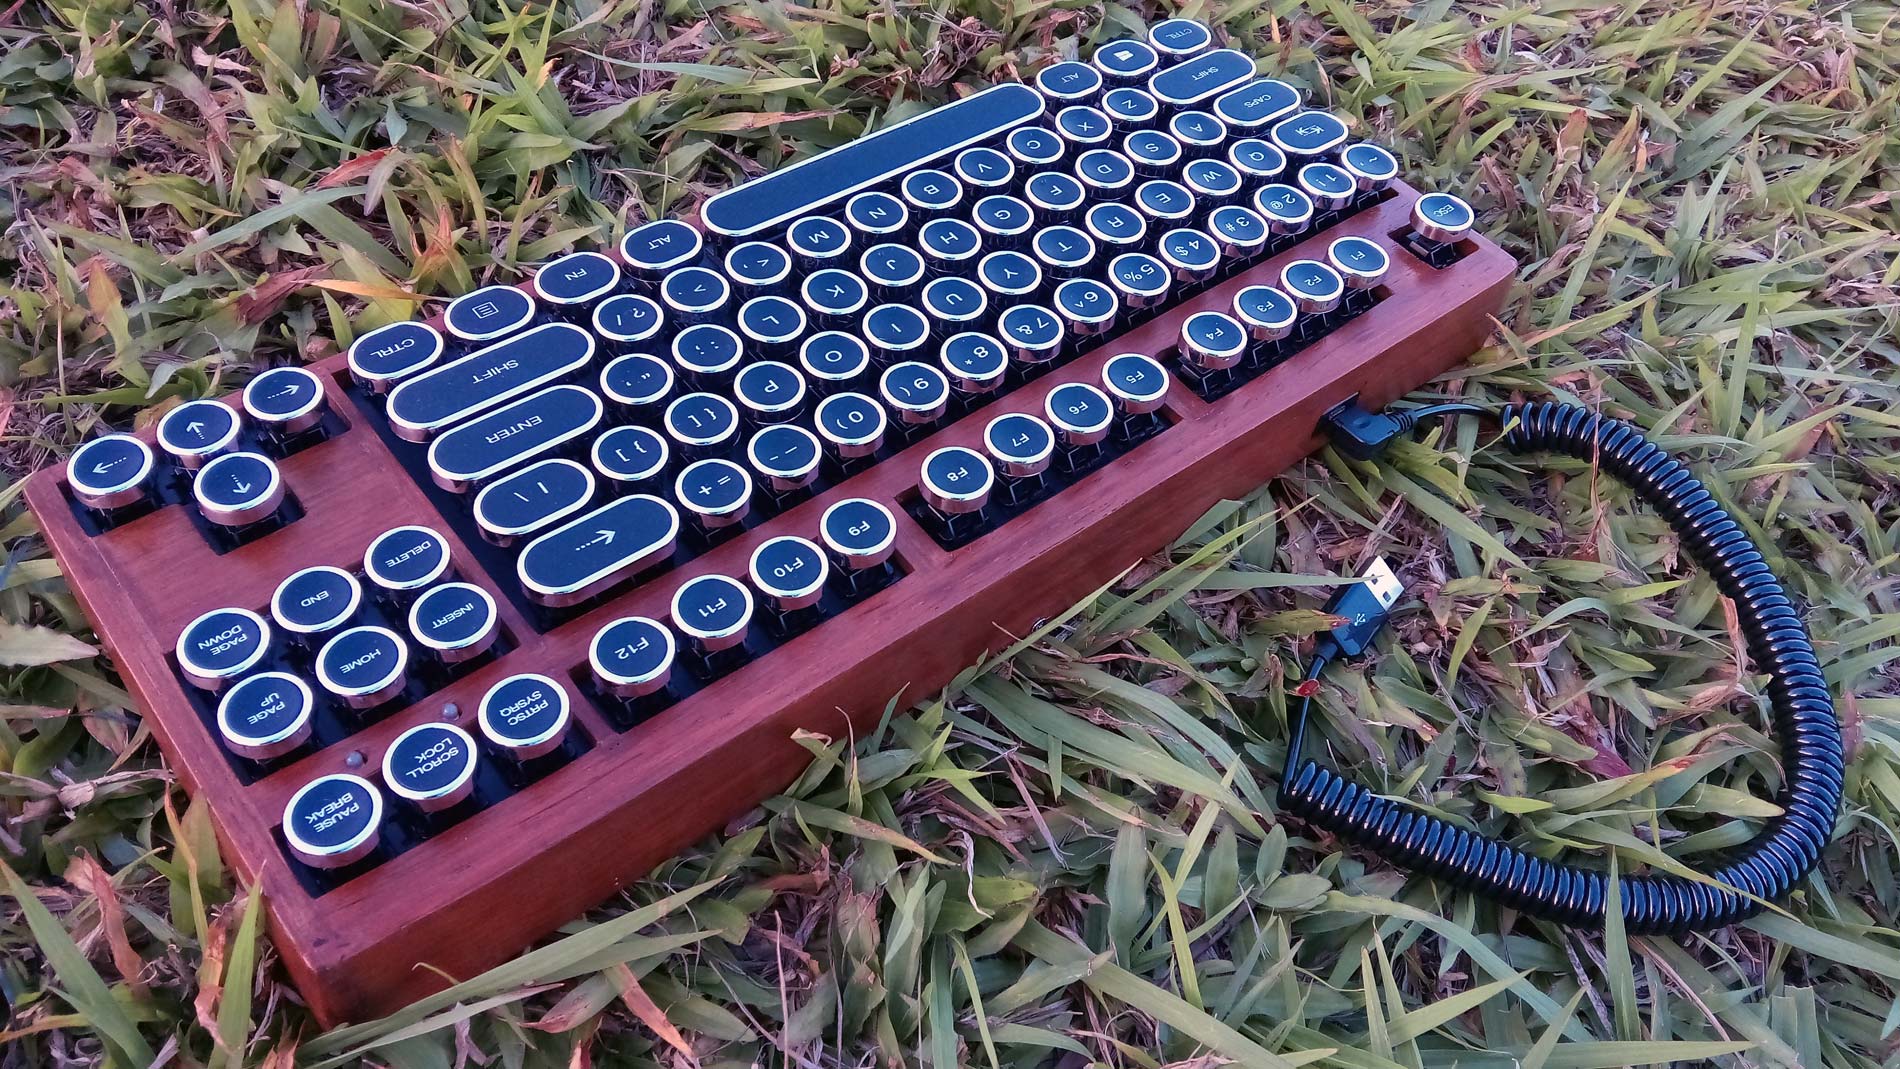
GLAMOUR SHOTS
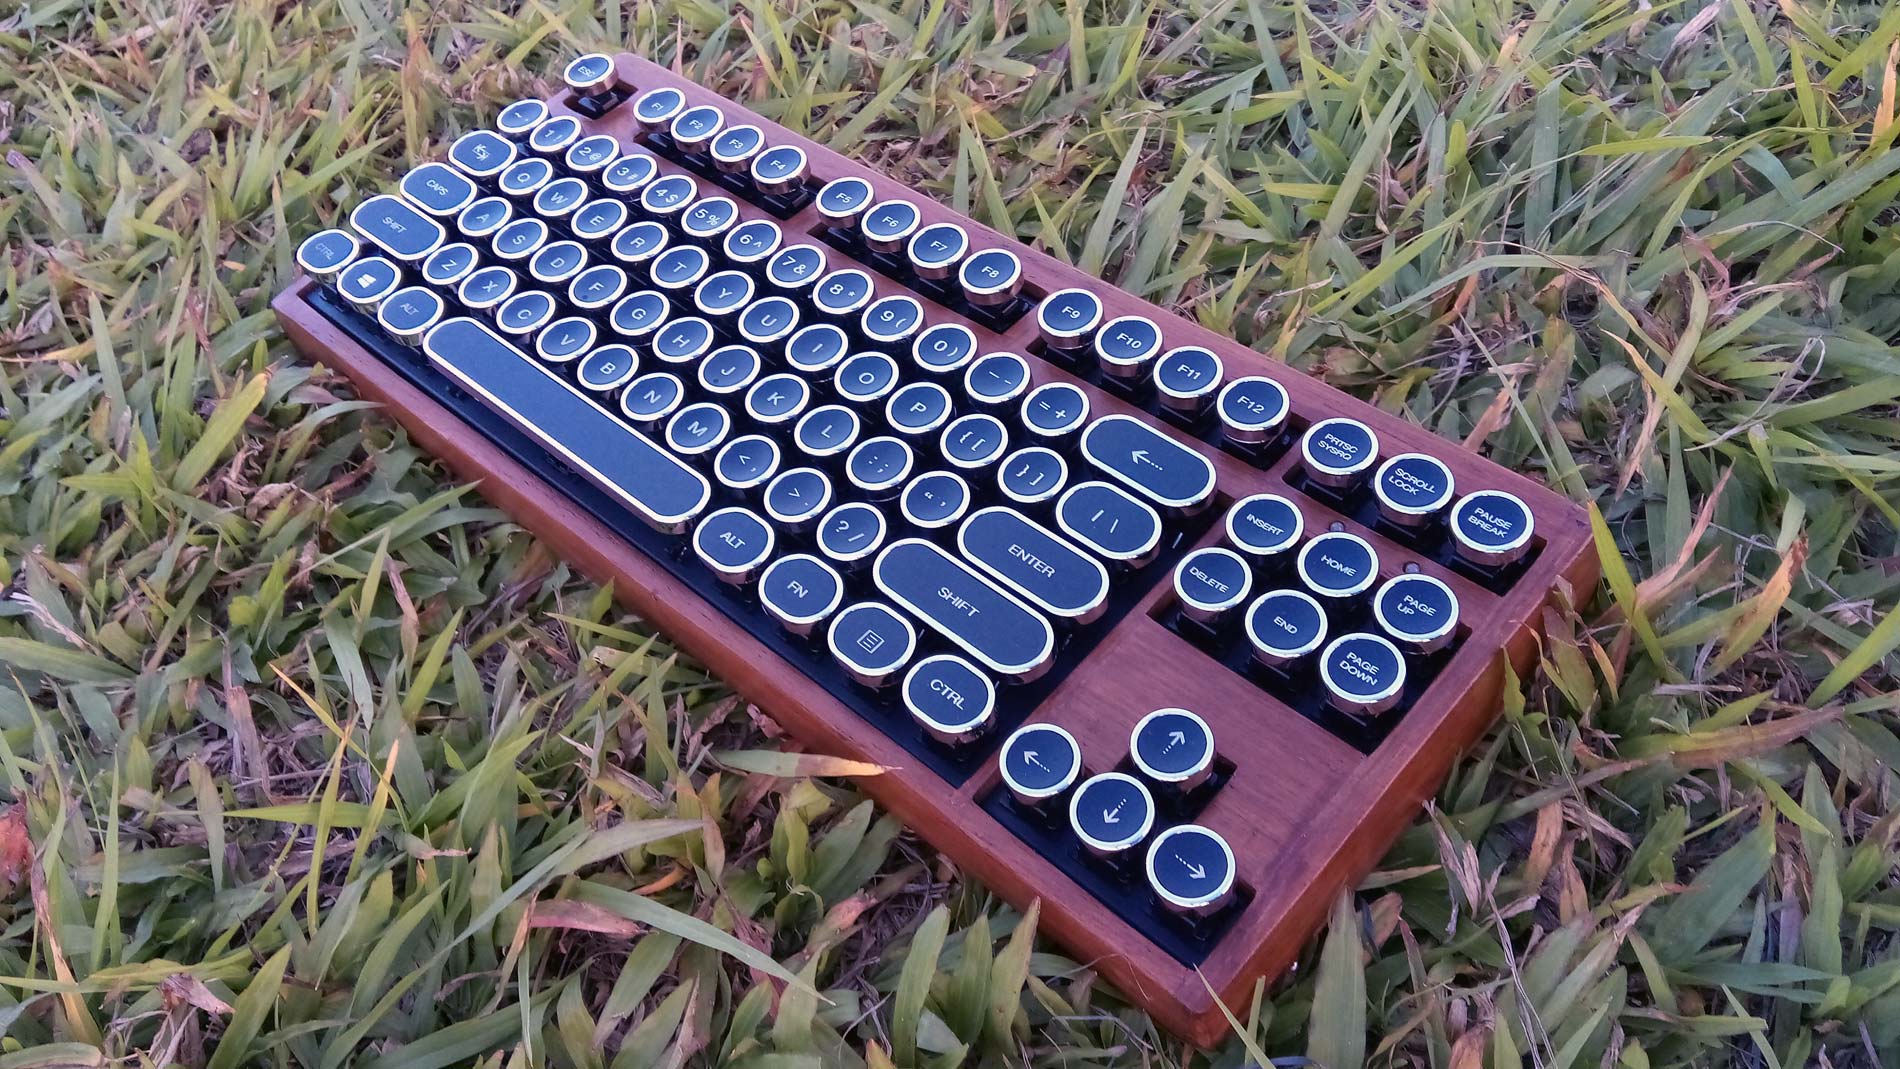
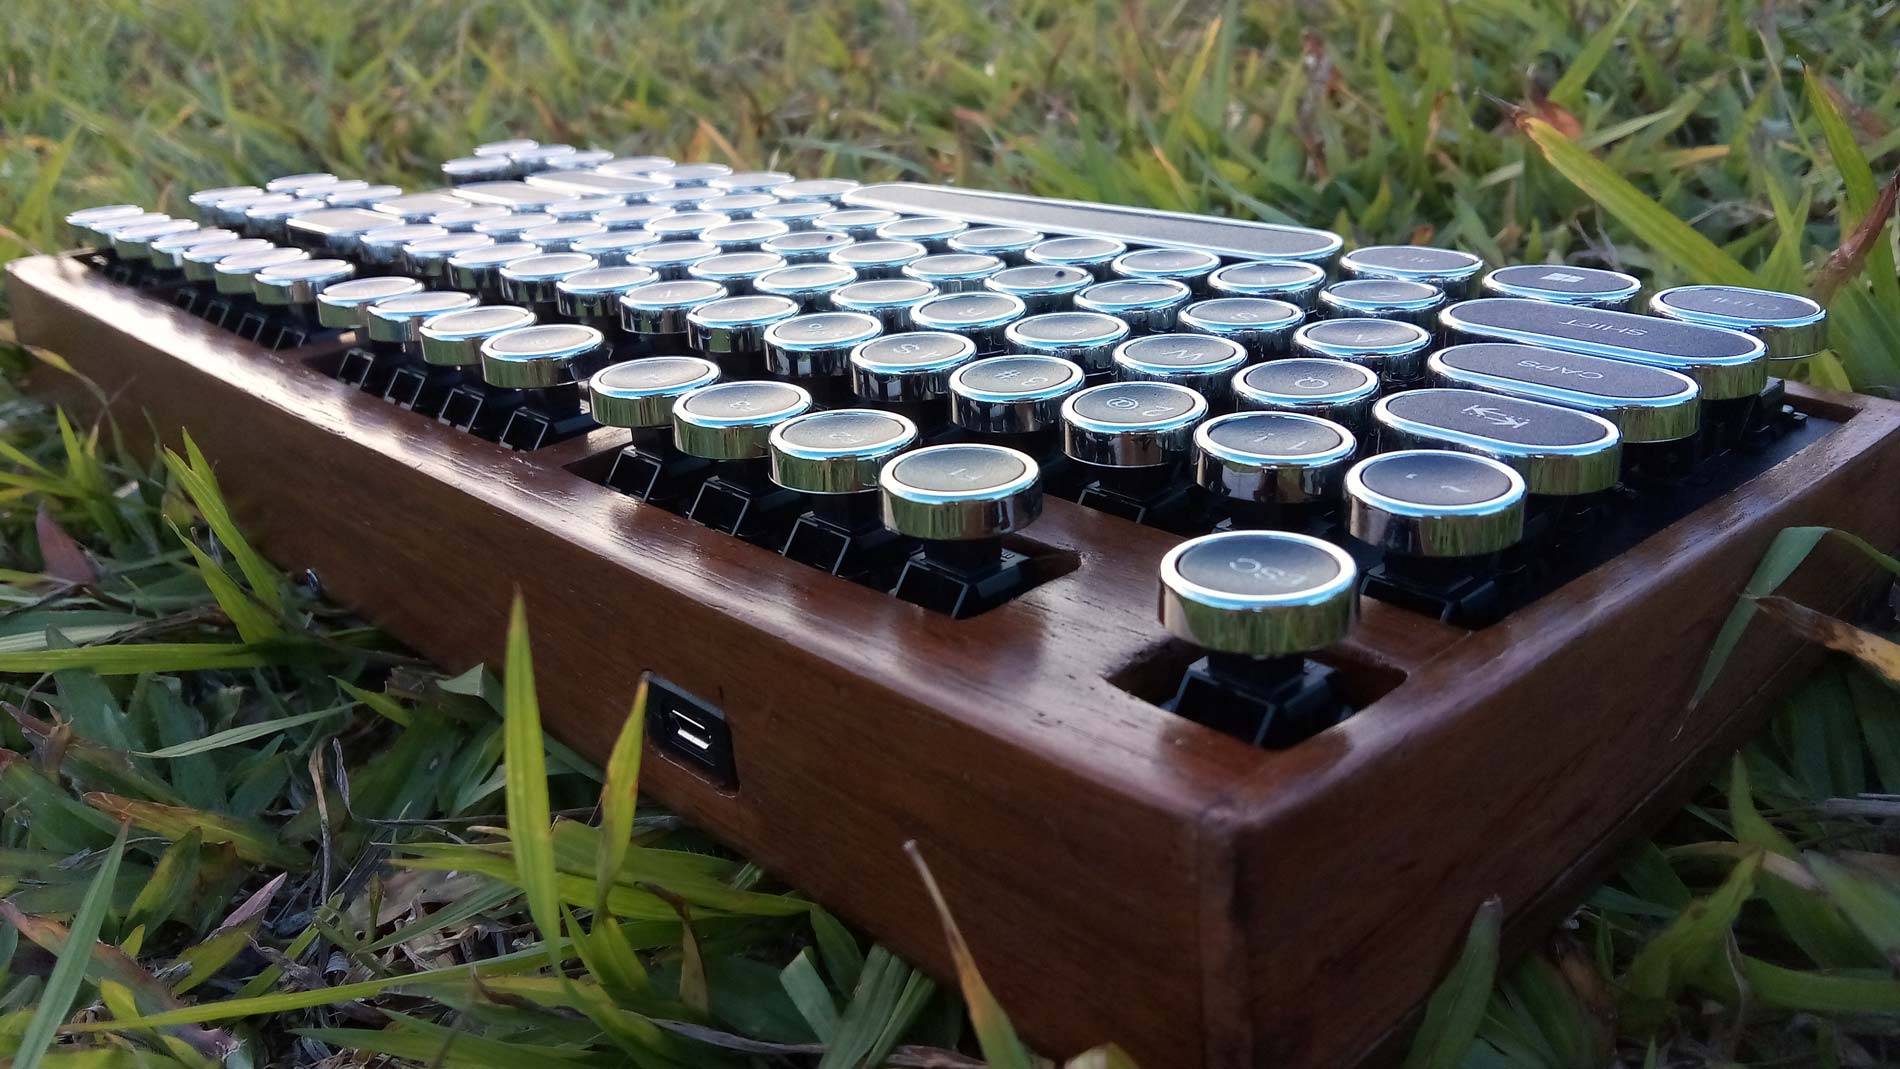
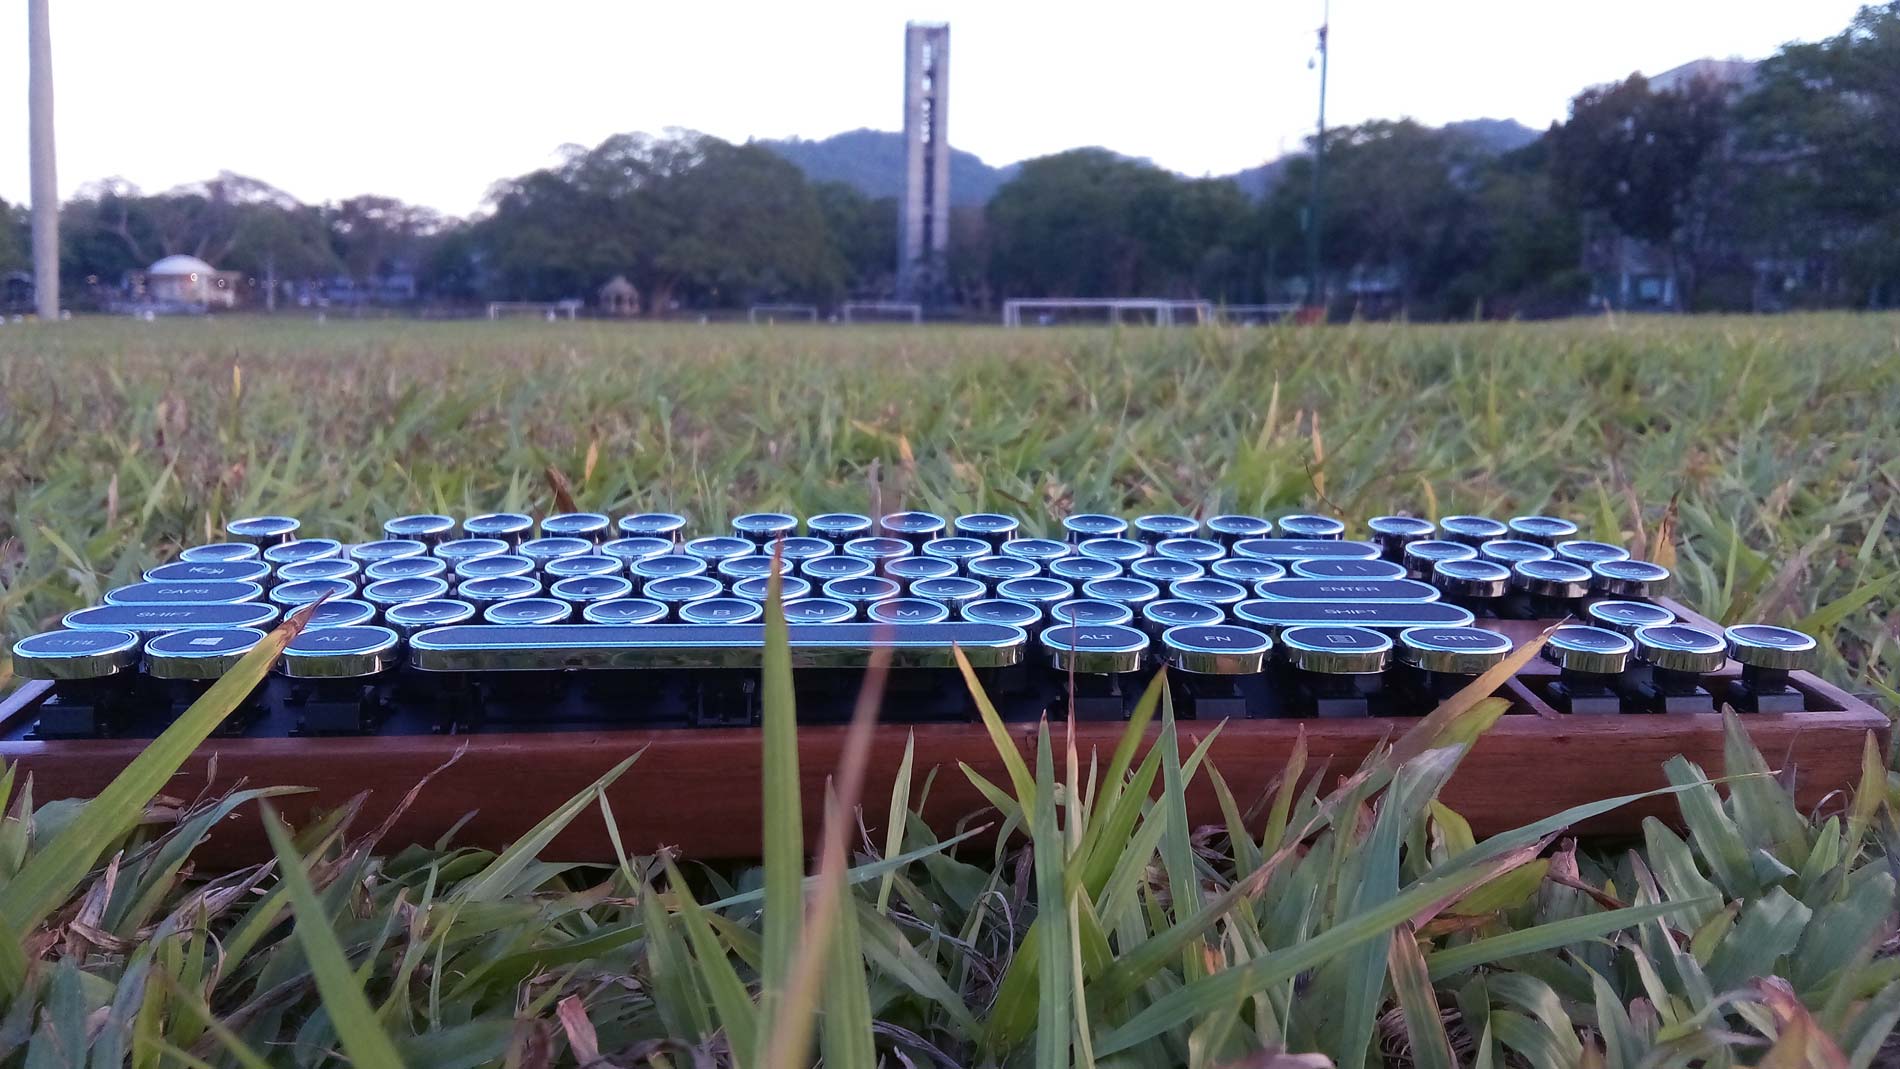
My modded Surmt CM625 TKL Wooden Case and Removable USB Cable
Top View
Rear View

Side View (left)
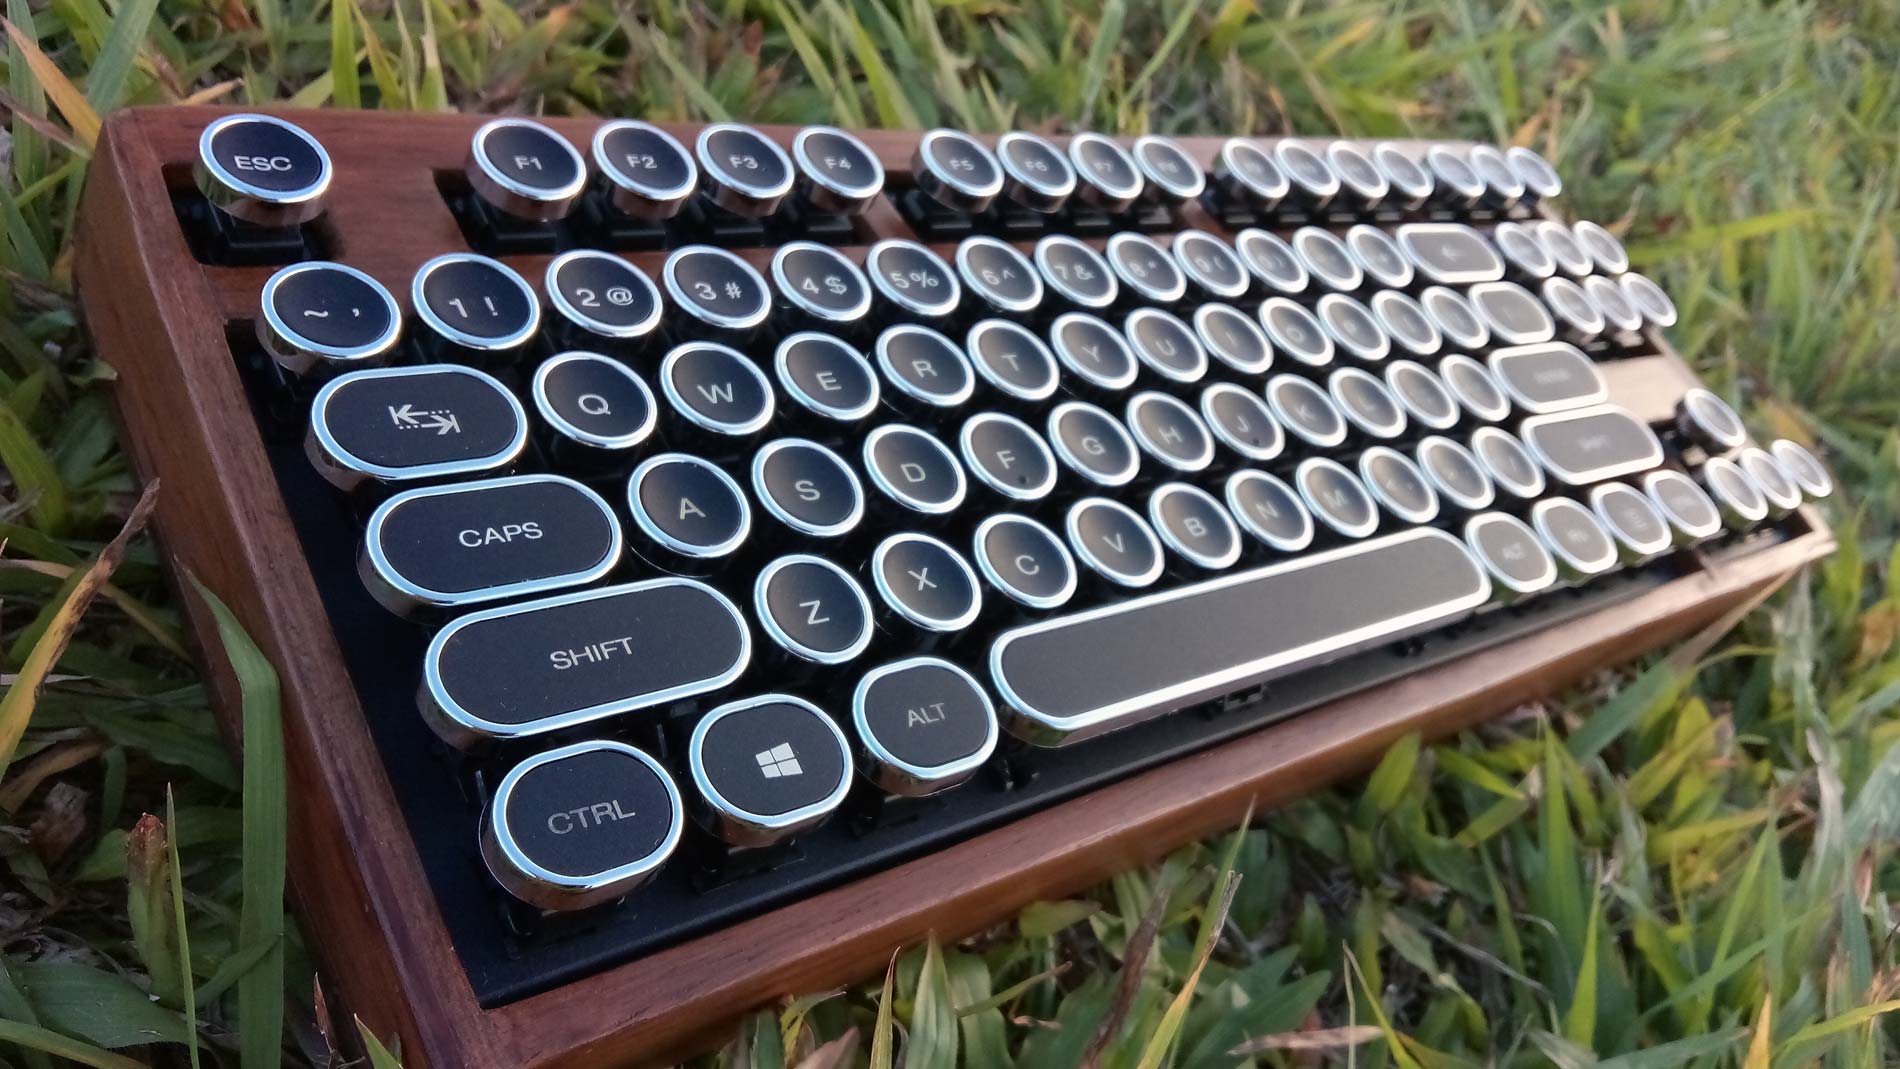
Side View (right)
Featuring the Micro USB Port
Over-looking the Mt. Makiling, and Carillon Tower at University of the Philippines – Los Banos.
Featuring the Micro USB Cable
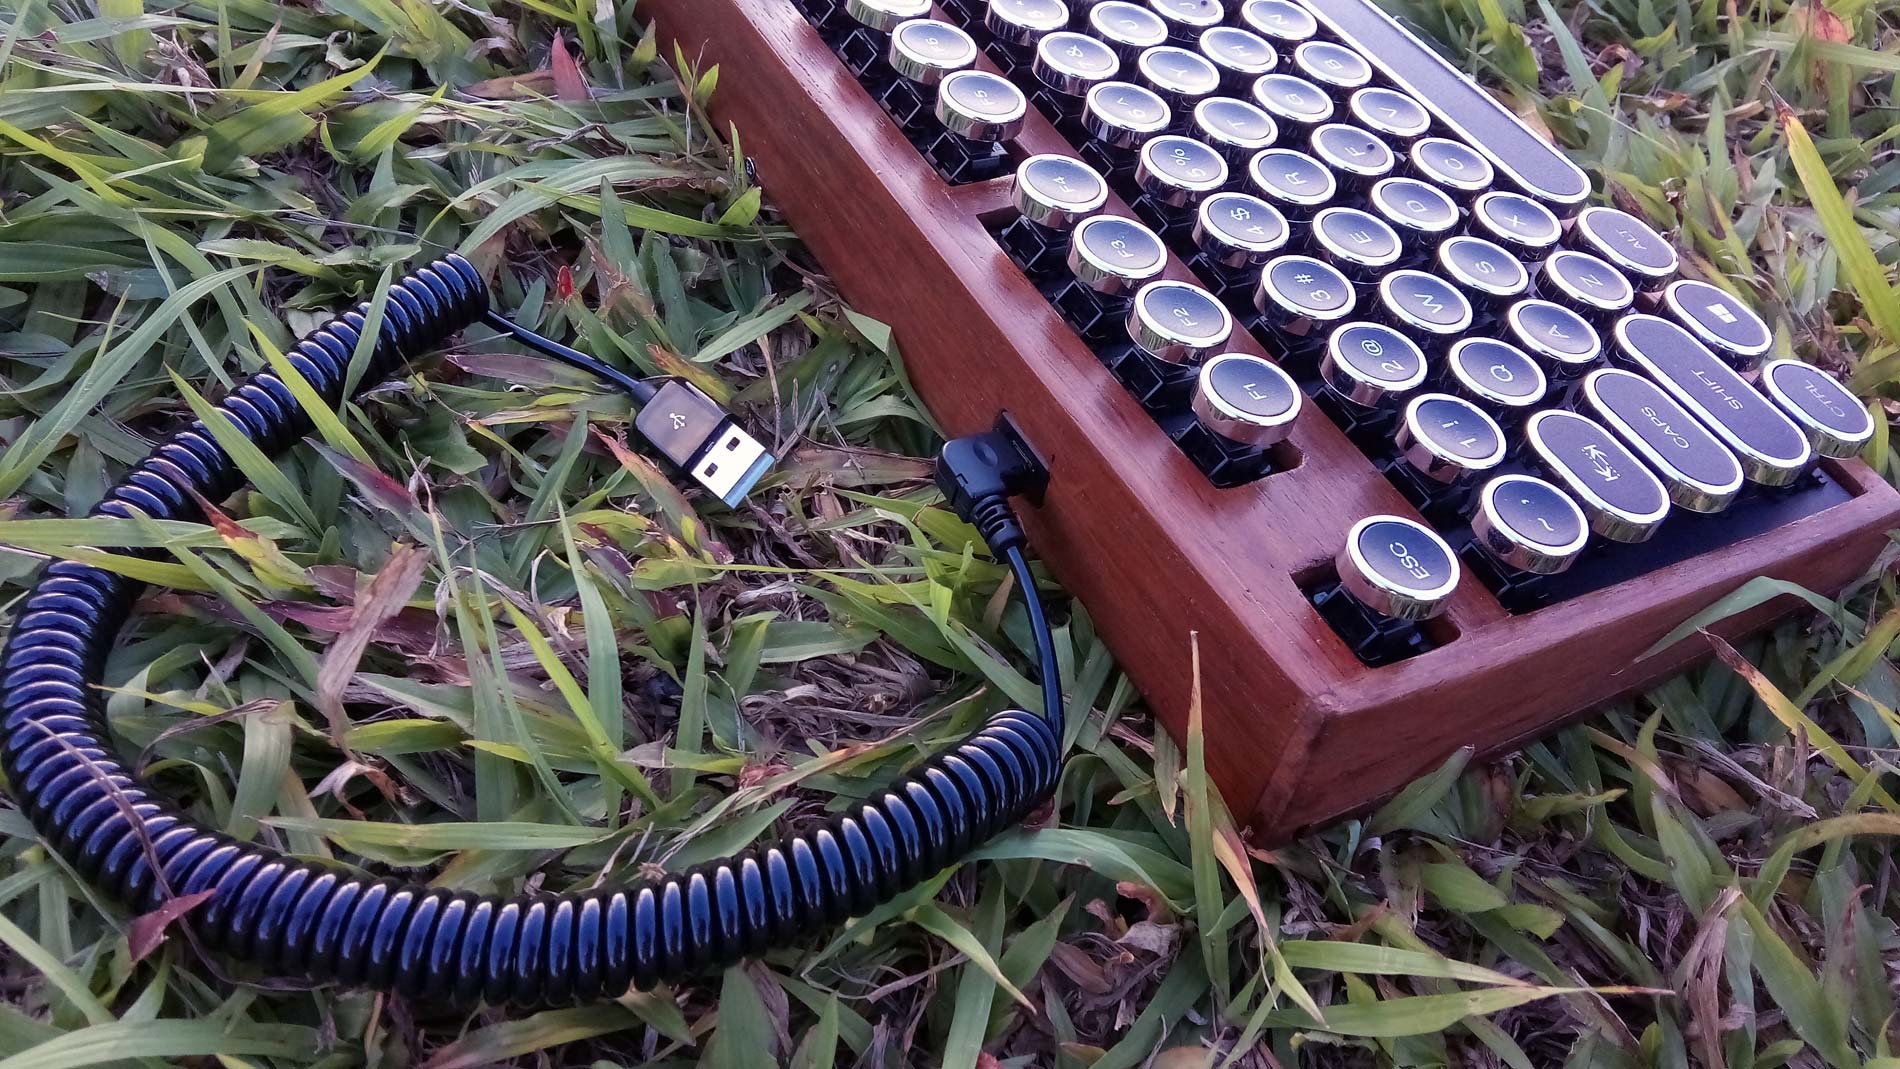
Rear View with Micro USB cable attached.
TOTAL COST OF MODIFICATION
- Php 1,800.00 – Surmt CM625 TKL Mechanical Keyboard (Base Price and Shipping Fee)
- Php 1,500.00 – Wood works (Assistance, tools, and facility use)
- Php 312.00 – USB 2.0 A Type Female to Female Micro USB Extension Adapter
- Php 312.00 – USB 2.0 Micro Male to A Type Male Stretch Data Cable
Php 3,924.00
imgur link: http://imgur.com/gallery/wHXmH